Appliances Reviewed is reader-supported. When you buy through links on our site, we may earn an affiliate commission. As an Amazon Associate I earn from qualifying purchases.
If there is one thing we truly appreciate in kitchen tools and appliances, it’s simplicity. The easier to assemble, use, clean, and store, the more valuable the tool.
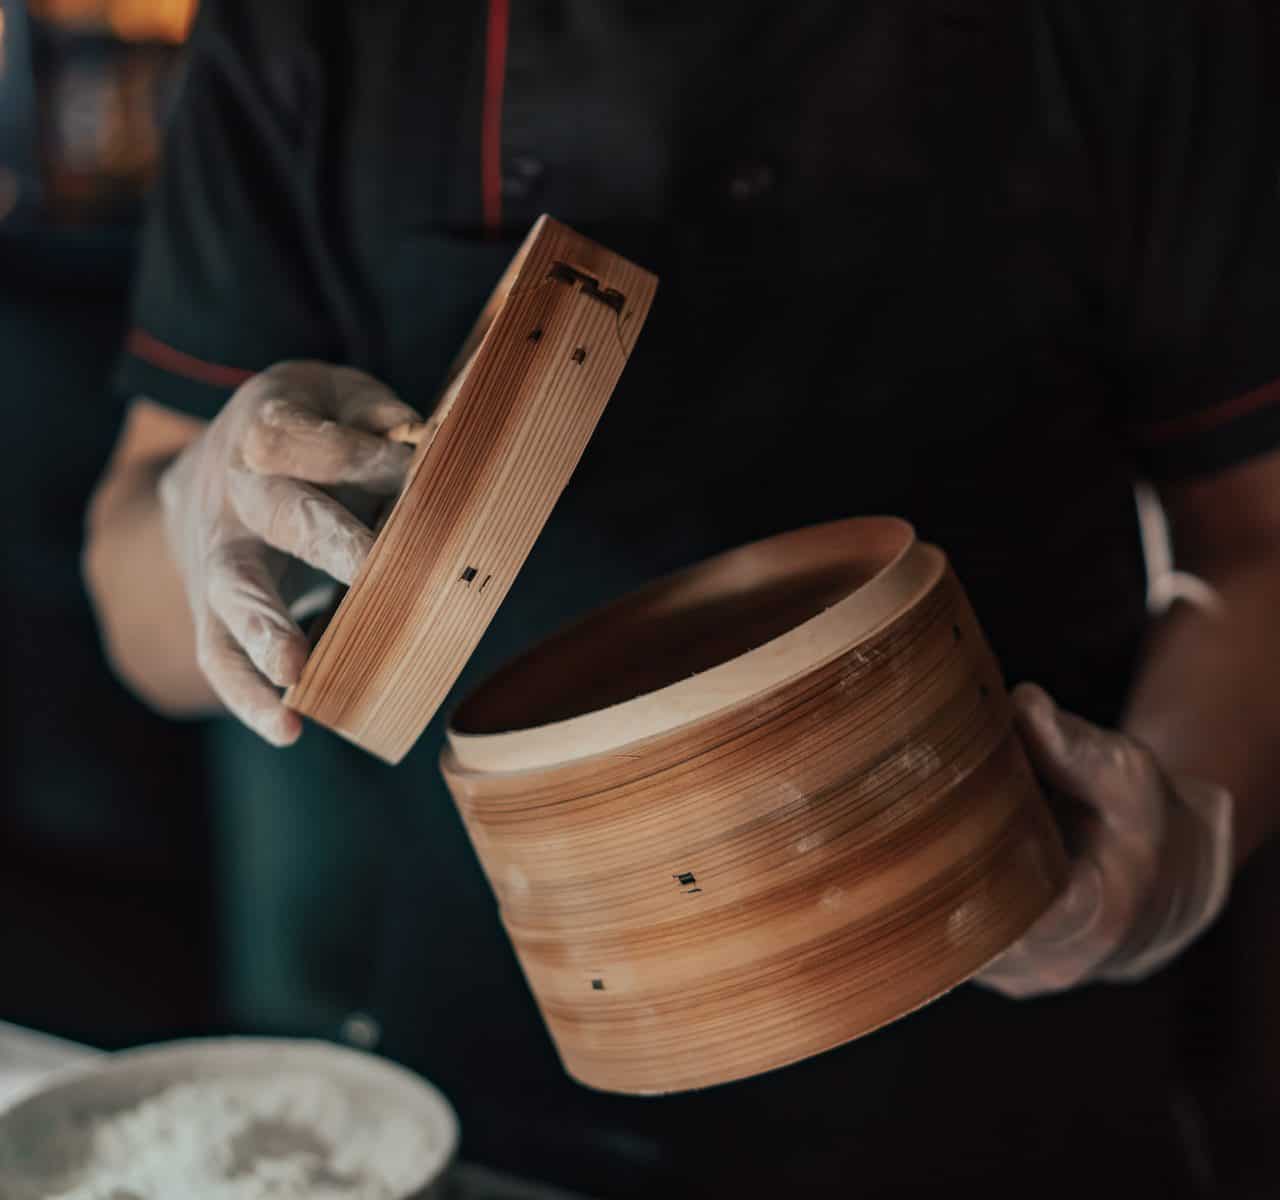
A steamer basket is a collapsible semi-deep dish you place over a pot of boiling water to steam-cook your vegetables. It checks all of the above criteria, and most importantly, it is the king of healthy food preparation.
In this article, we’re going to introduce you to the steamer basket, explain how to use it, and discuss which type is the best for your eating habits.
What Is a Steamer Basket Used For?
What can you cook with a steamer basket? They are commonly used for steaming vegetables but can also cook meat and other types of foods. Here is a non-exhaustive list of meals to prepare with a steamer basket.
Hardboiled Eggs
A steamer basket can be used to prepare hard-boiled eggs. Steamed eggs are easier to peel compared to boiled eggs. Eggs should be placed in the steamer from the beginning, not when the water is already boiling so that the shell doesn’t break during cooking.
Steamed Vegetables
Broccoli, carrot, paprika, and celery can be delicious when cooked in the steamer basket. You can also easily take out the pieces that are cooked earlier, like broccoli, while continuing to steam others that take longer to cook, like carrots.
Poached Meat
A steamer basket can help you cook meat. Poached chicken breasts are much better when cooked with a steamer, but you can also try different types of meat. For example, did you know that you can actually steam a beefsteak? The opinions about this delicacy vary, so we recommend you to try it for yourself or make a beefsteak tasting party and ask your guests to tell the difference. Maybe the healthier, steamed, oil-free option will win.
How to Choose the Best Steamer Basket for Me?
Steamer baskets come in different shapes, materials, and sizes. We prefer large steamers, as they give you more space. Handle size also matters. Shorter handles make it difficult to hold the steamer, especially when it’s full of food. Longer handles are easier to use. Some steamer baskets even have telescopic handles that will extend when pulled.
Steamer baskets can be made of plastic, rubber, or metal. They can be a single piece or collapsable, depending on the model. These configurations change the way you handle them.
Silicone baskets are the easiest to clean since removing food leftovers from the plastic, and metal models can be tedious. On the other hand, the silicone ones are floppy and small, and food spills out easily, while the metal ones are usually larger and firmer.
Steamer baskets come in different sizes, so you should buy one that matches the size of the pot you intend to use.
How to Use a Steamer Basket?
A steamer basket is fairly easy to use. Here’s what you need to do:
Fill the pot with water and put it on the stove;
Take the steamer and insert it on top of the pot;
Place the food in the steamer.
Cover the pot with a lid.
When the food is ready, wait for the steamer to cool down or use the mittens to remove it from the pot. Take out your food and rinse the basket with cold water. You can hand wash it or place it in the dishwasher for cleaning.
What Can I Use Instead of the Steamer Basket?
If you don’t steam your food frequently, you can use a metal strainer or a colander instead of a steamer basket. Make sure that the pot is deep enough and that the water can boil without touching the strainer.
Alternatively, fill a pot with ½ inch of water. Then, place three aluminum foil balls of roughly equal size in the pot. Cover it with a heat-proof plate, put your food on the plate, and heat the water to steam your food.
Do I Need a Steamer Basket?
The steamer basket is not a must if you steam your food every now and then and/or only steam vegetables. You can achieve good enough results with alternatives like a stainer.
However, if you want to steam different types of foods such as meat, eggs, various veggies, and so on, and if you plan to do it more often, buying a steamer will save you time and effort.
Steamer prices range between $2 and $20. We would say that they are worth the investment.
Conclusion
Steamer baskets are an excellent choice for people who want to improve their diet, eat more homemade meals, and consume less fat.
Fairly simple to use, clean, and store, steamer baskets are one of the most efficient ways to prepare healthy and delicious dishes.
We recommend larger, metal, collapsable models thanks to their durability and practicality.
Appliances Reviewed is reader-supported. When you buy through links on our site, we may earn an affiliate commission. As an Amazon Associate I earn from qualifying purchases.
Are you searching for a way to make the perfect french fries, as tasty and crunchy as those you get in your favorite restaurant?
If someone in the local fast-food chain can make delicious french fries that somehow crunch and melt in your mouth simultaneously, how hard could it possibly be?
The thing is, there are several ways to make french fries, but there is only one way to make them perfect. Ready? Here we go.
The trick to making the best french fries is to first soak them in ice-cold water for a very long time. Several hours long time. And then? Then, you need to deep fry them twice.
The first fry should take 5 to 7 minutes. Then the fries need to chill and soak for 3 to 5 minutes before you fry them again for 5 minutes.
In this article, we’ll teach you how to perfectly deep-fry french fries. But first, let’s see what you need for deep frying french fries.
Tools and Ingredients
For the perfect french fries, make sure you have all the right ingredients. Don’t settle with the sunflower oil, but go to the next shop to search for peanut oil. It may seem like an unimportant detail, but for perfect fries, you need all the best ingredients.
Russet potatoes
Peanut oil
Salt
French fry cutter (you can still make good french fries without this tool, but if you want them to look like those from McDonald’s, go for it)
The making of the perfect french fries begins with washing the potatoes and scrubbing them with a scrub brush to remove any potential dirt from the soil, if you plan to prepare them with the peel. Otherwise, you can lightly wash and peel them.
Then, cut the potatoes in the standard french fries shape. If you don’t have a french fry cutter, here’s a nice trick: remove the ends first so that you’re left with two short flat sides. Then slice and strip cut.
Now, the first crucial step: soak the potatoes in ice water. Sounds strange? Well, this little trick removes the excess starch from the potatoes and will make your potatoes soft on the inside and crunchy on the outside.
You can soak your fries for between two and twelve hours. So, if you have some errands to run, a party to attend, or simply need a nap, there is no need to rush. The potatoes should be fine on their own. If you are in a hurry, let them soak for at least 30 minutes.
So much for the preparation. The next step is to fry the potatoes.
How Long to Deep Fry French Fries?
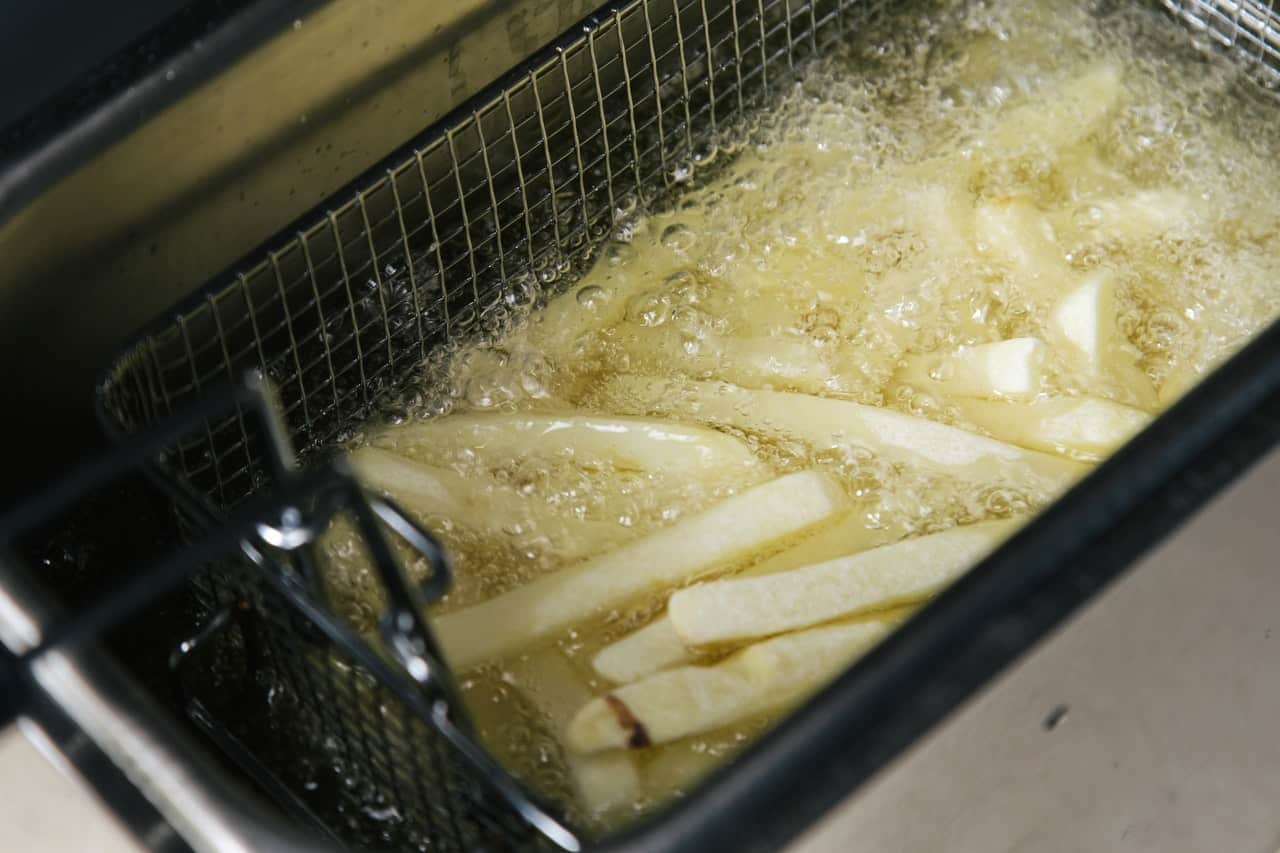
You need to deep-fry French fries twice to achieve the magical combination of perfect color, outer crunchiness, and inner softness.
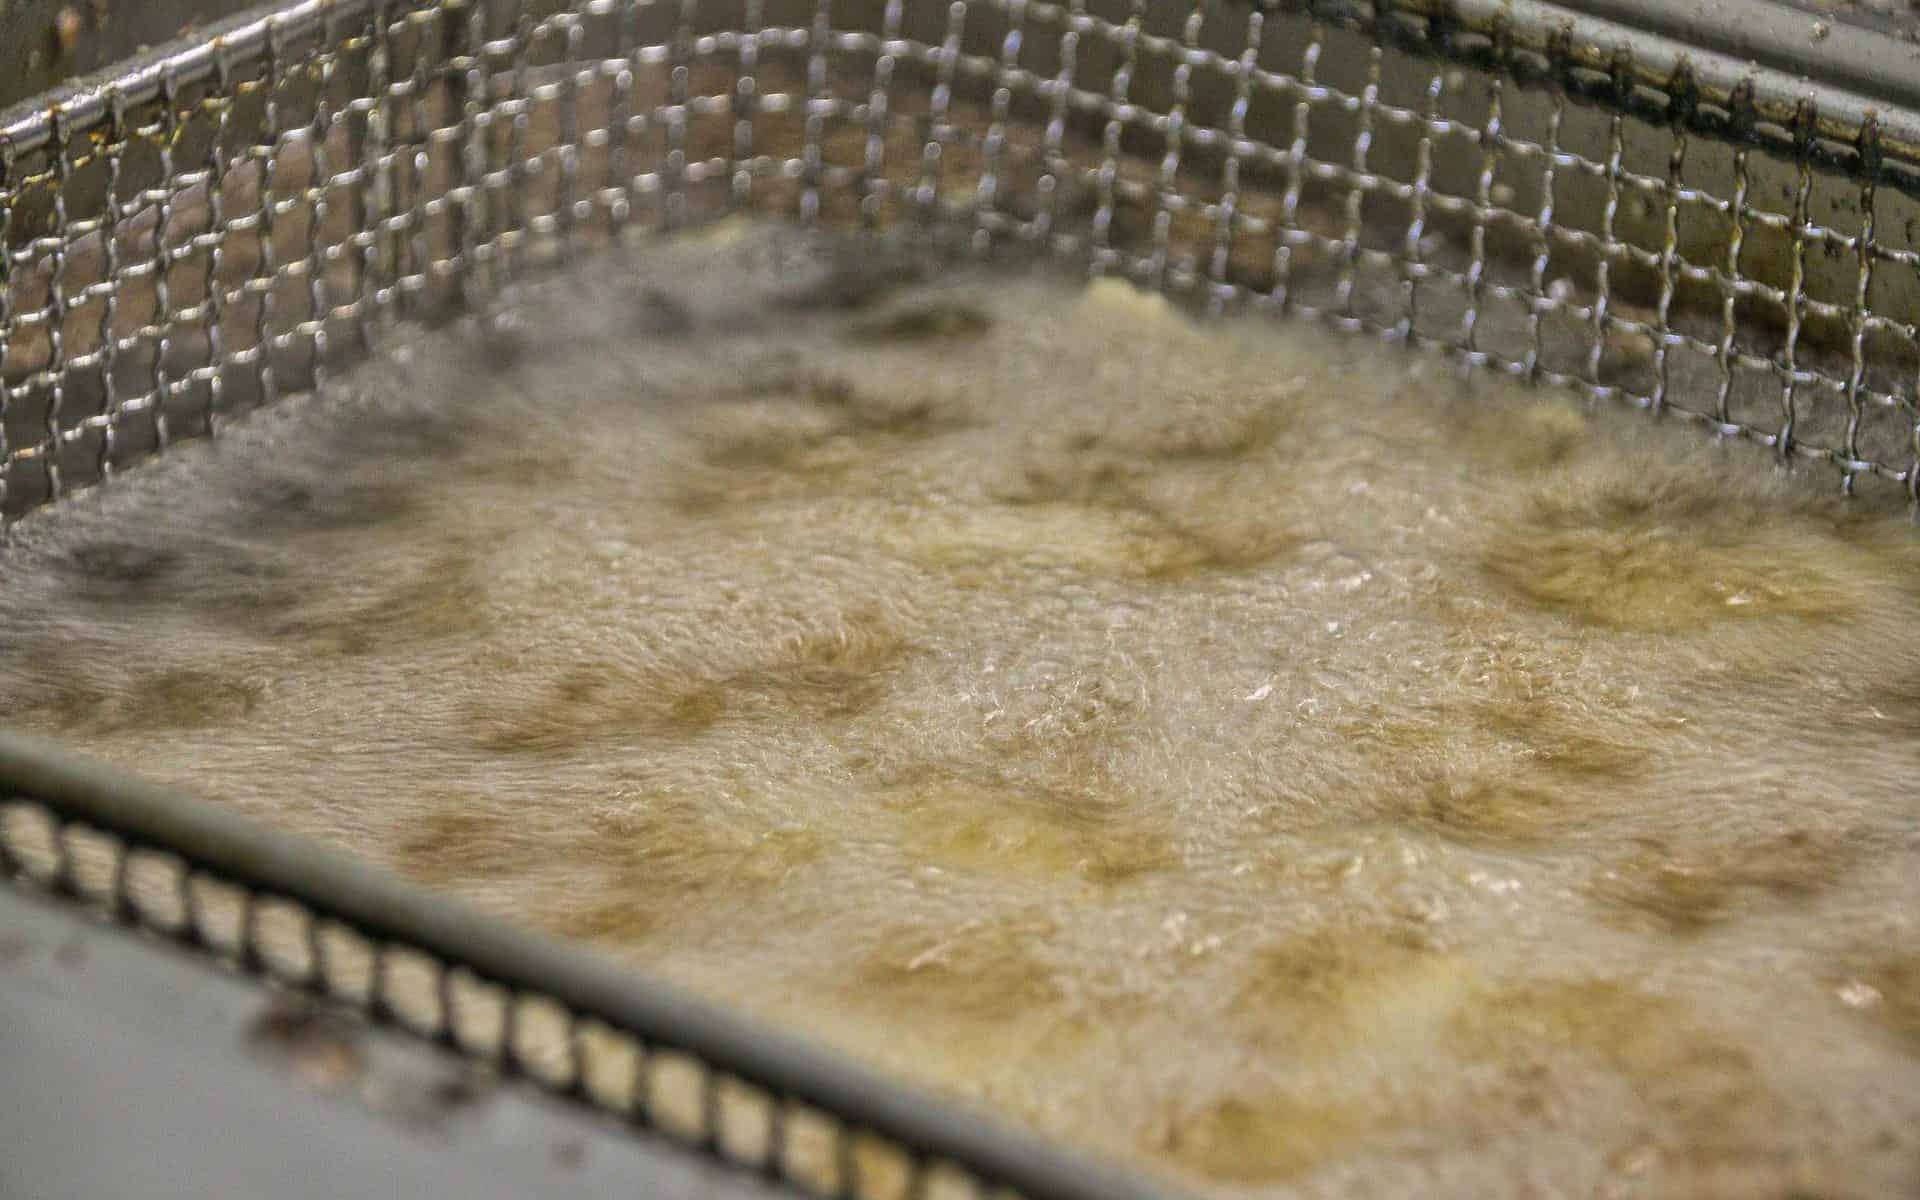
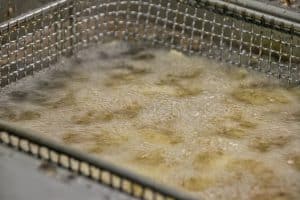
Drain before frying your potatoes for the first time. You should preheat the deep fryer or oil in a pan to some 300 degrees, and then put the potatoes in for the first 5-7 minute fry. If you’re using a plain pan and oil, you can fry them for up to 10 minutes, as oil takes more time to heat up in a pan. We recommend using a timer because frying too long can deprive the fries of that fluffy interior, resulting in a batch of french fries that are just greasy. On the other hand, a too-short first fry makes it harder to achieve that perfect texture, and the result can be soggy or raw fries.
After the first fry, leave the potatoes to soak on a piece of kitchen paper towel. Two or three minutes are enough to collect excess oil.
After the soaking session, your fries are ready to be fried again! This time, you can divide your potatoes into sub-batches before putting them in the deep-fryer. This way, fries have enough room to swim in oil and will be crunchier. Fry each batch for precisely five minutes, and place them on paper towels to soak again.
Salt right away.
Why Fry Twice?
There are at least two theories on why frying twice is necessary for the best results. According to the first one, the first fry establishes a watertight barrier around the potato so that it remains moist even after the second fry. According to the second theory, the first fry is necessary to cook the center. Otherwise, the fries would gain color and crispiness outside but remain raw inside.
Soggy or Raw Fries
If your fries are soggy or raw on the inside, don’t worry, they can be rescued. Oil a baking sheet lightly and heat the fries on it for 5 minutes. They might become satisfyingly crispy right away, but if not, you can just keep on heating them up in five-minute sessions until they reach the desired crispiness.
Are Over-Fried Fries Bad?
Heavy frying in oil makes food extremely stuffed with saturated fats. This can raise the bad cholesterol, which is linked to strokes, heart diseases, and other cardiovascular issues. Also, over-fried fries taste bad.
Frying Temperature
The optimal frying temperature for french fries is 325 degrees. If you want shoestring or basket-weave fries, then 375 degrees should work. Heat up the oil first, and add the potatoes carefully piece by piece to prevent cold fries from lowering the oil temperature and slowing down the frying process.
Deep-Fryer vs Oil in a Pot
In our experience, french fries are tastier and easier to prepare in a deep fryer. The main benefit of using a deep fryer is the speed of preparation. One of the fryers we’ve had the best experience with is the T-fal Deep Fryer that comes with a basket. However, this good experience comes with a price tag. If you’re looking for something more budget-friendly check out Chefman XL deep fryer.
The deal with the deep fryer is that the oil is heated at 325 degrees, and there is no air inside. This makes the frying process faster, and the food turns out super crunchy, just like in a restaurant.
Another benefit of deep-frying is safety. Working with hot oil can be dangerous, as boiling oil may spray and burn your skin. Unlike the pan, which is usually shallow and easy to tip over, the deep fryer is generally deeper. It has a lid to protect you from getting sprayed by oil and the base is sturdier, making it harder to tip over.
On the other hand, pans are cheaper, and almost every household already has a set of frying pans.
Frying in a pan also requires less oil, so pan-fried food can be considered healthier, although neither is exactly healthy since we’re dealing with frying oil. That being said, the food that floats in oil in a deep fryer isn’t really penetrated by oil; it is cooked in oil on the outside, while the steam cooks it on the inside. This is the secret behind deep-fried french fries’ outer crispiness and inner juiciness.
How Do I Know When French Fries are Done Frying?
If you’re using the deep fryer, strictly follow the recommended frying time. However, as you may know already, potatoes are often different, and some take longer to cook than others, so we may need additional signs that our fries are done.
The most important clue is the color. If fries have changed their color from golden yellow to brownish, this usually means that they are done. If there are too dark or burned pieces, remove them from the pan.
Another clue is the structure of the fries. By pinching a single french fry with a fork or knife, you can find out whether they are done. If the fork is not passing through the fry with ease, they need additional cooking, but if the fry feels soft on the inside, you know they’re ready to be served.
Conclusion
Making french fries is not exactly rocket science, but your homemade fried potatoes can compete (and win!) against those in your local fast-food chain with a little effort. And we promise you it will cost much less.
All you need in order to bring your french fries to another level is some patience and paying attention.
French fries go with everything. You can eat them with fish, red or white meat, grilled vegetables, or cheese, or snack on them alone with some good sauce. You can’t go wrong when it comes to french fries. Maybe you remember mixing your fries with ice cream in McDonald’s and how tasty that was. Now you can make the perfect fries for yourself, grab some vanilla ice cream to go with it, and enjoy the treat at home!
Appliances Reviewed is reader-supported. When you buy through links on our site, we may earn an affiliate commission. As an Amazon Associate I earn from qualifying purchases.
Freezing foods is an excellent way to preserve them without losing nutrients. The same goes for buying frozen foods. Having something in the freezer at all times is a smart move and can be a lifesaver in many different situations.
Let’s say you got home late from work and are without a dinner plan, or your friends decided to drop by, and you have nothing to serve. The easiest solution is to grab something from the freezer and let it cook while you take care of yourself or tend to other household duties. But can you do that without thawing the meat first?
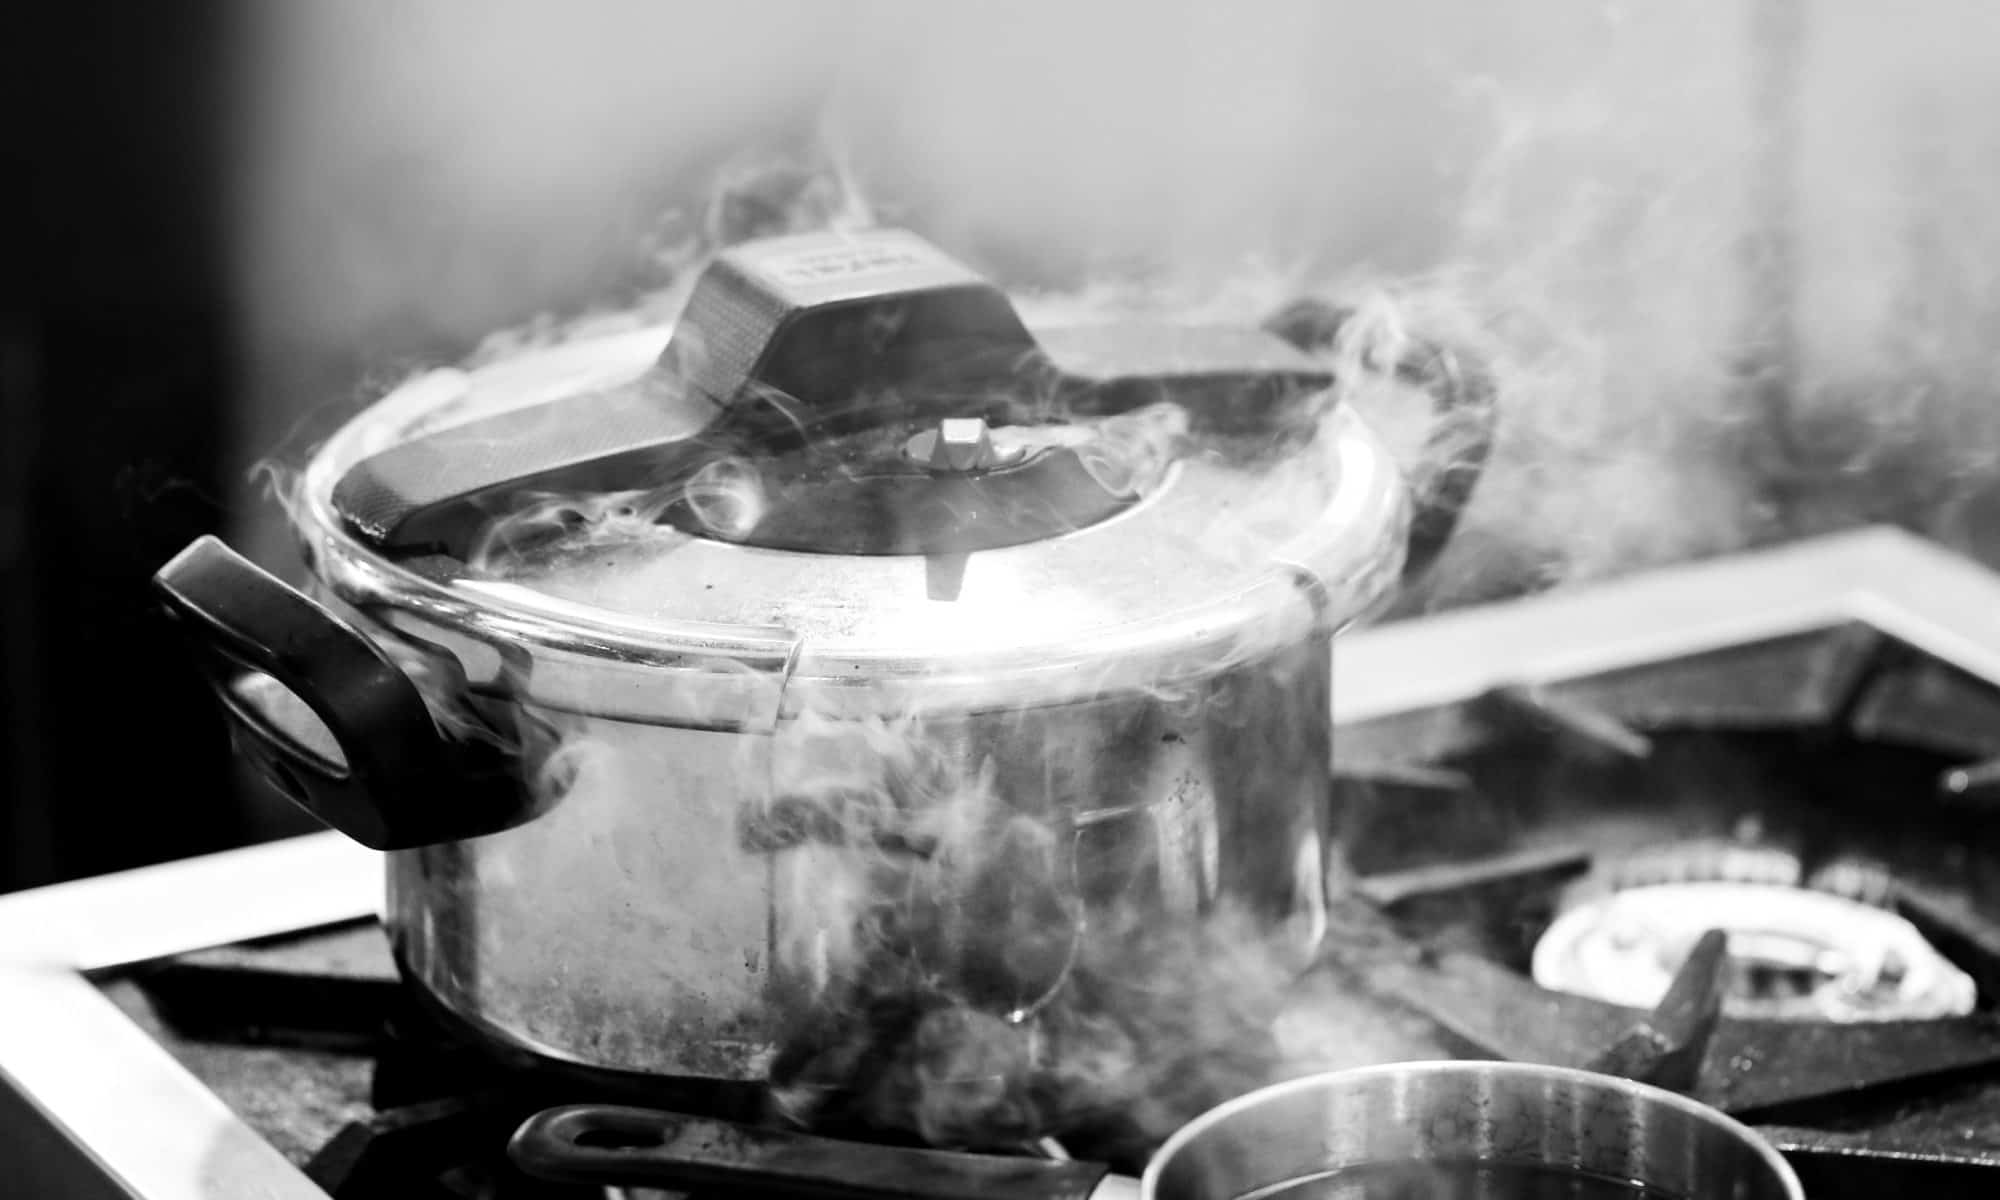
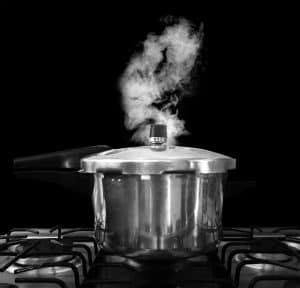
Pressure cookers are a game-changer because they save energy and time, cook without monitoring, and don’t make the kitchen a total mess. Better yet, being able to cook frozen foods safely is a major selling point of many pressure cookers.
So, yes, you can pressure cook frozen meat, but there’s a caveat.
Pressure cooking frozen meat can be tricky. And while you can safely pressure cook some frozen meats, there are a lot of factors and risks you need to consider first. Read on to find out everything you need to know before you put a frozen piece of meat in the pressure cooker.
What Is Pressure Cooking?
Let’s start from the beginning – what is pressure cooking?
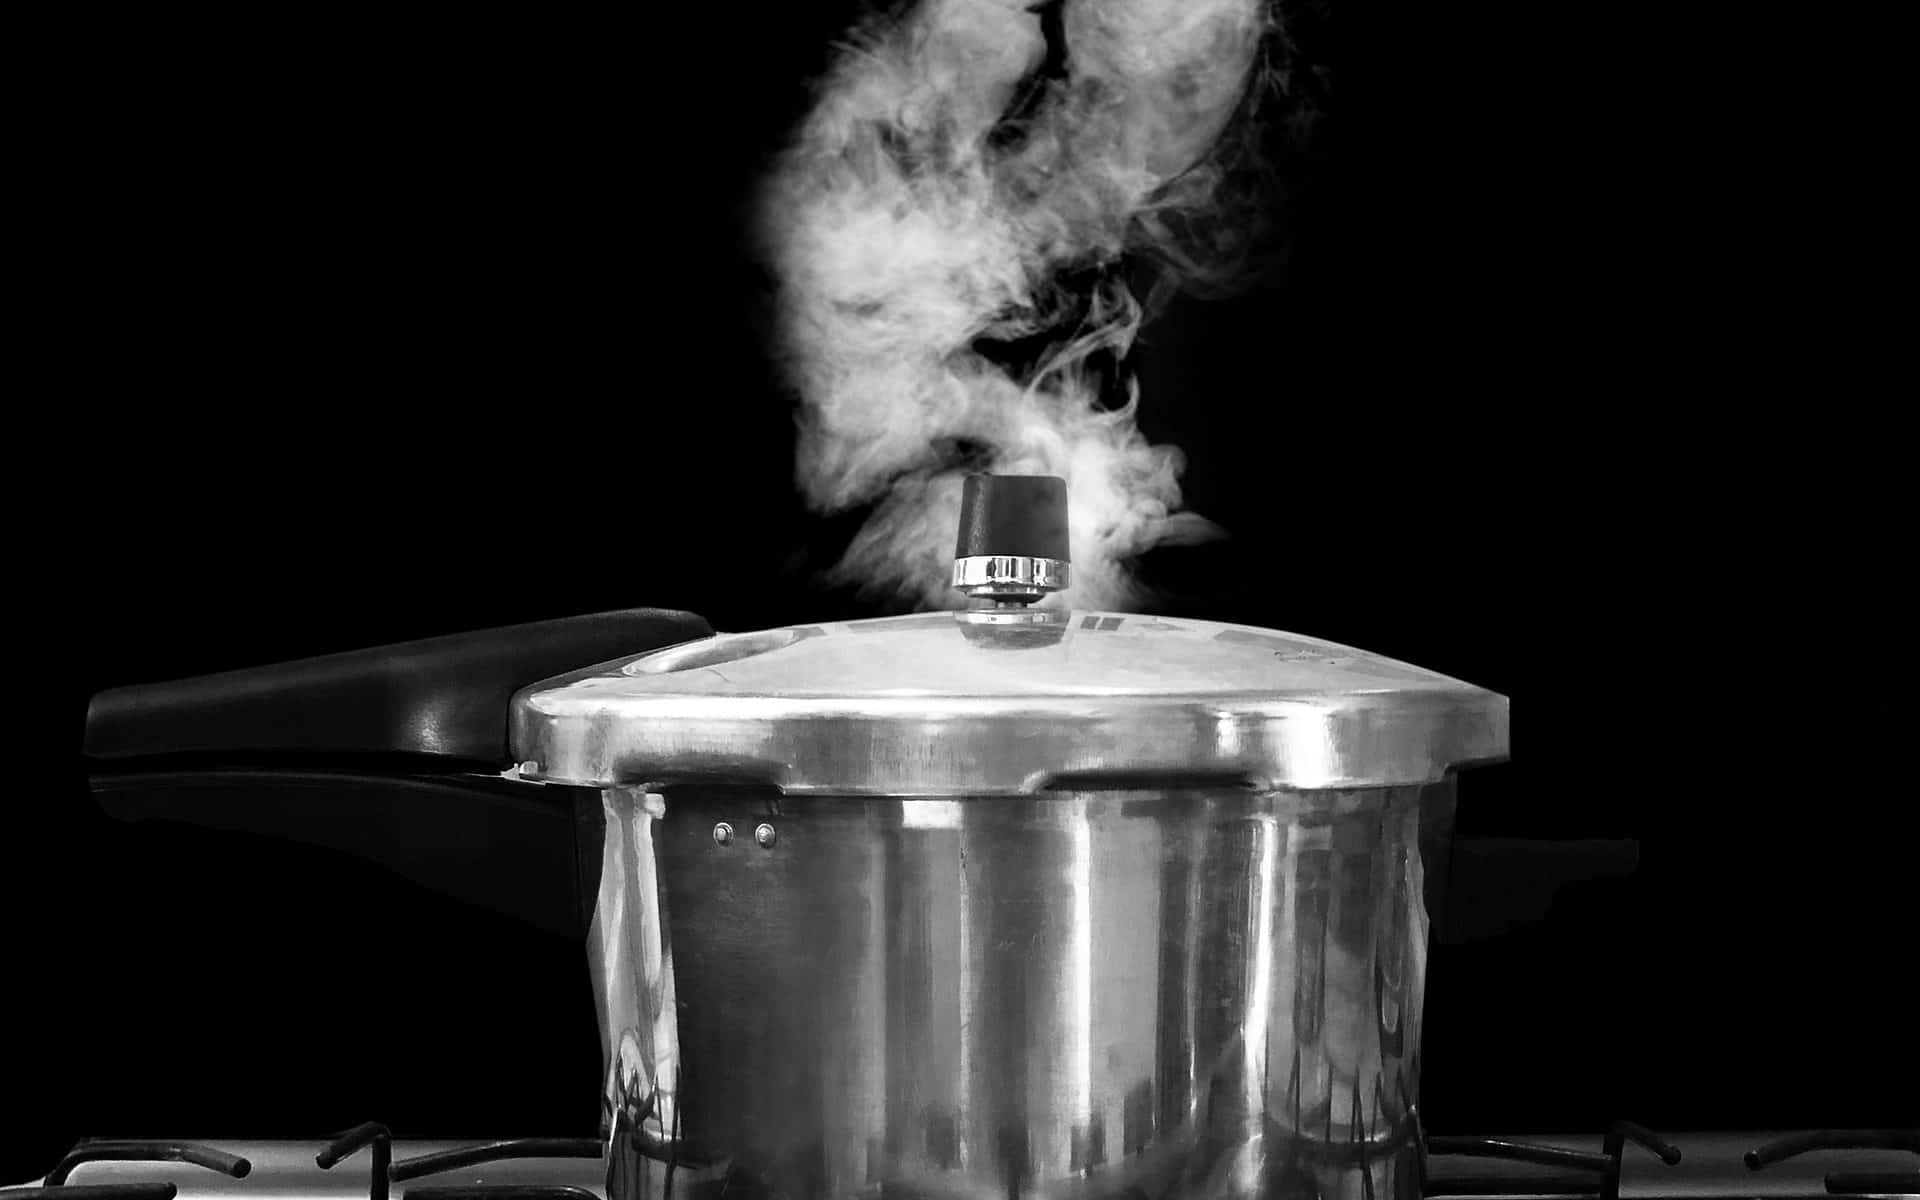
As the name suggests, pressure cooking is a food preparation method such as baking and frying, where the food is cooked under high-pressure steam. You need to trap water or another cooking liquid in a sealed container to produce steam, i.e., the pressure cooker.
Since the pressure cooker is a sealed vessel, meaning no air can get in or out, it allows the steam to build up, creating a high-pressure environment. The high pressure created inside the vessel raises the boiling point and temperature well above 100 °C (212°F). But what does this have to do with cooking the food faster?
The amount of heat that transfers to the food depends on the maximum temperature at which the liquid boils because liquid water cannot be at a higher temperature than its boiling point. In other words, higher pressure equals a higher boiling point of water, which allows a higher temperature to be reached and results in much more heat transferring to the meat. And, more heat inside the food means it will be done much quicker.
Food Temperature and Pressure Cooking
Okay, so now that we got science out of the way, what conclusions can we make about how the initial temperature of the food might affect the cooking process?
It’s not just the temperature of the food that affects the cooking process; it’s the water as well. If you add cold water to the pressure cooker, the cooking time will be longer. This is because the pressure cooker will need more time to bring the water to boil and start cooking. The pressure cooker will get up to pressure sooner if you add hot water.
We can apply the same logic to food as well. The colder our food is when we put it in the pressure cooker, the longer it will take for the pressure cooker to reach the temperature needed to cook the meat thoroughly.
Because of this, pressure cooking frozen meat can take up to one-third more than the normal pressure cooking time. The exact time depends on the size of the meat as well.
If you cut the meat into small pieces, then the pressure cooker will be able to heat up the food faster. The larger the piece of meat is, the more time it takes for the heat to reach the needed temperature to process meat safely. On top of that, larger pieces of meat increase the chances of uneven cooking where the surface is almost burnt, while the core is undercooked.
As a rule of thumb, a single block of frozen steak that’s at least 1-inch (2.5cm) thick will need double the amount of cooking time compared to frozen ground meat.
Verdict: Is It Safe to Pressure Cook Frozen Meat?
Yes, it’s perfectly safe to pressure cook some frozen meat without thawing first. In a way, the pressure cooker will do that for you. However, because of how pressure cookers work, putting frozen meat inside the vessel will delay the time needed for the pressure cooker to get up to pressure and reach high temperatures.
Size also matters in this case. Pressure cooking larger pieces of meat, or even a whole chicken or turkey, will significantly prolong the cooking time. To give you an example, if you were to pressure cook frozen ground meat, it might take 5 minutes, but pressure cooking frozen steak that’s 1-inch (2.5cm) thick will take at least 10 minutes.
Cooking large pieces of meat or a whole chicken or turkey is not recommended. First, large pieces of meat take more time to be cooked thoroughly from the inside. During this time, the outside is exposed to high heat and can easily burn, while the inside is still thawing. Second, uneven cooking affects the flavor and can be a health risk. Still, you can do it with some practice.
Drawbacks of Pressure Cooking Frozen Meat
While you can pressure cook frozen meat, the real question is whether that’s a really good idea. With everything that we said, is it worth it to cook frozen meat in a pressure cooker without thawing it first?
The answer depends on what type of meat you plan to pressure cook. If we’re talking about ground meat or very small chunks of meat, then pressure cooking them while frozen will only add a few more minutes to the whole cooking process. Plus, changes to the taste will be relatively the same for small chunks – unless you’re a real foodie that enjoys fresh food.
That being said, freezing can damage the texture of the food due to ice crystals forming inside the cells. Meat is especially susceptible to texture degradation, and the effect will be more noticeable in large pieces of meat.
On top of that, pressure cooking large pieces of meat takes more time, so the convenience of having a meal in 5 to 10 minutes is not really an option in this case. And rushing can lead to undercooking, which can be a health risk.
Finally, pressure cooking means you can’t check the food or add seasoning while the food is cooking. Large pieces of meat retain a lot of water that will be released during cooking. And not being able to adjust the seasoning can result in very watery and soft meat that lacks flavor.
Consider these limitations when deciding your next meal and plan accordingly.
How to Pressure Cook Frozen Meat
Since pressure cooking frozen meat is not the same as pressure cooking fresh meat, here are a few pieces of advice that will help you make a delicious meal.
First, adjust cooking times! According to the USDA Food Safety and Inspection Service (FSIS), cooking frozen meat will take around 50% longer than the time needed to fully cook thawed or fresh meat and poultry. The same rules apply when pressure cooking, but the size and amount of food affect the time significantly. The Instant Pot official web page has a cooking timetable with detailed information about time per size of meat. These times are a good guide, but you’ll probably need to experiment and see what works best for frozen vs. fresh meat.
Second, cut the meat into small chunks whenever possible. Even if you’re working with larger pieces, always think about how you can cut each piece within the limits of your recipe.
Third, fully submerge the meat in water. While it’s best to follow the recommended amount of water for frozen meat, if you do not have official recommendations from the manufacturer, a safe bet is to fully submerge the meat in water or other liquid to prevent uneven cooking. Steaming or braising frozen food without water can lead to undercooked areas, which is a health risk.
Fourth, always use a meat thermometer that you can insert into the center of the meat to check whether it is fully cooked on the inside.
And last but not least, experiment with seasoning as it probably won’t be the same as seasoning fresh chunks of meat. It’s best to follow recipes that detail how to pressure cook frozen meats.
Conclusion
Pressure cooking frozen meat is safe and doable, although a little bit tricky. We tried to explain the science behind pressure cooking because this will give you a better idea of why some limitations or recommendations exist. Plus, you’re more likely to resist the temptation of trying to pressure cook frozen meat the same way you would fresh or thawed meat.
The most important thing you need to remember is that the size and amount of frozen meat you want to pressure cook may prolong cooking times. If you adjust the cooking time depending on these two factors, you can pressure cook safely and without much fuss.
Remember that freezing affects the texture and taste, so adjust your recipes accordingly.
Follow our recommendations and advice to make sure the outcome is a delicious meal that you can enjoy when you need it. Plus, with a bit of practice, we promise that your friends and family won’t be able to tell whether you used fresh, thawed, or frozen meat.
Appliances Reviewed is reader-supported. When you buy through links on our site, we may earn an affiliate commission. As an Amazon Associate I earn from qualifying purchases.
Bacon is one of our favorite breakfast (and lunch and dinner!) dishes. But this modern favorite is actually quite an old favorite. Our taste for cured strips of pig flesh dates back a few millennia. Salted and cured pork belly first appeared in China a few thousand years ago, and from there, the meat curing techniques spread across the European continent to the Roman Empire.
Even the phrase “bringing home the bacon” has its roots in the Middle Ages. Sometime in the 12th century, a church in the old town of Great Dunmow declared that it would give out a side of bacon to any man who hadn’t quarreled with his spouse for a full year and one day. The husband that would bring the bacon home was made an exemplar of the community for his forbearance.
These days you don’t have to be happily married to enjoy a delicious slice of crispy bacon, but it is helpful to know how to cook it so you can enjoy it to the fullest. So let’s see whether we can deep fry bacon and how you can succeed at cooking the crispiest and most flavorful cut of pork belly.
Can You Deep Fry Bacon?
Bacon is a rather versatile cut of meat, as it can be cooked in a manner of different ways. You can stew it, microwave it, bake it in your oven, pan fry it, grill it, and of course, deep fry it.
In fact, the most crispy way to prepare bacon is to deep fry it. If you ever had deep-fried bacon, you might have fond memories of the tingling sensation it left on your palette. If deep-frying is the way you wish to cook your bacon, then we can recommend three different ways to deep fry it, as well tips and tricks in order to make it taste even better.
Ways to Deep Fry Bacon
We will show you three ways to deep fry bacon to bring a bit of versatility to the bacon dish.
The naked way – The naked way just means that the bacon is cooked without adding anything. Just drop a slice of bacon into the deep fryer. This is one of the simplest ways to deep fry bacon.
The batter way – You whip up a batch of batter and dip your bacon into it before you place it in the deep fryer.
The hybrid way – The hybrid way combines bacon with other meats. You can wrap bacon slices around a wiener, chicken breast, or any preferred type of meat and deep fry them together.
Deep Frying Naked Bacon
The only appliances you need for naked deep frying are a deep fryer, frying oil, and bacon. How much bacon?As much as you can fry! Regular vegetable oil will work just fine but for extra oomph, try out peanut oil.
Once you’ve poured the oil into the deep fryer, let it reach a temperature of 350F to 375F. You can deep fry bacon at lower temperatures, but high temperature renders the fat and gives it that nice crunch.
While the oil is heating, place your bacon slices in the fryer basket. You want to make sure that you lay out the slices neatly in order, without overlap. The bigger the fryer, the more slices you can cook at the same time, but it’s best not to overfill it. Make two frying batches with a few pieces rather than trying to cramp a pound of bacon into the basket.
If you don’t have a basket with your fryer, then it’s best to use tongs and tweezers to lower bacon into the heat, as dropping bacon into scalding oil will cause a quite large splash. Make sure you wear a girdle and keep at least three feet away from the fryer.
You should fry bacon for about 5 minutes, depending on the thickness of your cuts. If they’re thinner, 4 minutes could do it, if they’re thicker, 7 minutes might be needed. For the best results, take out a piece of bacon after 5 minutes and review it. If it’s nice and dark and crispy, then you’re good to go, if not, give it a minute or two.
Once they’re ready, neatly lay your bacon slices on paper towels to drain the excess oil and enjoy your crispy deep-fried bacon slices.
The Batter Way of Deep Frying Bacon
In order to make batter-fried bacon, you need to prepare a batter first. Here’s the list of ingredients and instructions for a simple frying batter. You would need :
A mixing dish and a whisk.
3 large eggs.
2 cups of whole milk.
3 cups of all-purpose flour.
Spices to taste.
The batter itself is quite bland without seasonings. There isn’t really a recipe, and you can put lots of spices and herbs inside. Coriander goes wonderfully with crispy bacon.
To start off, put the flour inside the bowl and start adding the milk. Whisk those two ingredients together until you’ve come up with a smooth texture. Finally, add the eggs one at a time and whisk them into the batter. Once the batter is done, pop it in the fridge for a couple of hours. The cold batter will perform better when put in hot oil and won’t rip or fall apart.
It’s best to pre-cook your bacon slices before deep-frying them with batter. in order to make sure they are thoroughly cooked. While your batter is getting ready, take a pan and fry up your pieces of bacon for a few minutes.
Make sure you remember to turn on the deep fryer to 350F. Once everything is ready, dip your bacon slices into the batter and place them in the hot oil. Word of caution, the batter will expand once it meets with the scolding oil, so it’s best to leave a bit of expansion room in the fryer. Make a few batches – it will be worth it.
Since the bacon is pre-cooked, the batter frying will only take up about 2-3 minutes. Once you remove the battered bacon from the fryer, place it on a kitchen towel to drain the excess oil and serve with your favorite beer.
Bacon-Wrapped Meats
The simplest way to wrap bacon around a slice of meat for deep frying is wrapping it around a wiener. Bacon-wrapped Hot Dogs sound like a great idea on a Sunday afternoon. For this recipe, you will need:
Bacon strips.
Package of wieners.
Hot Dog buns.
Toothpicks.
Take out a bacon strip and wrap it around the wiener. Lock the bacon into place with the toothpicks, placing one at the top and at the bottom of the wiener. Start your deep-fryer and add your bacon-wieners one by one. In terms of cooking, about 4 minutes on 350F would do the trick. Once they’re done, toast the bun and add your favorite toppings.
To Put the Sizzle on Top
We hope that we’ve helped you discover new ways to deep fry bacon. The truth is, deep-fried bacon goes excellent with everything, even chocolate. You can even deep fry some bacon slices, put them in a blender and create bacon-flavored spice for stews or for burger sauces. The possibilities are endless, and the results are always tasty!
Appliances Reviewed is reader-supported. When you buy through links on our site, we may earn an affiliate commission. As an Amazon Associate I earn from qualifying purchases.
The Hot Dog, one of America’s staple culinary treats, is also one of the oldest types of processed foods that dates back to the 9th century BC!
The Hot Dog or the dachshund sausage is credited to the Germans that created the dish sometime in the Middle Ages. Fast forward to the 19th century. German immigrants brought their sausage dish to the United States when they touched land on Ellis Island and Louisiana.
But enough about history, let’s roll some buns and find the ways you can deep fry your Hot Dog for an extra twist on the traditional boiled sausage we all know and love.
What Is a Deep Fried Hot Dog?
To put it plainly, a deep-fried Hot Dog is a wiener sausage cooked in hot oil. When the sausage is deep-fried, it develops a delicious and caramelized brown crust that can look a bit unappetizing but tastes heavenly. Deep-fried Hot Dogs are called Rippers because when the wiener cooks in hot oil, the ends start ripping apart.
Rippershave a richer flavor than traditional boiled wieners. They are also extremely versatile dishes you can combine with bacon, vegetables, french fries, or chilly for a Mexican twist. The foundation is the wiener and the bun, and the rest is up to the cook’s imagination. Everyone can fashion a deep-fried Hot Dog in a few minutes, but there are still a few small details that you should know in order to get the perfect deep-fried Hot Dog.
What Equipment Do You Need to Deep Fry Hot Dogs?
You probably already have everything you need to deep fry a Hot Dog in your kitchen. If you place the wiener horizontally, you’ll see that it doesn’t take up much space height-wise, so deep frying can be done in a regular frying pan. If you want to submerge your wieners completely in oil, then your best option is to fry them in a pot with a lid or in a deep fryer.
Deep fryers are very versatile tools as you can deep fry almost anything with a deep fryer. You just need to fill them with oil and plug them into a power outlet. While you don’t necessarily need one to deep fry a Hot Dog, investing in a more premium appliance would enhance your deep frying game.
You also need vegetable oil to deep fry your Hot Dogs. Olive oil is not great at achieving that high temperature necessary for deep frying, and it’s best used in frying pans.
How Long to Deep Fry a Hot Dog?
This can depend on the type of wiener you would like to deep fry. If you want to make your own hot dogs from scratch, then we have a great list of sausage stuffers that would bring extra flavor to your dinner table. If you don’t want to bother with stuffing sausages, then your two options for Hot Dogs are frozen Hot Dogs or regular canned or vacuum-sealed Hot Dogs from your grocery store.
Frozen Hot Dogs are a bit of a chore to cook as they don’t cook as well as thawed wieners. If you don’t have the time to thaw your frozen wieners out, deep fry frozen hot dogs for up to two minutes at 375F (175C) and then take them out, split them in half, and fry them for another two minutes. A word of caution: Deep frying frozen wieners may also cause oil splashes, so be careful and have a towel nearby for easy cleaning.
Thawed or fresh Hot Dogs should be deep-fried for just about 2 minutes at 350F (175C). A great indicator of when the wiener is cooked is the brown crispy coating. If you want it crispier, you can leave it frying for another minute or so.
Recipe for Deep Fried Hot Dogs
Preheat your pot with a lid or deep fryer to 350F (175C). If the oil isn’t the right temperature, then your Hot Dogs might end up soggy instead of crispy. The deep fryer would show you the exact temperature of the oil, while the pot is a little trickier. A great indicator of high oil temperature is light smoke coming out of the pan. You can always cut a corner of the weiner or put a whole wiener to check the sizzling action. This works great if you have a dog to which you can feed the demo-wiener.
Once the oil is up to temp, carefully put the wineries in the oil by using tweezers (or if you’re confident, you can use your hands). Pro Hot Dog tip: Wrap your Hot Dogs in a slice of bacon to achieve a better flavor and an extra layer of crispness.
How to Deep Fry Hot Dogs in a Pan?
Don’t fret if a lidded pot or a deep fryer isn’t a part of your kitchen arsenal since a simple frying pan would also do the trick. This is where olive oil comes into play. Pour a generous amount of olive oil into your pan and heat it until it has reached a medium temperature.
Lay down the wieners in the pan. Fair warning: you will experience a serious splatter of hot oil towards you as juices burst out of your Hot Dogs, so be careful and protect your head, hands and arms. Cook your Hot Dogs until they’ve reached a golden brown color, and place them on a kitchen paper towel or a cloth to drain that excess oil.
You can also toast your buns with a little butter in the pan for extra crispness.
Do You Need a Batter?
There are arguments in the world of Hot Dogs when it comes to battering. Some claim that battered wieners are automatically Corn Dogs, but this isn’t always the case. Corn Dog batter is made out of cornflour and spices, and the wiener is put on a stick before it’s deep-fried. We think the lack of a bun is really what distinguishes Hot Dogs from Corn Dogs.
One of the bar favorites for deep-fried Hot Dogs is a simple beer batter. To create a battered Hot Dog, you need:
A package of your preferred Hot Dog wieners.
A package of Hot Dog buns.
1-cup of flour.
A bit of flour for a side bowl, approx half a bowl.
3-cups of your preferred vegetable oil.
1-bottle of your favorite Lager or Pilsner, pretty much every beer works.
Take a bowl and put 1 cup of flour inside and take a second bowl and add half a cup of flour in there as well and put in on the side. Slowly add your beer to 1 full cup of flour until it turns into a consistent, thick batter. You can add spices like coriander, toasted black pepper, and other seasonings to your taste since there isn’t really a recipe.
After the batter has thickened, fill your air fryer or your lidded pot with the vegetable oil and preheat it to 350F (175C). Once the oil reaches the right temperature, powder your wieners with flour from the second cup. Dust excess flour from the wiener, dip the floured wiener into the batter, and finally drop it in the oil.
Put the battered dogs into the oil one at a time and fry them until they’ve reached a golden brown color. Once the wieners are cooked, you can place them in buns and choose your toppings. The whole process shouldn’t take more than half an hour.
To Put the Dog on the Bun
Hot Dogs are a staple food of the modern American cuisine, great for fairs, ball games, or Sunday family get-togethers. They are very simple to make: you can boil them, deep fry them, pan fry them, grill them, and even air fry them for a healthier alternative.
It doesn’t matter if you’re a hungry college student looking for a fun meal after a day of classes or a professional chef with years of experience behind the stove – Hot Dogs are a fun and easy meal we can cook and share with your friends and families, and they’re even more fun to eat. Just remember to thaw them out unless you want to clean up excess oil from your kitchen walls.
Appliances Reviewed is reader-supported. When you buy through links on our site, we may earn an affiliate commission. As an Amazon Associate I earn from qualifying purchases.
There are many ways to prepare eggs. Whether you prefer them boiled, fried, or poached – it has been done already. But what about deep frying eggs? What would happen if you crack an egg into the deep fryer?
We’re happy that you’ve decided to google the answer instead of simply experimenting on your own because deep fryer accidents are no joke, and hot oil burns are not something you want to risk. That being said, human curiosity has led many people to give this idea a try in an attempt to inspire a new culinary revolution in the way we eat eggs.
So, what were the results?
You can definitely deep fry an egg, and we’ll share some delicious recipes for you to try. However, you can still end up with a huge mess in the kitchen if you’re not careful, so let’s see how to do it the right way.
How to Deep Fry an Egg
The first thing you need to decide is how you want to deep fry your eggs. Do you plan to crack an egg in the deep fryer, or do you want to try to deep-fry an egg with its shell? Are there other ways to deep fry an egg? Let’s find out!
Cracking an Egg in the Deep Fryer
Let’s start from the first scenario – cracking an egg in the deep fryer. You might think that this is a recipe for disaster, as cracking an egg into the hot oil will make it dissolve and fall apart. Counterintuitively, this is not what happens. If you were to crack an egg in the deep fryer, the egg will stay together fairly well.
However, it won’t stay on the surface but actually fall down to the bottom. Because of this, it’s recommended to use a deep frying basket if you’re using an electrical deep fryer or a strainer ladle meant for deep frying if you’re using a deep frying pan.
The result will be something similar to a poached egg with a browned surface and loose center.
Instructions
To deep-fry eggs without their shell, here’s a step-by-step guide.
Plug your deep fryer and set it to 375°F. Alternatively, if you’re using a pan for deep frying, use a thermometer to control the heat because the temperature of the oil can exceed even 450°F on the stove – and that’s not good.
When the oil reaches the right temperature, crack one egg and let it fry for a few seconds. Then take your ladle and spin the egg to curl up the egg whites around the egg yolk if needed (for better shape). If you’re using a frying basket, you might not need to do this, as the egg will rest on the basket and form an oval-like shape.
Let the egg fry for 1-2 minutes until the surface starts to brown.
Take it out and let it cool on a paper towel that can absorb the extra oil.
Add seasons, serve, and enjoy!
Deep Frying Eggs With Shell
Another idea is to deep fry eggs with the shell. In other words, to place whole eggs inside the deep fryer. Can this be done, and is it actually a good idea?
As we’ve said, human curiosity is a wonderful thing, and many people have tried this as well. However, unlike the success of deep-frying cracked eggs, trying to fry eggs with their shells is a recipe for disaster.
First, you’ll most likely make a mess in your kitchen as the pressure inside the egg builds up, and the shell can actually explode. If you make the mistake of putting more than one whole egg in the deep fryer or a frying pan, the explosion can lead to a fire, severe burns, or material damage to your kitchen.
Second, even if you end up deep frying whole eggs without any accidents, the end result won’t be pleasant nor edible. The egg itself will be squishy and watery – not cooked at all.
Therefore, deep frying whole eggs (with shell) is a big no-no! A possible explanation for why this happens is that the egg white contains carbon dioxide that expands at high temperatures and creates pressure that the eggshell can’t withstand. This results in an explosion in a matter of seconds or minutes.
If you’re wondering why this doesn’t happen when boiling the eggs in hot water, the answer is the differences in temperature. Water boils at 212°F, while oil can reach temperatures up to 450°F.
Deep Frying Boiled or Poached Eggs
What if you could go a step beyond and try to deep fry already boiled or poached eggs for a more elaborate dinner? This is possible and can result in a very delicious treat when done right.
In fact, boiled or poached then fried (deep or shallow) eggs are an incredibly versatile treat that go well with many dishes. Plus, they look and taste amazing all on their own because the fried skin on the egg absorbs flavors like nothing else. Here’s how to make them.
Tiger Skin Eggs: Instructions
Deep-fried eggs that are previously boiled are called tiger skin eggs. To make tiger skin eggs, you need to first boil the eggs and then deep fry them:
Take some eggs and boil them like you always would. Typically, you would add a couple of eggs to boiling water and let them cook for several minutes (5-6 minutes). However, you can also use your preferred method or time.
The most important thing here is to let the eggs cool and dry. It’s even recommended to use a towel to absorb some extra water from the surface of the egg. Water and oil do not mix well, and dropping a wet egg into oil can cause explosions, so make sure they’re dry.
After drying them with a towel, you should also make very shallow cuts on the surface of the eggs. This will allow them to release any gas that’s trapped inside and prevent accidents.
With this, the eggs are ready for frying. Plug the deep fryer and wait while it heats up to 375 °F.
Then, place the eggs in the frying basket and submerge them into the oil. Let them fry for around 2-4 minutes, and take them out when the surface becomes golden-brownish.
Place the fried eggs on a paper towel and let them cool.
After this, you can toss them in a dish or eat them as a meal on their own with seasons or dips.
Crispy Deep Fried Poached Eggs
The second alternative is to deep-fry poached eggs. Here, just as with tiger skin eggs, you need to first poach the eggs and then deep fry them. To make them extra crispy, we’ll share a recipe from Chef Jack Ovens, who makes mouth-watering golden eggs with an oozing center.
Boil around 2 inches of water in a nonstick skillet.
Next, add a little bit of vinegar to the water. This is a little trick that prevents the egg whites from thinning and breaking down.
Crack the eggs into separate bowls, then carefully add them into the boiling water – one by one. You can also crack the eggs directly into the water, but if you’re a newbie, it’s easier to prep them in a small bowl.
Take a ladle and carefully stir in a clockwise motion. After five to six minutes, your poached eggs will be firm on the outside and soft on the inside, which is just what we want.
Take them out and place them on a paper towel. Let them cool and dry completely.
In the meantime, take two slices of bread and cut them into small pieces.
Take a baking tray and cover it with baking paper. Then, spread the pieces of bread onto the baking tray.
Place the baking tray in a preheated oven for around 10-12 minutes until they’re completely dry and crunchy.
Once they’re done, add the bread chunks into a blender and process them until you get a fine powder (finely ground).
In another bowl, mix one egg yolk and 60 ml of milk. Whisk the mixture until you get an egg wash.
In yet another bowl, place 50 grams of flour.
Take one poached egg and coat it gently with plain flour. Then, place them in the egg wash and finally coat them with the blended bread powder. Repeat the same procedure with all of the poached eggs. Be careful not to break them as they’re very fragile.
Plug the deep fryer in and wait while it heats up to 375 °F.
Place the coated eggs into the deep fryer and submerge them into the oil completely.
Let them cook for 1-2 minutes, then carefully take them out with a ladle suitable for deep frying and place them on a paper towel.
Once the eggs cool, serve them and enjoy.
Pro Tip: You can add seasonings in the bread powder such as garlic powder, pepper, chili, or rosemary to make the fried eggs more to your taste.
Conclusion
Deep-fried eggs are quite the treat and an excellent idea for breakfast, lunch, or dinner. However, frying eggs in a deep fryer can be messy and may cause accidents if you’re not careful.
You need to learn how to properly deep fry eggs to prevent dangerous accidents and a messy kitchen. For instance, you can safely crack fresh eggs into the deep fryer or deep fry previously boiled or poached eggs if they’re fully dried (mixing water and oil can be dangerous).
Trying to deep fry a whole egg with its shell is dangerous and should not be attempted. In fact, the shells of eggs can explode when submerged in hot oil due to the gasses such as CO2 that are naturally contained in the egg.
Finally, if you love eggs and want to explore new ways to prepare them, follow our recipes above. We shared three ways you can prepare deep-fried eggs, but you can always use the eggs as part of a more elaborate dish. Whether you want to further cook them with other vegetables or toss them into a soup, the only limitation is your own creativity.
Appliances Reviewed is reader-supported. When you buy through links on our site, we may earn an affiliate commission. As an Amazon Associate I earn from qualifying purchases.
Steam dumplings are the ultimate winter comfort food. They’re healthy, juicy, and taste absolutely delicious, especially when you eat them warm. In fact, the legend says that a Chinese medicine practitioner from the second imperial dynasty of China invented steamed dumplings as a way to warm people up and help them get through the cold weather.
It seems like he took a little bit of dough and filled it with mutton and medicinal herbs that are wonderful for our health, then steamed the dough wraps to bind everything together. And, good thing he did because the idea of a dumpling was embraced by many cultures and spread throughout the world. Even the Italian ravioli and Brazilian empanadas can be seen as two variations of the traditional Chinese dumpling.
One of the reasons why people love steam dumplings is because they offer endless creativity when it comes to taste. You can experiment with your own preferred flavors if you want to make them from scratch or buy some delicious options at your local supermarket.
Regardless of your choice, you can quickly and easily prepare them in an Instant Pot. This way, you’ll get a perfectly cooked dinner in just a few minutes. The process is simpler than you might think, so let’s break down how to steam dumplings in an Instant Pot.
The Easiest Way to Steam Dumplings in an Instant Pot
Using an electric pressure cooker such as the Instant Pot has to be the easiest and quickest way to cook dumplings. It’s a totally hands-off process, which shouldn’t come as a surprise if you’re used to cooking with an Instant Pot.
We particularly love this method because even people who have no confidence in their cooking skills can enjoy this delightful treat. That’s the kind of low-effort cooking that we’re all looking for after a busy day.
Having said that, if you enjoy cooking and want to go all out, you can actually make steam dumplings from scratch, which is why the first step is to decide what recipe you’re going to follow.
Step One: Find a Recipe or Make Steam Dumplings From Scratch
There are two ways in which you make steam dumplings in an Instant Pot. The first one is to go to your local supermarket and buy frozen dumplings. If you already have frozen dumplings in the fridge, then you are just five minutes and a few clicks away from a tasty dinner.
The second option is a long road where you make your own dumplings at home by following a recipe that caught your eye or experimenting with your own recipe.
If you choose the second option, here’s one delicious recipe that we think you’ll like.
Steam Dumplings Recipe
Ingredients:
6 round Wonton or potsticker wrappers (or any available dumpling wrappers in your store);
1/2 cup (35 g) minced mushrooms (shiitake or champignons);
1 cup (70 g) minced cabbage;
½ cup (55 g) shredded carrot;
1 tsp grated fresh ginger (or other seasonings).
Instructions:
Plug your Instant Pot in and turn on the sauté function to the normal setting. The Instant Pot will automatically display the default sauté time of 30 minutes, but don’t worry, you can press “Cancel” at any time.
Add the cooking oil and wait until the Instant Pot indicates that the pot is hot. After this, add the mushrooms and stir until they release their juices. Then add the carrots, cabbage, soy sauce, and vinegar. Once the mixture is dry and you’re satisfied with the texture of the ingredients, press “Cancel.”
Then take a small glass of water and place it next to your cutting board. Place a piece of wrapping on the cutting board and add around 1 tablespoon of the sautéed mixture in the center of the wrapping. Wet your fingers with water and spread it around the edge of the piece of dumpling wrapper. With this, you’ll be able to stick the opposite edges together when you fold the wrapping. Once you fold it into your desired shape, firmly press on the sides to make sure the dumpling doesn’t open.
Repeat the same procedure with all the wrapper pieces or until you use all the filling. When you’re done, your dumplings are ready for steaming.
Step Two: Steam the Dumplings in the Instant Pot
The easiest way to steam dumplings in an instant pot is to use a steamer basket.
Some models of Instant Pot have a steam basket included as part of the accessories, while for others you can buy a stainless steel one from Amazon for around $20.
The steamer basket allows the dumplings to stay above the water, so they can be steamed instead of boiled.
To prepare the steamer basket, lightly brush it with cooking oil to prevent the dumplings from sticking to the steel. This is especially important if you’re using frozen store-bought dumplings, but all dumpling doughs are sticky in general, so don’t skip this step.
Second, add water to the Instant Pot. If you’re following an Instant Pot recipe, then simply check to see how much water the recipe recommends for you to add. In any other case, the general rule of thumb is to add at least 1 cup of water (you can use more, but make sure the steamer basket is above the water level).
The third step is to place the dumplings on the steam basket and lower it inside the Instant Pot.
Finally, close the lid and set the vent to a sealed position. The pressure valve should be set to steaming. Click on the steam function and set the cooking time.
Cooking Time for Steam Dumplings in an Instant Pot
How to know what the ideal cooking time for steam dumplings is?
Well, the ideal cooking time depends on several factors, and you need to experiment to find what works best for you and your Instant Pot (more powerful models might be quicker than others).
If you follow a recipe, follow their recommendations. In most cases, dumplings take around 5 to 10 minutes to be fully steamed. Whether it is better to leave them longer or take them out in 5 minutes depends on several factors, including:
The ingredients inside the dumpling – meat and seafood take longer to be safely cooked (check this timetable for specific times for different ingredients).
The initial condition – if the dumplings were frozen, they need longer cooking time, while freshly prepared dumplings are usually done quicker.
The preparation – in our recipe above, the filling ingredients were sautéed before the dumplings were steamed. In this case, you won’t need more than 5-6 minutes of steaming time.
The steam setting – the Instant Pot has three steam settings: low, normal, and high. Usually, you need a high setting for dumplings with meat, while low or normal settings for veggie dumplings. However, a higher setting can easily overcook the dumplings if you leave them for more than 6-7 minutes.
The more you practice, the better you’ll become at predicting the exact time for making delicious and juicy dumplings.
How to Steam Dumplings Without a Steamer Basket?
A steamer basket is a very convenient accessory for preparing a lot of meals, not just dumplings, but what if you do not have one?
In that case, you can still use the trivet that’s included in almost all Instant Pot products. This is a metal rack that keeps the food above water. Now, you can place the dumplings directly onto the trivet, or better yet, use a small bowl or plate that’s heat-proof. According to users, the result is almost the same as with a steamer basket.
If you do not have a trivet, please resist the temptation to use aluminum foil or other improvisations that some people might suggest online since these alternatives can be dangerous. Do not use any other material inside the Instant Pot unless it’s approved by the manufacturer. The Instant Pot works under pressure, which is why explosions and fires are a common sight when it’s handled improperly.
Step Three: Serve and Enjoy
When the Instant Pot has finished, quickly release all the pressure. This is done by pushing the knob to quickly release the pressure and steam – the method is called quick release. You’ll probably see the steam being released, so do not stand above the Instant Pot when you do this.
Quick release usually lasts 2 minutes, but we recommend waiting 5 minutes to prevent burns.
After this, take a serving plate and place the dumpling on the plate. Decorate with soy sauce and seasonings of choice.
Conclusion
Steam dumplings prepared in an Instant Pot are a great idea when you want to squeeze a quick but tasty dinner into a very busy schedule. With frozen dumplings that are available in all larger supermarkets, you can prepare dinner in just 5 to 10 minutes.
However, for many people, steamed dumplings are more than just a quick meal. If you enjoy cooking, love dumplings, and want to experiment with different tastes, then preparing dumplings from scratch is also a possibility. In this case, the Instant Pot is a valuable multi-cooker where you can saute your filling, steam the dumplings, or even pressure cook dumpling soups or make other elaborate meals with dumplings as the main ingredient.
We hope that you’ll love our recipe and find it very delicious. But more importantly, we hope that we’ve convinced you that preparing steam dumplings in an Instant Pot is a very simple and fuss-free process, so you’ll decide to give it a try.
Appliances Reviewed is reader-supported. When you buy through links on our site, we may earn an affiliate commission. As an Amazon Associate I earn from qualifying purchases.
We’re all passionate consumers of fried foods, whether we’d like to admit it or not. Donuts, fried chicken, churros, french fries, whatever the delicacy is, they’re the best when they’re fresh out of the fryer.
But sometimes, you’re left with a bunch of soggy leftovers, remnants of your crispy dinner the previous night, and other times, the takeaway dish turns into a sad mess in just 5 minutes, which isn’t very appetizing. In some cases, even when just a couple of minutes out of the fryer, fried foods can lose the crunch and transform into a disaster if not stored properly.
Fortunately, there are some neat tips and tricks that we’ve learned to keep that satisfying crunch alive a bit longer, so keep reading to find out the best ways to keep that crunch crunching.
Why Fried Food Gets Soggy in the First Place
When fried food is taken out of your home fryer, most of it is full of steam. The food is piping hot, moist on the inside, and crispy on the outside. That excess moisture inside will evaporate in the form of steam and turn into the water if there’s nowhere else to escape. In other words, if you pack it in an airtight container, as many of us do when we’re in a rush.
The key to keeping fried foods crispy after removing them from the fryer is finding a way to ventilate that excess steam. If the fried food isn’t properly ventilated, the steam will cause all that crispy goodness to become soggy and unappetizing.
In plain terms, water and heat are the main enemies of crispy foods. The best way to keep the crunch crunching is to cool the food down while not allowing the steam to turn into water on top of the crispy layer and ruin it.
Learn From the Crispy Food Masters
Before you’ve cooked your own fried food, you must have visited some well-known crispy food restaurants for a dine-in or a takeaway meal. Well, the emphasis is on the takeaway meal. During our research, we visited crispy fried food specialists like KFC and Popeyes and looked at their delivery methods.
KFC delivers their meals in cardboard buckets with holes on top to let out the steam coming from their famed Kentucky fried chicken, while Popeyes uses cardboard boxes with big holes on every side. These packaging methods make good use of two important factors – ventilation and absorption.
Ventilation
When fried food leaves the fryer, it releases moisture in the form of steam, so it’s very important to make sure there’s space for it to escape and not condense and turn into water.
So, let’s say you’re making tomorrow’s dinner and frying something tasty. The best way to prevent your fresh-out-of-the-fryer crispy food from getting soggy is to place it on a cooling wire rack until it has cooled off instead of sealing it in a container while it’s still hot.
If you absolutely have to pack it while steaming hot, it’s best to use a container with holes. The smell of fried food might fill your car or your fridge with its unmistakable aroma and make you salivate, but it will be worth it when you finally taste the goodness.
Absorption
Absorption plays a key role as well when it comes to perfect crispness. When you remove your food from the fryer, it’s best to lay it on top of some paper towels or even a kitchen cloth. If you want to take your food on the go, you can place paper towels on the bottom of your ventilation container.
Why is this recommended? Well, since the moisture from the hot food will condense on the sides of your container, you need something to absorb the unwanted moisture and prevent it from making the edge of your crisp soggy, and a paper towel does just that. Remember, better to have a soggy paper towel than soggy fried food.
How to Actually Keep Fried Food From Getting Soggy
Now that you’ve learned what the fried food giants do to keep the crisp crisping, let’s see some other methods for preventing your next meal from getting soggy.
Cooling Mechanics
Fried food doesn’t get soggy when it’s reasonably cooled down before it’s stored in any container. If you need to take crispy fried food on the go, the best way is to let it cool on a rack for at least half an hour before putting it in a container. The cooling mechanics will not allow steam to form on the crispy bits, and you can always reheat crispy food when you’ve reached your destination.
Heated Containers
One way to keep crispy food fresh at home can be by placing it on a wire rack and keeping it in the oven on low heat. When you’re on the go, though, this effect can be emulated in your container by placing a pizza stone or some other passive heating item. The pizza stone combined with a well-ventilated container lined with paper towels or cloths will ensure that your fried food will stay warm and crispy wherever you take it, like your office, for example.
Just imagine how stunned your coworkers would be when you whip out a piece of fresh, hot, and crispy chicken for lunch despite the long trip from home. Well, it’s a secret only you know!
Preventing Soggy Takeout Food
Many places that serve fried takeout food will most likely pack it in a styrofoam container. The styrofoam container is great for keeping food warm, but it makes it soggy in just a couple of minutes. If you’re planning to order takeaway, it’s best to invest in vented Tupperware container. It’s not the most practical solution, but it’s perfect for preserving the crispiness.
With that being said, vacuum-sealed containers should have no business with hot crispy food. Remember our trick with the paper towels on the bottom? Exactly! It’s to ensure that the crispness stays intact, so make sure to do this. Tupperware containers are also a great choice as they don’t pollute the environment like single-use styrofoam containers that soggy up your food.
Wrapping Crispy Food
If you’ve prepared different fried foods like french fries, onion rings, and a couple of churros for the sweet tooth but only have one container, then you have no choice but to wrap them up separately. Wrapping food is a great way to separate fragrances and flavors, but the most common mistake you can make is to wrap your food too tightly.
There is a common misconception that wrapping food tightly will keep it warm and fresh, and while it’s true to some extent, it doesn’t apply to crispness. If you want to retain that crispy edge and moist center, you must wrap your food very lightly. Tight wraps only seal the moisture inside the food, and after a few minutes, you’ll end up with multiple soggy dishes. Wrap the food lightly, and make sure you use a vented container. Cooling your fried food for a couple of minutes before wrapping will also help you retain a crispy bite
Following that, most people make mistakes when choosing the wrong wrapping material. Plastic or aluminum-based wrappers can create moisture that will soggy up your crispy food in no time. They are great for retaining heat but not so good at retaining a crisp. As we mentioned before, crispy food can be reheated but not de-soggyfied, so if you want your crisp to last, you should only wrap crispy foods in paper wrappers.
The Way to Keep Fried Food Crispy
Like it or not, the best way to enjoy your fried foods is to eat them fresh out of the fryer while they’re still crispy. Fresh crispy food is a delight to eat while it’s sizzling, but sometimes we don’t have the luxury of time, and we have to take our food on the go or store the leftovers for the following day.
Storing is crucial for keeping the crisp from becoming a soggy mess, so remember to store your food in ventilated containers lined with paper towels or kitchen cloths to keep the moisture away from the crispy bits.
Whatever you decide to do, keep in mind that crispy food can be reheated, but there is no way to get that crisp back if it becomes soggy. If you keep to our guide on perfectly retaining a crispy bite when transporting or storing crispy food, then you’ll bite into a satisfying crispy piece of food.
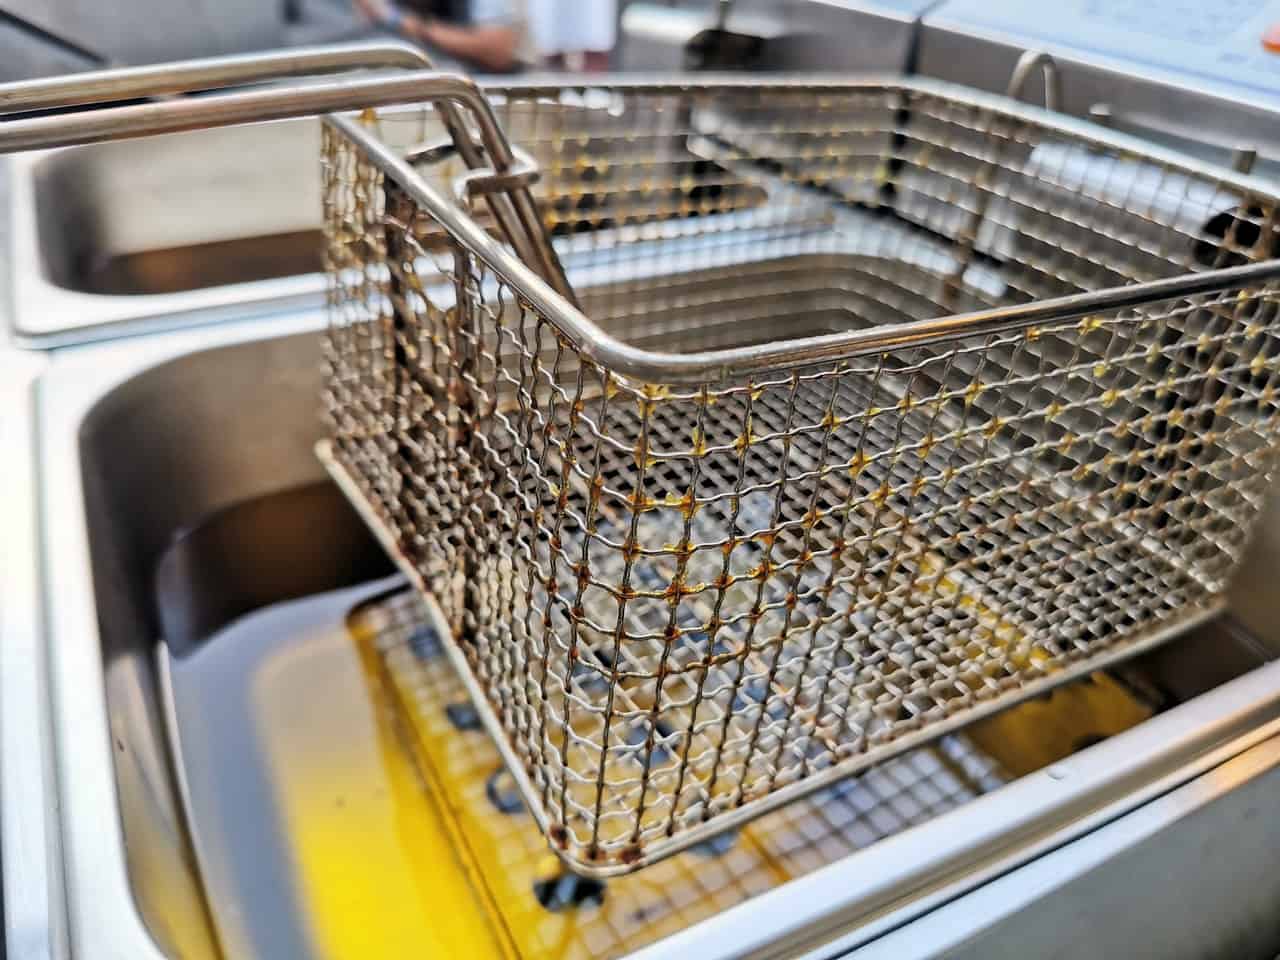
what kind of a container is this?
Plastic container with vents to let the steam out.
Appliances Reviewed is reader-supported. When you buy through links on our site, we may earn an affiliate commission. As an Amazon Associate I earn from qualifying purchases.
The pressure cooker is a workhorse in the kitchen. It comes with a long list of functionalities, which means it can make almost anything you would ever want in a matter of minutes. Of course, you can also use it as a slow cooker and leave it unattended for hours. There’s nothing this popular multi-cooker can’t do… or is there? If it’s that mighty, can it also fry?
In a pressure cooker, you can make yogurt and bake a cake, but unfortunately, you can’t fry – in most cases.
Why should things be simple, when they can be complicated, right? If you’re looking for a short answer, then you absolutely can’t and should never fry in a pressure cooker. However, there are different types of frying, so in some exceptional cases, you could use the pressure cooker as a fryer. Keep reading to find out what we’re talking about.
Pressure Cookers and Types of Frying
The idea of frying in your pressure cooker is tempting, especially when you consider the speed at which your crunchy nuggets or french fries can be done. But before you dump oil in your pressure cooker and potentially cause a fire, here’s what you need to know.
Pressure cookers are not designed for frying. And, if you’ve heard the word pressure frying, then that’s because there are specifically designed fryers that fry food under pressure. Nine out of ten times, pressure fryers are used commercially. They’re not and should not be mistaken for home pressure cookers.
Aside from pressure frying, you might also wonder whether you can deep fry with your pressure cooker. This is still not a good idea because some pressure cookers might release toxic fumes into the oil.
Other types of frying include pan-frying and air frying. These two are the only types of frying that can be done with a pressure cooker. In fact, some pressure cookers even have accessories for air frying.
Let’s break down all types of frying and explain the reasons why it’s dangerous to try them in pressure cookers.
Pressure Frying
We’ll start with pressure frying, a method commonly and mistakenly associated with pressure cookers. Yet, the only thing pressure cooking and pressure frying have in common is the use of pressure, hence the shared word.
Pressure cooking is a water-based method. Adding water or another water-based liquid such as broth is essential. The pressure cooker needs enough water (at least one cup) to be able to exert pressure and cook the food properly. The steam from the water reaches temperatures well above the water’s boiling point and transfers that heat to the food, which is how it is cooked so quickly.
On the other hand, pressure frying is a variation of pressure cooking that uses oil and a sealed container to reach high temperatures to cook the food more quickly. The specially designed containers used for pressure frying are called pressure fryers, and they’re mostly used in industrial kitchens.
Aside from the water versus oil distinction, pressure cooking and pressure frying operate at different temperatures. Pressure cooking reaches temperatures of around 121 °C (250 °F), whereas pressure fryers that use oil heat up to around 160 °C (320 °F) and more. Because of this, using pressure cookers to pressure fry can cause the gasket in home cookers to melt, explode, or release toxic substances into the food.
In conclusion, never use your home pressure cooker for pressure frying!
Deep Frying
If pressure frying is not an option, can you improvise and use the pressure cooker to deep fry? This would mean filling the vessel with oil – enough to fully submerge the food in oil and leave the lid open while the food is frying.
Unfortunately, the answer is still no! While it’s technically possible to use it as a deep fryer, you should not use the pressure cooker for deep frying. The reason for this is the same as pressure frying.
The ideal temperature for deep frying is between 350 and 375 °F (176°C to 190°C). This is way too hot for home pressure cookers and the material of the vessel is not suited for such high temperatures. While there might not be an explosion, accidents such as melting, fire, and the release of toxic fumes are all possible outcomes.
Therefore, do not try to deep fry in a pressure cooker. Instead, grab a deep pot or a pan suitable for frying. They’ll get the job done just as fast, make the food crunchy and delicious, and let you cook accident-free.
Pan Frying
Unlike deep frying, pan frying or shallow frying is a popular cooking method that requires a minimal amount of oil or fat to fry the food. The method calls for a skillet or another stove-top pan brushed or filled with oil. So, can you mimic pan-frying in a pressure cooker?
Fortunately, you don’t have to. Pressure cookers, such as the Instant Pot come equipped with a very similar, if not identical, function called sauté.
Sautéing is a cooking technique that derives its meaning from the French word for jumping. And, while it’s meant for the food to be cooked in a very hot pan over a stove-top without oil, some people use oil or fat in very small amounts. Both pan-frying and sauteing brown the food and get it slightly crisp on the outside and moist on the inside.
Therefore, you can use the sauté function of the Instant Pot and/or other pressure cookers and add a little bit of cooking oil to achieve the same results as you would if you pan-fry food. It’s totally okay to do this as most sautéing Instant Pot recipes include cooking oil in the ingredients lists.
Air Frying
Traditionally frying means cooking food at a very high temperature in cooking oil or fat. However, with the rising evidence that fried food is bad for health, people have been looking for ways to make frying healthier. One way to do that is to eliminate oil and fat out of the equation, which is possible thanks to a super popular product – Air Fryer.
Air Fryer was invented about a decade ago, but the words air fryer and air frying are now used generically. Air frying took the world by storm because it offers a very simple cooking solution that fits people’s busy and dynamic lifestyles perfectly. It’s a healthy and quick method that simulates deep frying – but without the added calories and health risks of fried oil.
The manufacturers of pressure cookers have found a way to add this functionality to their products. Most pressure cookers today have an air frying feature or sell special air frying lids that can transform traditional pressure cookers into powerful air fryers.
Depending on the kind of pressure cooker you have, you can easily air fry your food with small adjustments, or buy the necessary accessories to do so.
If you’re thinking of buying a pressure cooker and frying is important to you, then look for one that comes with an air frying functionality or doubles as an air fryer.
Pressure Cookers with Frying Options
How do you choose the best pressure cooker for frying? Well, that depends on your cooking habits.
First, you need to decide what frying method you prefer, or you plan to use frequently. For example, if you’re interested in deep frying, then you might benefit more from buying a deep fryer instead of a pressure cooker. If you regularly pan-fry your food, then you can use a regular pressure cooker to simply saute your food. Finally, if you want to opt for a healthier meal, you might want to invest in an air fryer.
That being said, sometimes you might want a two-in-one solution. What would be your best option then?
This, too, depends on your preferences and habits. Today, there are some incredible pressure cookers that double as air fryers. If you choose one of those, you’ll get a versatile multi-cooker in which you can pan fry (saute) and air fry.
There are products (multi-cookers) that claim to have a pressure frying function as well, but we do not recommend those, as pressure cooking and pressure frying are quite different.
Conclusion
As you can see, asking whether you can fry in a pressure cooker is not something we can answer in a simple yes or no manner. That’s because when people say frying they mean different things. In other words, frying might refer to several very different cooking methods: pressure frying, deep frying, pan frying (saute), and air frying.
If we’re talking about pressure cooking, which is common in industrial kitchens, then the answer is absolutely not! Pressure frying in home pressure cookers can lead to explosions, melting, fires, and toxic fumes.
The same applies to deep-frying, which is a very similar method except for the lack of pressure – the lid is open. However, this still doesn’t change the fact that deep-frying is done at very high temperatures that exceed the capacity of home pressure cookers. Trying to deep fry in pressure cookers could lead to similar hazardous accidents as pressure frying.
On the other hand, pan-frying (shallow frying/saute) and air frying can be done with a pressure cooker. Pan-frying is similar or almost identical to sauteing, which is a popular function in most pressure cookers, including the Instant Pot. With this function, you can achieve the same results as with pan-frying. Air frying is also doable but usually requires an additional accessory (air frying lid) or a pressure cooker that doubles as an air fryer.
Think about how you prefer to cook and what you’ll like most. Then, look for an appliance that would suit your needs best. A pressure cooker with an air fryer function is the most versatile option and can serve many delicious dishes that are both hearty and healthy.
Appliances Reviewed is reader-supported. When you buy through links on our site, we may earn an affiliate commission. As an Amazon Associate I earn from qualifying purchases.
Deep fryers and ice are a dangerous combination, right? Well, hopefully, you’re not here because you want to fry ice because the truth is you should NEVER put ice in a deep fryer. Don’t even think about it. But, accidents do happen, and you should be prepared to take appropriate action to protect yourself. And, then again, since curiosity already killed the cat, let’s just take the mystery out of the way.
Putting Ice in a Deep Fryer
The short answer to this question is: chaos ensues! There will be a violent reaction that, depending on the oil’s temperature and the amount of ice inserted, can even lead to a fire or an explosion. But, our guess is you want to understand why that happens, which is why we’ll turn to science.
Water and Oil Do Not Mix
Some of the most entertaining science experiments from childhood are the ones demonstrating that water and oil do not mix. By now, we know that that’s because water molecules are polar molecules, while oil molecules are nonpolar molecules. Polar molecules means that one side of the molecule has a positive charge and the other end has a negative charge. This allows them to bond easily with other polar molecules because opposite charges attract.
Nonpolar molecules can only bond with other nonpolar molecules, which is why oil molecules can’t bond with water molecules.
When you put water into oil and shake or stir the mixture, you’re forcing the liquids to mix, but as soon as you stop, they’ll separate again, and you’ll clearly see layers or splotches of water inside the oil. This is why we say that oil is hydrophobic.
It’s important to understand this because ice is just frozen water. Chemically, they’re the same thing. And, when you put ice in a warm or slightly heated oil, it will melt and turn into liquid again. However, due to the extremely high temperature of oil in deep fryers (up to 400 °F), the chemical reaction is a lot more violent than simply melting and repelling water molecules. In a mere second, the ice will change from a solid state to liquid to gas. Here’s exactly what happens.
Putting Ice in Fryer Oil
Ice forms at around 32ºF (0ºC), but it can get even colder than that. On the other hand, the temperature of heated oil in a deep fryer can get up to 400ºF (205ºC). The extreme difference in temperature is responsible for the powerful chemical reaction.
We said that the ice would go from frozen to liquid to gas in a matter of seconds, a process that produces a fierce chemical reaction. Now, if we combine that with the knowledge that water and oil do not mix, the water molecules in the hot oil will be rapidly expelled, which you’ll see as bursting and splashing bubbles of both hot oil and bubbling water.
This will probably be combined with a lot of smoke, and it will look like a small explosion. Depending on the amount of ice you’ve put inside the oil and how hot the oil was, the reaction can be violent enough to start a fire. Mind you, even the splashing bubbles of boiling water and oil can cause severe burns.
What About Dry Ice?
Chemically, dry ice is not the same as regular ice. Dry ice is the solid form of carbon dioxide, and when heated, it goes straight to a gas state. It’s also much, much colder than regular ice and more dangerous because melting dry ice releases carbon dioxide, which is considered a hazard in an unventilated closed space. The temperature of dry ice is usually around -109° F (-78.3°C).
Therefore, when you insert dry ice into a frying oil, the reaction will be different. What do you think will happen?
Because of the temperature, you might assume that the reaction will be more intense, which makes sense, but that’s not the case. This is because dry ice simply evaporates, it doesn’t turn into water when it melts, so there’s no repelling of the molecules. Putting dry ice in a deep fryer is kind of like frying a piece of chicken.
That being said, putting dry ice in the deep fryer is maybe even more hazardous because the danger sneaks up on you without you even being aware. In other words, like we said, dry ice releases carbon dioxide gas. Now, if you’re in a closed room without any open windows or ventilation, this too can be a medical emergency.
Exposure to too much carbon dioxide causes drowsiness, increased heart rate, blood pressure, unconsciousness, and even life-threatening complications.
To conclude, do not attempt to put dry ice or regular ice in the deep fryer! Both situations are dangerous in different ways and can lead to serious accidents.
What to Do in Case of an Accident?
Unfortunately, accidents happen. And, although you need to be responsible and not keep ice or iced drinks near the deep fryer, it’s always a good idea to know what to do in case of an accident. Let’s go over two scenarios: an accident with regular ice and one with dry ice.
Accident With Regular Ice
With good prevention measures, the chances of getting regular ice into the deep fryer are next to nothing. Still, if that happens, let’s say from drinking iced coffee or tea next to the deep fryer, you should keep calm and consider everything that we’ve explained.
Water and regular ice can create a violent chemical reaction where bubbles of boiling water and burning oil might splash around the deep fryer. Because of this, your first instinct should be to move away from the deep fryer. The initial reaction from the moment the ice touches the oil is the most explosive, so make sure you’re as far away as possible.
Locate the fire extinguisher and keep it close, just in case. There’s always a possibility of a fire breaking out. If it’s small and inside the deep fryer, you should try to unplug it, then use the fire extinguisher.
Do not use water to put out a grease fire! This can lead to an even bigger explosion that could spread through the whole kitchen. If you don’t believe us, check out this video of a fireman demonstrating what happens when you add water to a grease fire.
Unless we’re talking about a science experiment gone wrong, we really can’t imagine how dry ice might find its way into your deep fryer. Nonetheless, here’s what you need to do.
The only real emergency of putting dry ice into a deep fryer is if you’re standing too close to the fryer or if you’re in a closed area without proper ventilation.
This is why the first rule is to never stand close to or above a deep fryer if you ever put dry ice inside it. The fumes from the dry ice are carbon dioxide that can make you dizzy and faint. This is dangerous as you might fall on your head or toward the deep fryer.
The next step is to immediately open the windows and doors or turn on the ventilation in the room. This will prevent the accumulation of CO2 inside the room.
In conclusion, please be careful and do not try putting ice or dry ice inside a deep fryer. Even a slight reaction can cause unforeseen consequences depending on many factors, such as other kitchen appliances nearby, the number of people in the room, and more.
Does the Same Apply to Frozen Foods?
While we’re on the topic of frozen things, let’s answer the question of whether the arguments above extend to frozen foods. In other words, is it safe to put frozen foods directly into the deep fryer?
The short answer is no, but not for the reasons that we already covered above.
Just as regular ice and dry ice react in a very different way when inserted into a deep fryer, frozen foods too can produce unique reactions.
The first thing to remember is that not all frozen foods are the same. Some are very dry and small, while others retain a lot of water when frozen, making them more dangerous.
Accidents Related to Deep-Frying Turkey
Vegetables and turkey are two examples of foods that could cause an explosion or even lead to a fire if they’re inserted into the deep fryer while frozen. Vegetables – because they contain a lot of water – and turkey – because it also retains water due to its large size.
To prove just how serious deep-frying accidents are, we’ll share these staggering statistics from the National Fire Protection Association. According to them, in the US, “deep fryer fires cause an average of 5 deaths, 60 injuries and more than $15 million in property damage each year.” Most of these accidents happen around Thanksgiving and are due to deep-frying turkeys.
If 5 people die each year just from deep-frying turkey, can you imagine how higher that number would be if people started putting frozen turkeys and frozen meat into deep fryers?
So let’s reiterate: Do not put frozen foods into deep fryers, especially not foods that retain a lot of water and are large in size.
Dangers of Deep Frying Frozen Foods
If you need another reason to not put frozen foods into deep fryers, the danger of food poisoning may be a good one.
Putting frozen foods directly into the deep fryer changes the taste and texture of the food because the food might be cooked unevenly. While some people might not mind, foodies will definitely notice.
Still, a more important consequence of an uneven cook is the fact that meats, especially large cuts, might remain undercooked in the core while being almost burnt on the outside. And, undercooked meat is a health hazard and can cause food poisoning in certain circumstances.
Having said this, there are some types of foods that are generally safe to cook from frozen. We recommend doing your research thoroughly before putting any type of frozen food in the deep fryer, just to be safe.
Conclusion
Putting ice in a deep fryer is extremely dangerous and could lead to a hazard. We hope that we did a good job explaining how this happens and why, satisfying your scientific or cooking curiosity. We also hope we were convincing enough to stop you from ever willingly trying to put ice in a deep fryer and gave you enough reasons to be very careful around the deep fryer.
Even if you accidentally spill your iced drink and just a few ice cubes get inside the deep fryer, this could lead to splashes of boiled water or burning oil if the temperature is high enough. The outcome could be damage in the kitchen or worse – painful burns on your body or face.
Since starting a fire is also a possibility, we strongly advise that, in the case of an accident, to step away from the deep fryer and locate a fire extinguisher.
Similar risks and consequences can come from putting dry ice or frozen foods in the deep fryer, so be careful in these cases as well. Follow our advice on what to do in case of an emergency, and conduct thorough research on how to prepare some types of frozen foods in the deep fryer.