As an Amazon Associate I earn from qualifying purchases.
Eating fried food frequently is bad for our health, but can you imagine a life without french fries? Me neither. We live in a world where fried food is part of many traditional cuisines, not to mention the fast-food industry. On top of that, it’s absolutely delicious! So, if we can’t (nor want to) avoid it, what can we do to feel less guilty about consuming it?
One solution is to use a healthier oil when frying, which is not a new idea. Ever since science linked fried food with cancer, high blood pressure, type 2 diabetes, obesity, and other scary health consequences, people have been trying to find a way to make deep-fried food healthier by changing the oil they cook with.
The obvious choice would be olive oil, more specifically extra virgin olive oil as it usually ranks in number one in almost every health list, and for a good reason! However, at the same time, for some reason olive oil has been labeled as cancerogenic and unsafe to cook with, especially to fry with. This was quite a buzz a few years ago, and as it seems, it’s still a source of confusion for many.
For this reason, today, we’ll try to shed light on the issue of deep-frying with olive oil. We’ll carefully examine all the data available and finally put to rest the ongoing dilemma of whether you can deep-fry with olive oil.
What Makes Deep Fried Food Unhealthy?
Let’s start from the very beginning. The key to understanding whether we can deep fry with olive oil is understanding what makes fried food unhealthy. Knowing this will help us understand whether and how the properties of different types of olive oil might make it a safety concern when heated – and in what situations this happens (deep frying, shallow frying, baking, etc).
Every once in a while you’ll hear someone say: “Fried food is bad for health!” Hey, that was the first sentence in our article. But have you ever wondered why deep-fried food, such as donuts are so bad? Short answer: several reasons.
First, deep-fried foods significantly increase caloric and fat intake. This is not necessarily bad on its own – it only becomes bad when we put it in context. To give you an example, one baked potato (~100 grams, no salt or oils) contains around 93 calories and no fat. The same serving of McDonald’s french fries contains roughly around 323 calories and 15.5 grams of fat (based on data from the USDA). The difference is staggering and it’s due to two things: cooking temperature and the addition of oil.
From this, we can conclude that even with seemingly small amounts of fried food, we can easily exceed our daily nutritional requirements, which is a problem in the long run.
Second, deep-fried food is bad for health not just because it has a dense caloric profile, but because of certain chemicals and the high fat content – especially the notorious trans fats!
What are Trans Fats?
Trans fat, also called trans-unsaturated fatty acids or trans fatty acids are a type of unsaturated fat that naturally occurs in very small quantities in meat and milk fat. However, the biggest health concern is when we consume artificial trans fats, also known as industrial trans fats, that are created during hydrogenation – a process that turns liquid vegetable oils into semi-solid partially hydrogenated oil. This happens under very high temperatures (such as when deep-frying).
Now, there’s a lot of chemistry behind these processes, so to avoid getting lost in the technical jargon, let’s quickly sum up.
The really unhealthy ingredient in fried foods is the so-called artificial or industrial trans fats. They form through the process of hydrogenation which combines fat (read vegetable oil) with hydrogen. This makes unsaturated fatty acids in the oil-saturated. And, these are the fats that scientists link to all kinds of diseases or health risks. A lot of manufacturers add trans fats on purpose to prolong the shelf life of a product, hence we can find artificial trans fats in many processed foods.
But, why are some oils considered healthier than others if high cooking temperature (such as frying) leads to hydrogenation? Do different types of oil act differently under high temperatures?
That’s exactly right.
Cooking Stability (Oxidative Stability) of Oils
Let’s talk more about chemistry – this time about rancidification, or more specifically about oxidative stability (oxidative rancidification). This is the process of complete or incomplete oxidation or hydrolysis of fats and oils when they’re exposed to air, moisture, light, heat, etc.
But, don’t let the big words distract you because in reality, we’re talking about a very simple process – how stable are oils under high cooking temperatures. In other words, what temperatures can different oils withstand before they go rancid and start releasing bad chemicals? This can refer to the formation of trans fats (as mentioned already), but also other toxins.
There are a number of factors that impact an oil’s oxidative stability (cooking stability). These include:
- number of antioxidants – as the name suggests, antioxidants protect against oxidation. Oils with high antioxidant levels are considered healthier.
- type and ratio of fats – there are different types of fat, and those who do not contain double bonds between its molecules are more resistant to heat. polyunsaturated fats (PUFA) are a type of fats with many double or more bonds which makes them prone to oxidation and breaking down. Oils high in PUFAs are usually not suitable for deep frying.
- refinement process – refined oils are more prone to oxidation because refinement strips away their antioxidants and makes them more prone to oxidation. Cold-pressed extra virgin oils are much better than refined oils.
Side Note
Do not confuse oxidative stability with the smoke point. When exposed to heat, different oils start to produce a thin, continuous stream of bluish smoke at different temperatures. Therefore, the smoke point of an oil is the specific temperature at which the oil releases smoke. But, the smoke is not necessarily a bad thing, which is why it’s considered a poor indicator of the quality and suitability of the oil for cooking – contrary to popular belief. Oxidative stability is an indicator of how quickly an oil will start releasing harmful chemicals under high temperatures, which is considered a better predictor of quality.
Olive Oil Cooking Properties
Now that we have laid out the basics, let’s take a closer look at the nutritional profile of olive oil and see if it has what it takes to be suitable for deep frying. To contextualize the data and to be able to compare, we’ll include several other cooking oils as well.
| Oil Type | Fat: MUFA % | Fat: PUFA % | Fat: SAT % | Oxidative stability (hrs)* | Antioxidants |
| Extra Virgin Olive Oil | 75 | 10 | 15 | 34 | 5972 |
| Virgin Olive Oil | 75 | 10 | 15 | 30 | 4949 |
| Olive Oil (refined) | 75 | 10 | 15 | 16 | 3281 |
| Sunflower Oil | 22 | 66 | 13 | 2.5 | 275 |
| Avocado Oil | 68 | 15 | 16 | 10 | 936 |
| Coconut Oil | 6 | 2 | 92 | 44 | 8 |
| Canola Oil | 63 | 32 | 8 | 11 | 327 |
Data from OliveWellnessInstitute.org
* higher oxidative stability means the oil is more resistant to oxidation and behaves better under high cooking temperatures.
Extra virgin olive oil is arguably the healthiest oil. It has an incredibly high antioxidant level and oxidative stability (very resistant to heat). On top of that, it has a relatively low percentage of PUFAs (double bond unsaturated fatty acids which are prone to oxidation).
But the thing is, extra virgin olive oil also comes with a high price tag. Sure, it’s good to have it as a salad dressing, but can households afford it for everyday cooking? The real question seems to be: “Should people splurge on extra virgin olive oil when deep frying?”
What Does Science Say?
Before we sum up everything and write our final verdict, let’s see what scientists have found in experimental studies.
In 2002, The European Journal of Lipid Science and Technology published a study that investigated the oxidative stability of virgin olive oil and other vegetable oils. The results showed that virgin olive oil has a high resistance to oxidative deterioration because of its triacylglycerol composition low in polyunsaturated fatty acids (PUFAs) and the high amount of phenolic antioxidants (mainly polyphenols and tocopherols). This confirms everything our explanations and initial observation that olive oil is a good candidate for deep frying.
Moreover, another study in the same journal that investigated the health benefits of heated cooking oils, concluded that virgin olive oil “has a remarkable thermal stability, but when a healthful effect is expected from the presence of phenolic compounds, heating has to be restricted as much as possible.” What this means is that virgin olive oil has the highest cooking stability when compared to other vegetable oils (sunflower, soybean, cottonseed oils, and a commercial blend specially produced for frying). However, if you want to fully enjoy all the health benefits of olive oil it is best to consume it unheated (as a dressing).
Even more good news comes from a study that looked at olive oil’s cooking stability under deep-frying conditions regardless of the commercial category chosen (extra virgin, virgin, or regular-refined olive oil). The results further gave support to the previous findings, concluding that olive oil is clearly resistant to deep-frying conditions.
Verdict: Can You Deep Fry With Olive Oil?
After reviewing what makes fried food unhealthy and what part oils play in that equation, we feel more confident making assumptions about the healthiness and suitability of oil under different conditions – such as deep-frying, baking, or using it cold (as a salad dressing). Hopefully, we helped you feel more confident about your cooking choices, too.
In short, our verdict is: yes, you can deep fry with olive oil!
In fact, it’s better to deep fry with olive oil, especially virgin or extra virgin olive oil, than with sunflower, avocado, coconut, soybean, or canola oil (some of the vegetable oils we compared with olive oil before).
However, knowing that you can deep fry with olive oil is not the same as making a decision to deep fry with olive oil. In the latter, you need to factor in other things such as affordability, taste, smell, and so on. But, if affordability is no issue and you want only the best, then you need to ask another question: What’s the healthiest oil for deep frying?”
In this article, we’ve concluded that olive oil is extremely healthy and suitable for deep frying, but is it the best? Let’s briefly discuss this before we conclude.
What Is the Healthiest Oil for Deep Frying?
Deep frying works by submerging the food completely in a very hot oil – one that’s usually at a temperature around 350–375°F (176–190°C).
If the temperature is too low, the oil will make the food too greasy. On the other hand, if the temperature is too hot, the oil might oxidize, releasing harmful chemicals and forming trans fat.
Therefore, to ensure that your food is cooked just right and is of good quality, you need to optimize the temperature and find a stable oil whose smoking point and oxidative stability are above your cooking temperature. Beyond this, you want an oil that has a high level of antioxidants and a low level of PUFAs. Which oils fit best within these conditions?
According to MedicalNewsToday and Healthline, olive oil and coconut oil are the two best choices for deep frying, both backing their claims with several studies.
Other healthy choices include avocado oil, canola oil, and peanut oil.
Conclusion
It has been demonstrated that olive oil is not only a good choice for deep frying but also the healthiest oil for cooking in general. This is backed not only by looking at the nutritional profile of olive oil (regardless of extraction and refinement methods) but also by studies that experimentally prove the benefits of using olive oil at high temperatures.
With this in mind, we believe that we can finally put the popular “olive oil is cancerogenic” myth behind us. If you want to make homemade french fries or donuts, olive oil is your friend, not your enemy.
However, whether you actually choose to use olive oil or not depends on several other factors such as affordability and taste. Because of this, we included a few other alternatives, so you can make a good decision.
That being said, deeply fried foods will still be an unhealthy choice when eaten frequently, so let them be an occasional guilty pleasure instead of an everyday meal choice.

 If for some reason you’re using K-Cups, you might as well use great K-Cups. While they are a scourge on the environment, and their inventor himself has


 Now you know everything about the best K-Cup coffees on the market, which will certainly improve your opinion of just what that Keurig’s machine can do. Still, the question remains – which one is the right choice for you? Let’s go over the main factors you should consider when choosing your new order of K-Cups.
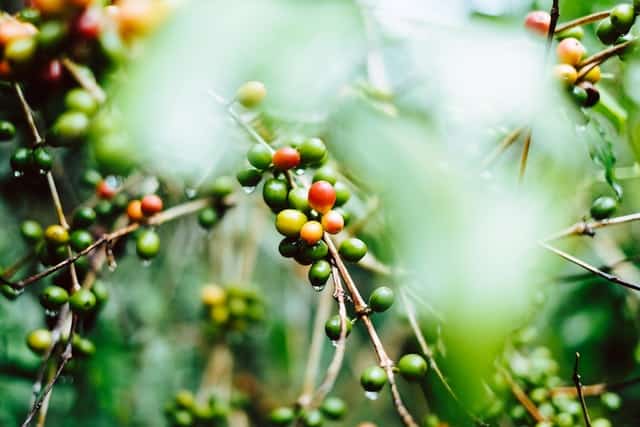

 Coffee is the staple drink of every morning routine. Well, nearly every morning routine – a 2018 study published by the National Coffee Association reported that
 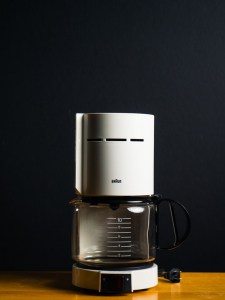 Let’s start off with the classics, and nothing is more contemporary Americana than drip coffee makers. Drip coffee makers can be found in homes, hotels, motels, offices, support groups… Their popularity can easily be attributed to their ease of use, consistent results, and ability to produce a big batch of coffee with minimal effort on your part.
 Espresso machines can bring the full coffee shop experience to your home. If you’re an avid espresso lover, you may find the effort and additional cost that come with an espresso machine well worth the cup of full-bodied, rich, tasty espresso brew.
 Pour-over coffee makers are a simple yet delicate way to produce a custom cup of coffee that’s per your taste. Pour-over coffee makers consist simply of a cup with holes on the bottom, which you can place over any mug or carafe to make as much coffee as you want.
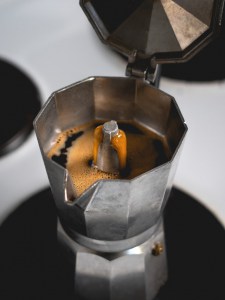 Moka pots are my go-to method when I want a rich, full-bodied cup of coffee that gets as close to an espresso as possible without actually using an espresso machine. Although it’s not as dark as an espresso, a Moka pot will give you a thick, deeply dark cup of delicious coffee that’s also made on the principle of using high-pressure to extract the coffee grounds.