Appliances Reviewed is reader-supported. When you buy through links on our site, we may earn an affiliate commission. As an Amazon Associate I earn from qualifying purchases.
As you descend into the deeper circles of coffee enthusiasm, you start picking up on things beyond the basic tag of coffee. Whether you’re ordering beans or ground blends online, or simply perusing the aisles of a specialty coffee shop, you’ve most likely come across the words Arabica or Robusta. This tells you that not all coffee is equal, and in fact – the coffee plant genus has several popular varieties and over 100 species worldwide.
This time around, we’ll focus on the two most popular and widely available types of coffee beans: Arabica and Robusta. These two types of beans have different flavor profiles, caffeine contents, and ultimately – prices – which may influence your decision next time you’re shopping for coffee. You may also come across some blends of these coffee types which are meant to offer you the taste of one species with a sweetened price thanks to the affordability of another species. But more on this later – let’s get to it!
The Two Most Common Types of Coffee Beans
Let’s look at the two most common types of coffee beans. Keep in mind that other than the species, the origin country of the bean also has an effect on the resulting flavor profile. The other 100 or so varieties of coffee are quite a bit rarer, so we’ll leave them for another occasion.
1. Coffea Arabica
Origins and production
Coffea Arabica is the most popular coffee bean on the market, and it accounts for nearly 60% of coffee production on a global scale. This species is likely to have been the first detected and cultivated coffea plant, with its first being documented in the 12th century and found in Yemen, the holy origin land of coffee. Today, Arabica plants are grown all over the world, and mainly in Latin America. Columbia produces exclusively Arabica beans, while Brazil is the biggest exporter of Arabica coffee globally.
Taste
Arabica is the most popular coffee bean because it hits the sweet spot between flavor, acidity, and caffeine content. The flavor profile of a specific Arabica bean will vary depending on the region it comes from and the variety. Still, it’s considered to be quite rich in taste with subtle notes that pop and result in a beautiful, full-bodied cup of coffee.
In general, Arabica beans have a milder, sweeter taste than the second most popular coffee bean, Robusta, and usually carry notes of fruit and berries. What fruits and berries accompany the flavor depends on the origin. For instance, Arabica beans from Sumatra oftentimes have hints of rose and dark chocolate. On the other hand, a lot of Arabica blends that come from Kenya have hints of orange blossom, butterscotch, and fig.
While Robusta beans are more bitter, Arabica beans have more of a pronounced acidity. This gives the coffee a somewhat wine-like dimension. Still, when you’re buying Arabica beans, look for a blend that’s not too acidic, as it can dominate the taste in a not-so-pleasant way.
Arabica is less bitter than Robusta because it has lower caffeine content. While Arabica beans contain about 0.8 – 1.4% of caffeine, the percentage doubles with Robusta beans, which contain 1.7- 4% of caffeine.
Arabica on the Market
As we’ve mentioned, Arabica beans are the world’s favorite coffee due to their flavor and quality. This also makes them more expensive than Robusta beans or Arabica-Robusta blends. Another reason that Arabica beans are pricier is that they’re much more sensitive and prone to disease than Robusta, so they take more care and produce a lower yield. This can mainly be attributed to the lower caffeine content in Arabica beans, as caffeine is a natural insect repellent.
Of course, within the Arabica world, there’s also a hierarchy of taste, quality, and price. For instance, the Hawaiian Kona coffee – a special Hawaiian Arabica strain – is one of the most desired and expensive types of bean on the market.
Drinking Arabica
We especially recommend using Arabica beans if you like your coffee black. While sometimes adding a splash of milk can add to the flavor (especially if it’s a dark roast), drinking this coffee black may help you fully appreciate its flavor palette.
2. Coffea Robusta (Coffea Canephora)
Origin and production
The second most popular subspecies of the coffee bean is Coffea robusta or just Robusta. This coffee bean accounts for about 40% of the global coffee market – so, as you’ve probably realized, Arabica and Robusta dominate the global coffee market. It’s also quite adequately named, as it’s robust and resilient to different conditions.
As we’ve mentioned, it has over twice the caffeine content of Arabica beans, which makes it a formidable foe to disease and insects. Because the Robusta crop produces a higher yield than Arabica and can persevere in less than ideal conditions, it’s also quite cheaper. Robusta beans have their origins in central and sub-Saharan Africa, and today they’re grown in the Eastern Hemisphere, mostly in Africa and Indonesia. Brazil and India produce both Arabica and Robusta beans.
Taste
As Robusta has twice the caffeine content of Arabica, it also has a more bitter taste. So while you’d find Arabica to have acidic overtones, Robusta is on the bitter side.
This bean is generally considered to be of lower quality than Arabica due to the harsher flavor profile. Overall, the taste of Robusta coffee is stronger, with grainy overtones, and has been characterized as having a bit of rubbery, burnt taste. As milder flavors are preferred in most coffee markets, Robusta is bumped further down the commodity scale. It’s only preferred in cultures that enjoy strong coffee. Most instant coffee and mass-produced, cheap, commercial beans are made of Robusta.
There are some exceptions, however. While you won’t be able to find high-quality Robusta beans in a regular market or convenience store, some specialty coffee shops offer exactly that. These are usually single-origin, craft coffees that offer tasty Robusta beans with overtones of rum and chocolate.
Robusta on the Market
As it’s much easier to grow, produces higher yields, and isn’t too popular for its taste – Robusta is much cheaper than Arabica.
Still, there’s a way to kind of get the best of both worlds and strike the right balance between cost and taste. You can easily find blends that are about 70% Arabica and 30% Robusta which carry the overall taste of Arabica with some hints of Robusta, and cost less. This especially works with dark roasts. But we did say kind of, and that’s because if you’re finicky about flavor, you will notice the difference.
Drinking Robusta
If you decide to go for Robusta or a Robusta-Arabica blend, the best way to cut the bitterness is to add some sugar and frothed milk or cream. A good, single-origin Robusta bean also goes great for espresso and espresso-based beverages.
Also, if you’re just looking for a quick caffeine fix to keep you up as you head to work with a bit of hangover, Robusta will do just fine. It will give you the kick you need to really wake up.
Honorable Mentions: Liberica and Excelsa
Liberica and Excelsa coffee beans are quite rare and account for a small part of the global coffee production. Still, their flavor profiles are unique, and should you incidentally come across either of them, you’d do well to give them a try.
Liberica
Liberica coffee beans were originally produced on a large scale in the Philippines during a coffee “plague” called coffee rust that drastically damaged the Arabica population during the 19th century. The Philippines stepped out by mass-producing this tasty coffee bean strain. However, due to economic sanctions by the US (basically a neo-imperialist punishment to the Philippines for declaring independence from the US), this type of coffee bean quickly passed its heyday.
In any case, Liberica beans have an excellently unique flavor, with woody notes. It also has hints of flowers and fruits, with a smoky aroma.
Excelsa
Excelsa is actually a subspecies of the Liberica family, but it has a unique flavor that grants it a unique place in the world of coffee. These beans are generally grown in Southeast Asia and take up only 7% of global coffee production. While it’s rare to get purely Excelsa beans, they’re found in blends for an elevated flavor.
The taste of Excelsa can be characterized as being tarty and fruity.
A Few Words Before You Go…
Now you know what to expect from the different types of coffee beans available on the market. Keep in mind that to get the best tasting cup of coffee, you need freshly ground beans.
Appliances Reviewed is reader-supported. When you buy through links on our site, we may earn an affiliate commission. As an Amazon Associate I earn from qualifying purchases.
In this day and age, when more and more people are looking for healthier cooking alternatives, the air fryer has become a popular cooking appliance that emulates the results of deep-frying using just hot air and little to no oil.
The best thing about it is that everything can be air-fried – from prepackaged chicken wings and handmade French fries to roasted veggies and fresh-baked cookies.
There is, however, one thing you should do before cooking, and that’s preheating your air
fryer and today we’re here to help you learn how. But before we get into that, let’s first start with some air fryer basics.
The Process of Using an Air Fryer
Air fryers have a heating mechanism and a fan in the upper part of the inside. When you turn it on, heated air flows down and around the food in the fryer-style container. The quick hot air circulation allows the food to get crispy, as it’s similar to deep-frying but without the oil. The fact that you can get this result without all the grease makes the air fryer much healthier.
You can, if you wish to, add just a tiny bit of oil, like a few drops or a spoonful, to make the food even crispier.
Step-By-Step Guide on Using Your Air Fryer
If you’ve already purchased an air fryer, or you are on your way to do so, we believe our short and easy step-by-step explanation of how to operate it can give you more confidence in cooking with this appliance.
1. Fill the Basket With Food
There are different sizes of air fryers. The size determines the amount of food you can prepare and how many dishes you can make simultaneously. Open the basket, fill it with food, but don’t overfill it.
Circulating hot air around the food is how air fryers function. The circulation can be limited if you pack food too tightly, steaming the meal instead of crisping it properly, and the end result is that it will be cooked unevenly.
To be sure you don’t overfill the air fryer, don’t pack in all the food you can fit inside it. After you fill the basket with food, add 1 or 2 tablespoons of oil if you want. Although oil is not essential, it will aid in the crisping of the dish.
2. Decide on a Time and Temperature
Depending on the meal you’re preparing, air fryer baking time might range from 5 to 25 minutes.
3. Allow the Meal to Cook
To ensure the food crisps up evenly, you may need to rotate it halfway through the cooking process.
4. Keep It Clean
When you’re done cooking, don’t forget to clean your air fryer.
Why Do You Want to Preheat Your Air Fryer?
We’ll explore why with a simple example.
Let’s compare cooking with an air fryer with cooking on your kitchen stove or furnace.
For instance, you want to make fish or vegetables. When cooking on your stove, you will use a pan; if you use your furnace, you’ll use a pot.
With the first method, you don’t put your meat in a cold pan – you preheat the pan, make it sizzling hot, put some oil in it, and then throw in your meat or vegetables. Or, if you’re baking a delicious vegan casserole, you preheat the oven before you put the food in. That’s the way of cooking, and that’s how air fryers work, too!
The only time you shouldn’t preheat your air fryer is when warming up food leftovers or when baking bread that you can also bake in the oven. You place them in the oven and then check periodically if the bread is done baking or if the leftovers are heated.
But with most food, for instance, fries or chicken, you always preheat your air fryer. Luckily, the preheating only takes a couple of minutes, so it doesn’t cause any delays to your lunchtime preparation.
Types of Air Fryers
Even though there are various models of air fryers on the market, they can be divided into two main types: basket air fryers and convection oven air fryers.
A convection oven air fryer is a turbo oven with an installed air fryer. It makes air frying in your range a breeze with convection fans swiftly circulating heated air over the food, giving it a fine crisp.
A basket-type air fryer is a type that does exactly what it says – it cooks meals in a basket. The basket features a handle for convenient tossing/flipping of the dish at one or more intervals while cooking.
Air fryers can be further divided into digital, analog, and classic, and each of these is preheated differently. Let’s see how.
How to Preheat Your Air Fryer
You might have a robust digital air fryer, and if you put it to the highest setting, it will reach the temperature in two to three minutes. It’s fast and quick, way faster than a regular oven.
If you have the classic air fryer, that one is a little less powerful, but still, it will reach the desired temperature in a couple of minutes, and you’re ready to go.
Digital Air Fryer
Choose a temperature, and hit go. For example, say you want to preheat your air fryer to 50 degrees Celsius (120 degrees Fahrenheit). You only need to set the temperature and the air fryer will do its job. You’ll hear a beeping sound signaling that the appliance is preheated, and you’re ready to start cooking.
Analog Air Fryer
An analog air fryer features two LEDs – one is a temperature indicator and the other indicates that the power is on. You also have a knob for the timer. You can set the temperature and then turn the knob. Usually, this type of air fryer is really quiet, and although the tech is older, it works great.
Initially, the temperature indicator LED is green, and when the air fryer reaches the desired temperature, the green LED indicator will turn off, alerting you that it’s preheated.
Classic Air Fryer
The classic air fryer is the easiest to use. It will signalize when it’s preheated with a bell.
What Happens if I Don’t Preheat the Air Fryer?
If you don’t preheat your air fryer, a variety of problems might happen:
Cooking time will increase.
The food won’t get as crispy.
If you’re cooking in stages, the first batch will take longer to cook, and if you’re not careful, the following batches will burn.
The meal may be overcooked or undercooked.
Every air fryer has a unique wattage that warms up at a different rate.
Follow the instructions in the recipe; if you don’t, your dish might not turn out as planned.
Frequently Asked Questions
Q: Do I take the basket out of the air fryer while preheating it?
A: You should keep the basket in. Many models won’t even turn on if the basket isn’t in place.
Q: Can I use baking paper to preheat my air fryer?
A: No! Food is used to weigh down the baking paper, or they will burn while preheating.
Summary
Step-by-step guide on using your air fryer
Fill the Basket With Food
Decide on a Time and Temperature
Allow the Meal to Cook
Keep It Clean
Conclusion
Due to their convenience, speed, and method of cooking, air fryers are here to stay. In terms of preheating – think of this appliance like a stove that’s quicker and you can’t get wrong!
Most air fryers have their unique method of alerting us when it has reached the desired temperature.
Please be aware that you can also buy an air fryer that doesn’t come with this feature, so shop wisely!
Already have an air fryer? Share your favorite recipe with us! Looking to buy an air fryer? What type looks the most appealing to you?
Appliances Reviewed is reader-supported. When you buy through links on our site, we may earn an affiliate commission. As an Amazon Associate I earn from qualifying purchases.
You know the saying “you don’t want to know how the sausage is made?” Well, if you’re interested in making your own sausages, then the exact opposite is true. Making your own sausages can be enjoyable and gratifying, and choosing which ingredients to use is an important first step. It may surprise you to find that one of the most crucial ingredients to consider when making sausages is the casing. But what is sausage casing, and why is it so important?
What Is Sausage Casing?
Whereas the filler is the blend of meat and spices inside, the sausage casing, or sausage skin, is the casing that holds the inner filling of a sausage.
Many people believe that the key to a good sausage is the casing, and there are a wide variety of options on the market today. These can be broken down into three primary categories: natural sausage casings, artificial sausage casings, and vegetarian sausage casings.
Natural casings are made from animal skins or intestines and come in a myriad of options. Although artificial casings can also be made from animal products, they are processed differently and come in both edible and inedible varieties. Finally, vegetarian options have hit the market at a time when interest in plant-based diets is increasing every day.
Let’s explore the different types of casings available, their traditional uses, and their pros and cons.
A Brief History of the Sausage
For centuries, the most common sausage casings have come from the intestines of animals. The earliest known example of humans eating animal intestines stuffed with meat – in other words, a sausage – likely dates back nearly 4,000 years, when the stomach of a goat was used by the Sumerians to hold cooked meat.
There are countless types of sausages from almost every culture and culinary tradition. In addition to being delicious, sausages use pieces of the animal that would otherwise go to waste. They are often smoked or preserved with salt, which means that they can last a long time without spoiling. For these reasons and more, sausages are one of the most enduring culinary staples around the world.
Natural Sausage Casings
Today, most sausage makers use a layer of the small intestine called the submucosa as their preferred sausage casing. The submucosa consists of collagen and, when used for making sausage casings, it’s referred to as a natural sausage casing.
Natural casings are the most traditional type of sausage casings and are still among the most popular. They vary widely in length and size, and they’re more porous than artificial casings, which allows for a richer, more intense flavor when smoked.
Natural casings enhance the flavors of the filling without adding too much flavor of their own, and many people prefer their texture to other kinds of casings. Their flexibility makes them easy to stuff, but they’re also very durable, meaning they won’t fall apart during smoking or other stages of processing.
Most natural casings come from pigs, but sheep, cow, and even horse intestines can be used.
Let’s explore the pros and cons of a few popular natural casings.
Sheep Casings
Sheep intestines are naturally smaller than pigs or horses and thus are generally preferred for smaller sausages, such as breakfast sausages or hot dogs. They’re very tender, and an all-around delicious option for a sausage casing. Their small size also makes them a good option for beginner sausage makers.
Pig Casings
Pig casings are the most common and, arguably, most popular option for natural casings.
They are traditionally used for making classic link sausages, such as Italian sausages and bratwursts, bologna, and smoked Polish sausages.
Beef Casings
Beef casings come in three sizes, each one corresponding to different parts of the cow intestine: beef rounds, beef bung caps, and beef middles. Each can be used for different types of sausages:
Beef rounds are low in fat and often used for blood sausages, a type of sausage made from animal blood and filler.
Beef middles are slightly thicker and thus are generally preferred for salami and other dry sausages.
Beef bung caps are made from the widest part of the cow’s intestine and are preferred for larger sausages such as bologna and capicola.
To prepare a natural casing, the submucosa has to be removed during slaughter, scraped, and flushed with water. While in the past this cleaning process needed to be carefully done by hand, today there are fortunately machines that do this. The cleaned, processed intestines are generally sold at butcher shops and in grocery stores, and a wide variety of gourmet options can also be bought online. Although instructions will vary, most natural casings will need to be soaked in cold water or brine before being filled.
Artificial Sausage Casings
These days, most commercially-produced sausages are made with artificial sausage casings. Artificial casings can be made from a wide variety of materials. They are generally stronger, less expensive, and more uniform than natural casings. They are also significantly longer than natural casings: collagen casings. For all of these reasons, artificial casings can be easier to work with, particularly for beginners.
Newer artificial casings can be made from cellulose, animal bones, fish, and even plastic, although these are not edible. Let’s take a look at a few of the different types of artificial sausage casings available on the market today.
Collagen Casings
Collagen is a natural substance found in the connective tissue of animals and is the same material found in the intestines used for natural sausage casings. However, artificial collagen casings are usually made from processed cow or pig hides. They’re a relatively new option – they’ve only been in use for the past sixty years – and are generally less expensive than natural casings.
They can be more ‘user-friendly’, because they are uniform in size and can be bought in packages and used without any extra processing or cleaning. All of these factors may make them preferable over natural casings for many people making homemade sausages.
They are also becoming the preferred option for commercial manufacturing because they can be standardized and produced for a much lower cost.
However, their texture is less ‘snappy’ than natural casings, which can come as a disappointment to anyone looking for a more traditional sausage. Further, different types of artificial casings will have different flavors, which may not work with every type of filling. It’s worth taking the time to do the research and see which type of casing will work best for your purposes.
Cellulose Casings
Cellulose casings are made from viscose, a material made by soaking wood pulp or cottonseed fibers. They’re not edible and should be peeled off after the sausage has been cooked.
Cellulose casings are good for making hot dogs, chorizo, and smoked sausages. This is because they’re permeable, which allows the smoky flavors to fully sink in during the smoking process.
Fibrous Casings
Created in the 1930s, fibrous sausage casings are inedible. They’re made from a mixture of viscose and filament paper and are excellent for larger sausages that need to be held together by firm casings. They are one of the strongest casing options and can allow for a uniform look that isn’t possible with natural casings. Just don’t eat them!
Plastic Casings
Plastic casings are, for obvious reasons, also inedible. They’re generally made from layered nylon and, like fibrous casings, offer durability and give your sausages a uniform look. They are particularly popular for commercial sausage production but can be used for making sausages at home, too.
Although there are some smokeable options on the market, most plastic casings are impermeable and thus generally not a good option for making smoked sausages.
Vegetarian Sausage Casings
Studies have shown that cutting meat and dairy products out of your life is the most impactful way to reduce your environmental impact. With many people concerned about their carbon footprint, it’s not surprising that the popularity of plant-based and vegan meat substitutes is skyrocketing.
Sausage is a classic meat-lovers favorite, and fortunately for vegetarians, there are now a variety of meatless and even vegan sausage casings on the market. In addition to being made from plant-based ingredients, they are a much healthier alternative to natural or artificial sausage casings.
All vegetarian casings are edible and – unlike many varieties of natural or artificial casings – they can be made halal and kosher-friendly. The primary ingredients are vegetable glycerin, sugar, and natural starches, and non-GMO options are available.
Vegetarian sausage casings can be homemade or purchased in specialty stores, although you’re unlikely to find them at your local butcher. Unlike natural casings, which are determined by the animal’s unique anatomy, vegetarian sausage casings can be made to any desired length or width. Instructions will vary based on the brand, but all vegetarian sausage casings can be stuffed with whatever filling you desire.
The Big Picture
If all of these options feel overwhelming, don’t worry! Whether you’re a beginner or an expert, making your own sausages should be a fun learning experience.
Natural sausage casings are made from the intestines of animals, usually sheep, pigs, and cows. These range in size, texture, and width according to the anatomy of the animal they came from. They’re the most traditional option for sausage making, with the technique dating back thousands of years. Some of the pros of natural casings include a superior ‘snap’ texture when bitten, and a porousness that allows for delicious flavor when making smoked sausages.
On the other hand, natural casings can be more difficult to work with, especially for beginners. They are not uniform in size or shape, and thus are often not preferred for commercial manufacturing, either.
There are a wide variety of artificial sausage casings. These include edible options, such as collagen and cellulose casings, and inedible, firmer options, such as plastic and fibrous casings. While the specificities of artificial casings vary based on their type, in general, they are more standardized in size and shape and are easier to work with for beginners.
On the negative side, they are less traditional than natural casings, and many say that they lack the signature, delicious texture of a natural sausage casing.
And speaking of nontraditional, the newest and perhaps most surprising option available on the market is vegetarian sausage casings. These are made from plant-based glycerin and sugars and can accommodate dietary restrictions including kosher and halal lifestyles.
Now that you know how the sausage gets made, it’s time to go out and find the best casing for your sausage-making needs.
Appliances Reviewed is reader-supported. When you buy through links on our site, we may earn an affiliate commission. As an Amazon Associate I earn from qualifying purchases.
Coffee is the staple drink of every morning routine. Well, nearly every morning routine – a 2018 study published by the National Coffee Association reported that 64% of Americans drink coffee, and 79% of those coffee drinkers brew coffee at home. And this year – 2020 – is pretty much the year of staying at home (because you know, coronavirus), so if you weren’t brewing coffee in the comfort of your kitchen before, you’re probably doing it now.
There are quite a few perks of brewing your own coffee. At the very least, it helps save money. But coffee connoisseurs say that the trend with coffee these days is all about taste. It’s less about getting a kick out of your bed in the morning, and more about enjoying the drink. And with so many affordable, readily available coffee makers out there, drinking instant coffee is slowly becoming a thing of the past. Not to mention that one of the biggest instant coffee producers in the world – Nescafé – is owned by Nestle, a company that has a long, long list of transgressions against nature and humanity.
In any case, we’re here to introduce you to the four most popular types of coffee makers that can help you get a beautiful cup of java in the comfort of your home. We’ll go over the pros and cons of each coffee maker so that you can decide which one is the best choice for you depending on your lifestyle, budget, and taste.
1. Drip Coffee Makers
Let’s start off with the classics, and nothing is more contemporary Americana than drip coffee makers. Drip coffee makers can be found in homes, hotels, motels, offices, support groups… Their popularity can easily be attributed to their ease of use, consistent results, and ability to produce a big batch of coffee with minimal effort on your part.
Drip coffee makers are also quite versatile in terms of quantity – you can get one that brews anything between one and fourteen cups of coffee.
How does it work?
Drip coffee makers work using electricity. You plug the machine in, fill up the filter tray with ground coffee, fill up the water pitcher with water, and set the carafe on the heating plate. All that’s left for you to do is to press the start button and wait for your coffee to brew. A shower head at the top drips the hot water into the coffee grounds, allowing it to extract them before it passes into the carafe ready to drink.
Pros:
A drip coffee maker is affordable, easy to use, and produces consistent results.
Cons:
There’s not a lot of variety in taste as far as the brewing process goes, but you can get some variety switching up the beans you use.
Another drawback is that if the carafe sits on the heating plate for too long, the coffee may start tasting a bit burnt.
We recommend it for:
Families, homes, offices, and entertaining. Instead of sitting at the stovetop, babysitting your brew while your guests wait in the living room, you can let the machine do it for you.
2. Espresso Machines
Espresso machines can bring the full coffee shop experience to your home. If you’re an avid espresso lover, you may find the effort and additional cost that come with an espresso machine well worth the cup of full-bodied, rich, tasty espresso brew.
An espresso machine offers a lot of versatility, as you can recreate coffee shop specials like Americano, macchiato, cortado, and so on. If your espresso machine doesn’t come with a frothing wand, you can get your own milk frother to get that beautiful cream which is the signature ingredient in espresso-based beverages like cappuccino.
Espresso is usually made with dark roasts and fine grinds, which results in a concentrated, rich cup of coffee.
How does it work?
Espresso machines are electric-powered. There are different types you can choose from, which vary the level of labor that will be necessary on your part. You can decide between manual, semi-automatic, automatic, to super-automatic. The way they work is by heating water to a high temperature and allowing it to pass through a metal filter cup filled with pressed coffee grounds at quite a high pressure.
Pros:
Espresso machines can help you get consistently delicious, rich cups of espresso.
They also allow a lot of versatility to recreate coffee shop specials.
Plus, a lot of them come with a frothing wand.
Cons:
Espresso machines are usually quite a bit pricier than other coffee makers.
Other drawbacks of manual espresso machines are that they’re quite labor-intensive and require some technical knowledge.
We recommend it for:
Espresso enthusiasts and those who appreciate bold, rich-tasting coffee.
3. Pour-Over Coffee Makers
Pour-over coffee makers are a simple yet delicate way to produce a custom cup of coffee that’s per your taste. Pour-over coffee makers consist simply of a cup with holes on the bottom, which you can place over any mug or carafe to make as much coffee as you want.
Taste-wise, pour-over coffee makers generally produce a delicious, full-bodied cup of java.
How does it work?
Pour-over coffee makers generally consist of a cup with a base that’s meant to go on top of mugs or carafes, and holes at the bottom that allow the coffee to pass through to the container below. The cup-shaped coffee maker has a cone-shaped funnel in which you place a paper filter and fill it up with medium ground coffee. Then, you slowly add water to the pour-over coffee maker in several phases. The first pour is meant to allow the coffee grounds to bloom, i.e. to activate them and extract the initial flavor. The following gentle pours are meant to finish the coffee grounds’ brewing process.
Pros:
Pour-over coffee makers are generally simple to use – although it’s important to take note of the series of pours to get the optimal taste of the coffee. They’re also quite compact and thus easy to travel with.
These coffee makers are also quite affordable.
Plus, they offer versatility when it comes to the amount of coffee you want to make.
Cons:
Making pour-over coffee is a process. It takes a hands-on approach on your part, and may require more time than some other coffee makers to brew the coffee.
We recommend it for:
Pour-over coffee enthusiasts and those who need a single cup of coffee at a time.
4. Moka Pots
Moka pots are my go-to method when I want a rich, full-bodied cup of coffee that gets as close to an espresso as possible without actually using an espresso machine. Although it’s not as dark as an espresso, a Moka pot will give you a thick, deeply dark cup of delicious coffee that’s also made on the principle of using high-pressure to extract the coffee grounds.
Moka pots are one of the most affordable coffee makers you can get your hands on, and you can also use them to make espresso-based drinks like lattes and macchiatos.
Depending on the capacity of the Moka pot you buy, you’ll be able to create anywhere from one cup to twelve cups of coffee.
How does it work?
Moka pots work with stovetops or gas burners. They contain three chambers: the bottom chamber is filled with water, and the middle chamber (a metal filter) is filled with coffee grounds. As the water in the bottom chamber heats up, it generates steam. The pressure from the steam causes the hot water in the bottom chamber to travel up through the middle chamber where the coffee is, and extract it. Finally, it travels through a tube into the top chamber, where you get your lovely, piping hot, finished brew.
Pros:
Moka pots are quite eco-friendly – they don’t create any waste other than used coffee grounds (which you can always find uses for!).
Overall, Moka pots produce a consistently good cup of coffee and they’re a great, much cheaper alternative to espresso makers.
Lastly, they work pretty fast – so you won’t have to wait too long for your coffee to be ready.
Cons:
A Moka pot should be cleaned regularly, which can be a bit of a hassle considering it has three parts. To be fair, you should regularly clean any coffee maker you decide to get (or already own).
We recommend it for:
Anyone looking for an espresso alternative or a richly deep cup of coffee.
We also highly recommend it to campers – with a Moka pot, you’ll have coffee anywhere you go.
A Few Words Before You Go…
Hopefully, you enjoyed our guide to the most popular coffee makers you can get for your home. Depending on your taste, budget, or how much effort you’re willing to put it, you can decide which one’s right for you. And don’t forget – every perfect cup of coffee starts with freshly ground beans!
Appliances Reviewed is reader-supported. When you buy through links on our site, we may earn an affiliate commission. As an Amazon Associate I earn from qualifying purchases.
We all love coffee, and we all hate waste. And with the mounting hills of garbage ending up in oceans, we’re all becoming increasingly conscious of avoiding adding onto those vile piles, the products of neverending consumerism. So even though coffee beans break down into the soil and even add to its structure, throwing them into a plastic bag and then in the trash will slow down this natural process, turning coffee – the gift that keeps on giving – into an accomplice against nature.
Luckily, there’s so much you can do with old coffee beans! Whether we’re talking about stale beans that you discovered in the back of a cupboard, or used ground beans that stay behind after you’ve drunk your cup of java, there’re lots of ways you can repurpose them. From composting them to give the plants in your garden a boost, all the way to turning them into natural beauty products, coffee can do it all.
Without further ado, let’s look at 6 smart ways in which you can reuse coffee grounds.
There are many useful ways to reuse old coffee beans
1. Use Coffee Grounds To Fertilize Your Garden
If you have a garden – even if it’s a little nook of potted plants on your balcony – you can use coffee grounds to fertilize it. The soil in gardens almost always needs a little help. Either it doesn’t contain enough essential nutrients for the growth and wellbeing of the plants, or those nutrients get absorbed from the soil as the plants grow.
Old coffee beans have some wonderful properties that make them a beautiful addition to the soil. They contain a good deal of nitrogen, as well as much-needed amounts of potassium, magnesium, copper, and even phosphorus. Some coffee beans can also help add calcium and iron.
There are some flowers, like roses, hydrangeas, and camellias which simply love coffee! It helps them flourish and satisfies their need for nitrogen. Fruits such as blueberries and cranberries also benefit from the nutrients that coffee grounds add to the soil.
To fertilize your garden with used coffee beans, you can simply sprinkle them on top of the soil around your plants. Alternatively, you can bury them about 6-8 inches into the soil near the plants.
Keep in mind that it’s best to use used coffee grounds rather than stale coffee beans for fertilization. This is because used coffee grounds lose their acidity in the brewing process, and end up with practically neutral pH value, which is ideal for most gardens and plants.
2. Add Old Coffee To Your Compost
Both coffee grounds and stale coffee beans make an excellent addition to your compost. If you don’t already compost, composting is a great, natural way to add essential nutrients to your plants. This is done by composting organic food scraps, which you can also combine with stuff like leaves, biodegradable paper, branches, cut grass, garden weeds, and so on. As the organic matter composts, it creates humus: a dark, nutrient-rich, soil-like material.
Adding humus to the soil not only increases its nutrient content but also helps it retain more of the nutrients and more water. It’s a party for your plants!
In any case, coffee has time and again proven to be an excellent addition to any compost pile. To begin with, the coffee’s nutrients and their properties allow them to additionally extract more of the benefits of the other organic matter in the compost pile, so compost that contains coffee is richer in nutrients than compost without coffee, with only kitchen waste.
Another wonderful benefit of adding coffee beans or grounds to compost is that it reduces the greenhouse gas emissions of the compost while helping it achieve the highest nutrient quality. Good for your plants, good for the environment!
You can add coffee grounds to your kitchen waste compost, or you can create a compost pile by layering ⅓ leaves, ⅓ grass clippings (fresh, of course!), and ⅓ used coffee grounds.
3. Get Rid of Unwanted Bugs and Gastropods
Some bugs, like bees and bumblebees, are a very much welcome – in fact desired – presence in your garden. They are incredible pollinators, helping your garden grow and your plants flourish.
However, there are bugs and gastropods (snails and slugs) that will only do harm to the plants, i.e. eat them. To keep these little guys away from your flowers and plants, just sprinkle the coffee grounds around the flower beds. Coffee grounds are an excellent insect repellent, as the caffeine and diterpenes found in coffee are somewhat toxic to bugs. Snails and slugs hate to come into contact with coffee, as well.
But it’s not just the plants that will get a break from pests thanks to coffee. Coffee is also a great way to deter that enemy to all mankind, ruiner of good sleep, punisher of the sweet-blooded, the dreaded mosquito. Plus, it repels fruit flies and beetles, too! You can just put some used coffee grounds in bowls around your balcony, garden, or sitting area to keep pests far away.
4. DIY Body Scrub from Coffee Grounds
Why waste money on questionable beauty products (both in terms of ingredients and ethics), when you can make your own body scrub using coffee grounds? You can use coffee grounds to exfoliate your body, getting rid of dead skin and rejuvenating your epithelial cells.
Coffee – both in the form of old, stale beans and used coffee grounds – has a wonderful effect on the skin. Not only does its texture help renew the surface of skin cells and get rid of dirt, but it also has antioxidant properties due to its caffeine content. Antioxidants are very healthy for the skin and can help protect it from exposure to the sun (this is no way substitutes SPF though). Coffee also increases blood flow, which keeps the skin looking fresh and young.
There are several ways you can use coffee beans to exfoliate. If you’re lazy, or just can’t be bothered, simply mix the coffee grounds with some water or coconut oil, and then scrub the paste all over your clean body. Rinse. Feel good.
If you’re not lazy and like indulging in spa-treatment-grade-self-care, you can take the DIY coffee body scrub a step further.
For high-grade pampering, combine equal parts (usually about half a cup) used coffee grounds (or ground stale beans), brown sugar, and coconut oil. You can add a teaspoon of vanilla extract for good measure – it really adds to the scent and feel. Mix everything well together, and rub the paste into your pre-washed body. Allow it to sit for about five minutes, and rinse it off. Enjoy feeling silky smooth and smelling like a dessert.
You can also freestyle and mix coffee beans with honey (for lip exfoliation), almond oil, Greek yogurt, cinnamon, and whatever you think tastes and smells good – just make sure that it’s also great for your skin.
Just remember one thing: avoid using this DIY coffee scrub on your face. The skin on your face is a lot more sensitive than the skin on your body and you risk being too rough on it.
5. DIY Anti-Cellulite Treatment with Coffee
No matter how much we take care of ourselves, it’s difficult to skip cellulite altogether, especially as we grow older. The vast majority of adult women have at least some amount of cellulite on their bodies, and although it’s completely natural, not everyone appreciates its presence.
So, to reduce the appearance of cellulite on your body you can also use a DIY coffee-based treatment. As caffeine stimulates blood flow, it will encourage blood circulation in the affected areas, reducing the appearance of cellulite. Plus, the antioxidants in the caffeine will encourage more collagen production, causing your skin to look younger and smoother.
Simply take used coffee grounds or grind stale coffee beans and mix them with water or coconut oil. If you don’t have coconut oil, you can use almost any other oil – we generally say coconut because it has the most benefits for the skin. Once you’ve mixed those two, scrub on the affected area for about 10 minutes. Repeat this twice a week to see long-term results. Keep in mind that nothing can completely get rid of cellulite, bit scrubs like this one can decrease its visibility and severity.
6. Scrub Your Pots and Pans
Trying to get rid of stubborn food residue from cooking? You can scrape your pots and pans clean from burnt eggs, or any sort of caked-on food using coffee grounds. The texture of coffee grounds helps clean kitchen utensils thoroughly.
Simply pour some grounds into the utensil, and scrub it with a sponge or a steel scrubber. Just make sure that you’re not scrubbing a non-stick pan, as this method can permanently damage it.
Appliances Reviewed is reader-supported. When you buy through links on our site, we may earn an affiliate commission. As an Amazon Associate I earn from qualifying purchases.
Coffee is all about taste. Sure, it’s the world’s go-to beverage for a morning pick-me-up, thanks to its stimulating caffeine content, but most of us don’t drink coffee just to get a kick out of bed. We drink coffee because of its unique, delicious flavor.
However, coffee beans don’t exactly come out of the ground with that signature taste we all know and love. The key to bringing out that characteristic, rich flavor of coffee is roasting.
In any case, there’s no single type of coffee roast. Whether it’s in a specialty coffee shop or just the local market, you’ve noticed that there’s a variety of coffee roasts, ranging from light to dark, and each of them has a unique flavor. To help you decide what type of roast you’re into, let’s take a look at the different types of coffee roasts, as well as how roasting changes the taste of the green coffee beans.
What’s Coffee Roasting?
Roasting green coffee beans triggers a chemical reaction that changes the taste of the coffee, turning it into a consumable product. While unroasted green beans have a similar makeup to roasted coffee – like the amount of caffeine, protein, sugar, and acid – they lack the beautiful taste that roasted coffee has been giving us since roasting became a thing in 15th-century Persia and the Ottoman Empire.
Several chemical reactions occur when green beans are roasted. One of them is the Maillard reaction – a chemical reaction between amino acids and reducing sugars – which is also responsible for the beautifully popping flavors and colors of seared steaks, caramel, toasted bread, marshmallows, cookies, chocolate, and even beer!
Guatemalan green coffee beans in their natural habitat
The different types of coffee roasting are a result of how long and at what temperature coffee beans are roasted. In general, beans are roasted by quickly increasing their internal temperature to high degrees, and then being quickly cooled to end the roasting process. Unlike green beans, roasted beans have that scent that, to us, is coffee, and are crunchy, since all the moisture has been removed.
For the most flavorful cup of coffee, you’ll want to use freshly roasted and ground beans. You can always ground your beans yourself by getting a great little manual coffee grinder for your home.
The Different Types of Coffee Roasts
Let’s take a look at the different types of coffee roasts, what temperature they require, how they taste, and what some popular roast names are in each category.
The different types of roast: light, medium, medium-dark, and dark.
Light Roasts
The first step on the coffee-roasting ladder are light roasts. Light roasts are brightly colored, have the highest level of acidity, and in general retain most of the coffee’s original features.
Light roasts are achieved when the bean is pulled out from the heat after the first crack. This usually means that lightly roasted beans reach an internal temperature between 356°F and 401°F.
Although people usually think the darker the bean the higher the caffeine content, green beans and therefore light roasts have the highest caffeine content, as the caffeine content decreases with continued roasting and higher temperatures.
Light roasts have a light brown color and don’t have any oil on the bodies of the beans, as they haven’t been roasted long enough for the oils to seep out.
Light roasts have the taste of a toasted grain, and have a slightly pronounced acidity. They also have a more fruity scent, which makes the origin of the coffee bean more easily detectable for the coffee connoisseur. Although you can use any roast for any coffee brewing method, coffeeshops usually prefer using light roasts for milder coffee types, such as pour-over coffee and drip brews.
Some popular light roasts are Cinnamon, New England Roast, Light City and Half City.
Medium Roasts
Medium roasts are apparently the favorite of people in the United States, which is why they’re sometimes referred to as the American roast (although George Carlin had a different take on an American roast, amirite?). Overall, medium roasts strike a delicious balance between body and acidity.
Medium roasts are roasted longer than light roasts, and thus reach a higher internal temperature which is somewhere between 410°F and 428°F. Medium roasted beans usually reach this temperature after the first crack, and right before the beginning of the second crack.
Medium roasted beans have less caffeine than light roasts, but more caffeine that medium-dark and dark roasts.
Medium roasted coffee has a brown (sometimes specified as medium-brown) color, and no oil on the surface of the bean. In terms of taste, medium roasts have a stronger and sweeter taste than light roasts, but they also have less of that grainy scent. Overall, the aroma, flavor, and acidity of light roasts are quite beautifully balanced, which is probably why medium roasts are a popular favorite.
Some popular roasts in the medium category are American roast, Breakfast Roast, City Roast, and Regular Roast.
Medium-Dark Roasts
Medium-dark roasted beans are dark brown, with finally some oil beginning to show on the surface. This is because they’re roasted just long enough to get the essential oils moving, bolden the flavor, and activate a whole new host of seductive scents that tickle your sensations. Medium-dark and dark roasts have a richer taste and bolder bodies.
Medium-dark roasts generally reach an inner temperature of about 437-450°F. This happens around the beginning or middle of the second crack. The longer, hotter process allows for the taste and aroma of roasting to become more pronounced.
Medium-dark roasts have a rich, almost spicy, full-bodied taste – certainly heavier than that of light and medium roasts – with aromas and flavors that are fully unleashed. In this process, the acidity in the flavor virtually disappears. Rather, medium-dark roasts have a unique bittersweet aftertaste.
Keep in mind that while light and medium roasts have more pronounced acidity, medium-dark and dark roasts have a more pronounced bitterness. So next time you’re at a coffee tasting (perhaps in the coziness of your kitchen), pay attention to this difference and see which one tickles your fancy.
Some popular medium-roasts you may have come across are Full City, Vienna Roast (which borders on a dark roast), and After Dinner Roast.
Dark Roasts
Darkly roasted coffee beans have the darkest color, which can range from dark brown, like the color of dark chocolate, to almost black. They have quite a bit of oil on the surface, which gives the beans a lovely sheen. Dark roasts offer a rich, full-bodied, smokey, and almost burnt taste which is a result of the roasting process, so the original taste of the green coffee bean is pretty much gone at this point.
To create a dark roast, the beans need to reach the highest internal temperature, which is somewhere between 465 and 480°F. This temperature comes either at the end of the second crack, or sometime after. However, beans are almost never roasted beyond 490°F, as at that point the coffee bean loses all positive flavor characteristics, and starts tasting like charcoal or tar. Blegh.
As we’ve mentioned, the aroma of dark roasts can be attributed to the roasting process, so the origin flavors and acidity of lighter roasts are lost. As it’s the most roasted bean, dark roasts have the lowest caffeine content, and also the bitterest taste.
Due to the boldness of the flavor, dark roasts are often the go-to option of baristas for making espresso and espresso-based beverages like lattes. Dark roasts are a great choice for espresso-based drinks as their rich taste is excellently complemented by creamy, silky milk and froth.
But there’s even variety among dark beans. The roast can range between slightly dark to charred, so make sure you check what kind of dark roast you’re getting before purchasing the beans.
In fact, the body of the coffee will depend on the exact temperature, or point, where the bean was removed from the heat. The body is fully developed at the beginning of the second crack, but begins to diminish right after that. So for instance, one dark roast, like Full-City Roast, will have a much fuller body than another dark roast, like Italian Roast, due to the higher temperature and roasting time of the latter.
Dark roasts have been quite popular in Europe, which is why some common roasts in this category include French Roast, Italian Roast, Viennese Roast, Spanish Roast, Espresso Roast, Continental Roast, or European Roast. Some other, less obvious dark roast varieties are High Rost and New Orleans Roast.
A Few Words Before You Go…
Hopefully, our guide on the different types of coffee roasts has helped you get a better idea of what you’d like to try next, or how your favorite bean comes into being.
At the very least, knowing all this can help you look mighty smug on your next trip to the coffee shop.
Appliances Reviewed is reader-supported. When you buy through links on our site, we may earn an affiliate commission. As an Amazon Associate I earn from qualifying purchases.
We generally consider coffee to be an adult pleasure. It has its place in the mornings preceding busy days, late into the night when you’re cramming for a university exam, on the kitchen counter of every office, during casual meetups with friends. But then the day comes when your 11-year old wanders into your home office asking if they can have a sip of your coffee. Can they? Should they?
When I was a kid, I coveted the drink that my grandmother made whenever her friends came over. I coveted the coffee-soaked biscuits that they were enjoying while I was forced to settle for orange juice and dry, unsoaked biscuits. When I was a kid, they would tell me that if I drank coffee, I’d grow a tail.
Obviously, your child won’t grow a tail if they have coffee, but there’s a good reason why we get asked this question so often. The main ingredient in coffee is caffeine, which has psychoactive and physiological effects on the body. If it gives adults that kick they need in the morning, what does it do to kids? Let’s take a look at what scientific research and experts have to say about kids drinking coffee in terms of whether they should, when they can, and what the limit should be.
Coffee, Caffeine, and Kids
The main active ingredient in coffee that causes concern over child use is caffeine. While it’s a myth that caffeine can stunt growth, there are other reasons why the young, developing brains and bodies of kids won’t benefit from drinking coffee. Rather, caffeine can cause some harm when consumed at an early age.
To begin with, there’s really not too much research on the extensive consumption of caffeine in children because, duh, who is going to force kids to do something potentially dangerous? However, there is enough research and expert opinion for us to get a general idea of what the problems are with exposing kids to caffeine.
Caffeine is a natural stimulant found in coffee, tea, and cacao. Less naturally, kids have access to caffeine through soda and energy drinks. Still, caffeine itself has proven to have some positive effects on the adult body. For instance, moderate coffee drinking has been directly associated with a reduced risk of heart disease. It can even reduce the risk of some types of cancer or developing type 2 diabetes. However, the first problem is that these benefits haven’t been proven to apply to children drinking coffee.
The second problem is that caffeine is a drug. Sure, it’s the world’s favorite drug and one of the safest ones you can enjoy – but it is nonetheless a drug. As it’s a stimulant, the psychoactive effect that caffeine has on the brain is keeping it alert and concentrated. However, this can also have negative side effects, especially on children.
That’d better be milk in her cup.
The Negative Side Effects of Caffeine on Children
A 2017 report by the USA National Coffee Association showed that about 37% of youths between 13 and 18 years of age consume coffee on a daily basis. But what can caffeine do to the developing, adolescent body and brain? Here are some of the potential negative benefits:
1. Disrupted sleep patterns and insomnia
Proper sleep is key for the growing, developing body of a child (child here includes adolescents, of course). Youths should be getting about 8 hours of undisturbed sleep every night to maximize their growth and development. However, teens that drink coffee regularly have reported sleeping less and waking up feeling much more tired in the morning. Plus, while adults have a higher threshold, kids can develop insomnia from drinking even less coffee regularly. If that’s the case for teens, imagine what high caffeine intake would do to a prepubescent child.
2. Psychological overstimulation and anxiety
According to research, while caffeine does improve concentration in children, it also increases their chances of developing anxiety. In fact, a study done on adolescent rats showed that increased caffeine intake during adolescence resulted in a higher risk of developing anxiety in adulthood. It also showed that early access to this stimulant increased the chances of rats seeking out more stimulating drugs later on in life.
If you’re saying rats aren’t people, you’re right. But oftentimes, science has been able to draw a connection between rat and human behavior – and that’s true in this case also. Research conducted on human young adults showed that increased caffeine intake from energy drinks can cause anxiety as well as a propensity to seeking other brain-stimulating drugs later in life.
It’s not all bad, though – there are certain doses of caffeine that have been deemed acceptable for kids – but we’ll get to that a bit later. First, let’s take a look at another problem that accompanies kid-coffee drinking which isn’t caffeine. Namely…
Coffee Beverages as Vessels for High Sugar Intake
One of the main issues with child and teen coffee drinking is the sugar that comes with a lot of the “special” coffees you’d get in places like Starbucks and Dunkin’ Donuts. Fine, so there’s both caffeine and sugar in a can of Coke, but some of the coffee-based barista specials you get at these stores are much, much worse.
I remember when I first started drinking coffee as a teenager I was getting it in the form of a Frappuccino from Starbucks. My mother was very vocal against my new favorite drink, and apparently it was for good reason. A grande Caramel Cocoa Cluster Frappuccino at Starbucks has 68g of sugar! Can you imagine that much sugar in a single beverage? The total caloric count of this drink is 450 calories, which is nearly a quarter of the total daily intake for a child or young adult. Dunkin’ Donuts, on the other hand, offers a Cinnamon Sugar Pumpkin latte that has 55g of sugar. This is more than you’d get from a 16-oz serving of Coke. And unfortunately, these are the coffee-based drinks that kids are most commonly drawn to. They’re not (yet) fans of the nuanced bitter and bold flavors of coffee, so they get their caffeine fix in the form of unhealthily sweet desserts.
But let’s put this amount of sugar in some context. According to the American Heart Association, children older than 2 and below 18 shouldn’t consume more than 25g of added sugars per day. These drinks contain more than twice the maximum recommended value. The insane amounts of sugar that accompany these drinks can endanger a child’s health and at the same time increase their risk of developing childhood obesity.
The Bottom Line: Should Kids Drink Coffee?
This is where we get to the not-so-negative side of the answer. So far we’ve covered the possible negative effects that caffeine and coffee-based beverages can have on kids and teenagers. However, coffee, and indeed caffeine, isn’t the enemy. The answer to whether kids should be drinking coffee is the same answer given to most other dietary questions: the key is moderation.
While the AAP says that caffeine doesn’t have a nutritional place in a child’s diet, a little bit of coffee won’t hurt either. And really, when it comes to parenting, imposing too many restrictions can end up having an adverse effect on the child’s relationship to pleasures and experiences, or, worse yet, an adverse effect on the child’s relationship to the parent.
Experts say that in general, kids that don’t suffer from disrupted sleep patterns and aren’t showing early signs of anxiety can comfortably enjoy approximately one cup of coffee per day. This would be about an 8-oz cup of joe. As most adults should limit their intake to 200-300mg of caffeine on a daily basis, the number gets cut in half for kids. About 70-100mg of caffeine in a child’s daily diet (this should include soda or sport’s drinks – so there shouldn’t be both soda and coffee in a single day’s intake) will do just fine.
Still, if you can, it’s best to postpone introducing coffee to your kid’s diet as late in adolescence as possible. And sharing a few sips of your own cup of coffee with your kids won’t cause any problems, either.
A Few Words Before You Go…
The main question when it comes to kids and coffee arises from the ingredient in coffee we all love so much – caffeine. But it’s not just coffee that contains caffeine – it’s also soda and sport’s drinks to a lesser degree, and energy drinks to a higher degree. If anything, you should try to limit your child’s intake of energy drinks, as lots of studies have shown that they pose more of a threat to kids’ health than coffee. This can easily be attributed to the fact that they’re more marketable to children than coffee is.
When it comes to coffee, once your tween or teen starts showing interest in drinking coffee, try to keep them off sugary beverages loaded with calories and try to limit their intake to a single, modest cup containing no more than 100mg of caffeine per serving.
Appliances Reviewed is reader-supported. When you buy through links on our site, we may earn an affiliate commission. As an Amazon Associate I earn from qualifying purchases.
If there’s one thing that all coffee lovers will agree on, it’s that every promising cup of java starts with the single most important ingredient: freshly ground coffee. No matter what your favorite coffee beans are, the only way to get the most flavor in your morning cup is grinding them yourself, then and there.
However, nothing is too simple when it comes to coffee. As every brewing method requires a special technique, there’s also nuance and finesse when it comes to grinding. For starters, there are different types of coffee grinders with their own advantages and disadvantages. Then, various brewing methods require different degrees of coarseness – some will require that your coffee grounds are coarse, while others demand that your beans are practically pulverized.
With all that in mind, let’s get to the bottom of everything you need to know about how to grind coffee beans.
Types Of Coffee Grinders
Let’s start off with the main types of coffee grinders. This can give you a good idea of what to expect performance-wise as well as price-wise.
Blade Coffee Grinders
Blade coffee grinders are the most widespread, familiar type of coffee grinder. They’re sold almost everywhere for affordable prices, so there’s a good chance that there’s one stowed away somewhere in grandma’s home. My grandmother actually tried to force-gift me her old blade coffee grinder, but luckily, she couldn’t find it. Naturally, she blamed her caretaker. But why am I saying luckily?
Well, the way blade coffee grinders work is through a rapidly spinning – you guessed it – blade that cuts and hacks the coffee beans. The issue with this method is that they do a very uneven job. You won’t be able to expect a consistent grind for any type of coffee. Plus, the motor in the grinder may heat up, so you’ll end up with a chunky grind that won’t taste very good, either. This is because the heat in the motor destroys the coffee’s essential oils.
So, to reiterate: the pros of blade coffee grinders is that they’re cheap and easy to use. They’re usually corded, so you just plug them in, and they do the rest. The cons are that you’ll get an uneven, possibly burnt grind. Blegh.
Burr Coffee Grinders: Flat Disk
Of the two types of burr grinders we’ll talk about, the first one is flat disk. This type of burr grinder uses two rapidly spinning disks that grind the coffee evenly. So when it comes to a uniform, precise grind, flat disk burr coffee grinders are definitely a step up from blade grinders.
However, flat disk coffee grinders have the same failing as blade grinders when it comes to overheating. If the disks heat up, they’ll have an adverse effect on the coffee’s essential oils, which will mess up its taste.
Burr Coffee Grinders: Conical
The solution to overheating comes in the form of conical burr coffee grinders. They are generally pricier than flat disk options, but they’re well worth the extra buck. Conical burr grinders operate more slowly, keeping the motor and blades cool, thus preventing the coffee beans from heating up.
Rather than flat disks, these burr grinders use a conical disk that grinds the coffee perfectly, every time. It’s also easy to adjust the precise type of grind you want, everything from extra-coarse to extra-fine. This is why they’re an ideal choice for fine grinds, like what you’d need to make a Turkish coffee. Most coffee shops use this type of coffee grinder.
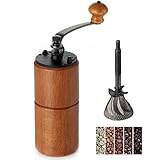
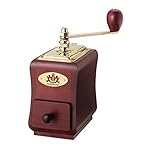
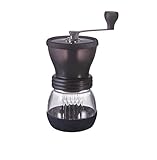
Manual Coffee Grinders
Manual coffee grinders, also known as hand grinders or hand coffee mills, are a smart way to save money and get a uniform grind. They work on the same principle as burr grinders, except instead of using electricity, you use your wo/man power. In other words, they’re hand-operated.
A manual coffee grinder with a conical burr is a great budget-friendly solution for uniformly ground coffee
The best manual coffee grinders use a conical burr mechanism that prevents the disks, and thus the coffee, from overheating. They also ensure that you get a beautifully precise grind ranging from coarse to fine. The main downside of manual coffee grinders is that they require more time and effort than corded alternatives. Plus, you won’t be able to grind coffee for more than 5 cups of coffee, at most, at a time. Still, a manual grinder can be a meditative addition to your morning ritual and a handy companion for camping.
Choosing the Right Coffee Grinder
Some things to consider when choosing the best coffee grinder for your home is price and performance. If your priority is getting a precise, uniform grind (which it should be) you should opt for a grinder that uses a conical burr. If you want to grind coffee for more people and have extra money to spare, you may consider a corded conical burr grinder. If you’re on a tighter budget, don’t grind too much coffee at once, and don’t mind the extra workout, you should look into a manual coffee grinder.
Different Types Of Grinds
The type of grind you want from your coffee beans will depend on the type of coffee you drink, or rather, your go-to brewing method.
Coffee grind is different from coffee roast. The roast of a coffee bean refers to how roasted it is when you buy it. Basically, it’s all about how long the coffee has been heated and at what temperature. (Or, if you buy green coffee beans, how long you roast it for.) Choosing a roast depends largely on your taste, while choosing a grind depends on the coffee brewing method.
So, the grind of a coffee is how coarse you grind it. Grind can range from being quite coarse to being extra-fine, or pulverized. Let’s take a look at the different types of grind, and what coffee brewing method each grind is suitable for.
Coarse Grind
A coarse coffee grind is when you get the largest granules of coffee. Coarsely ground coffee approximately has the size of store-bought bread crumbs. This type of grind is good for brewing methods where the coffee is exposed to hot water for longer periods of time, as the larger particles prevent the beans from being over-extracted, which would cause the coffee to taste bitter.
The most popular brewing methods that use a coarse grind are percolators and French Presses. Cold brew is made with an extra-coarse coffee grind.
Medium Grind
A medium grind falls somewhere between coarse and fine grind and has a similar size to granulated sugar. It’s the most common and versatile grind, so it’s used for lots of different brewing methods. It’s also the most common grind you’d get if you bought your coffee pre-ground at the store.
Some popular brewing methods that use medium grind are drip coffee makers, AeroPress, pour-over coffee makers, as well as siphon and vacuum brewing.
Fine Grind
A fine grind, which is sometimes referred to as espresso grind, has the approximate consistency of powder. It’s generally used for brewing methods in which the hot water goes through the coffee more briefly. The fineness of the grind ensures that the coffee gets extracted, and the brevity of its contact with hot water ensures that the coffee doesn’t get over-extracted.
Fine grinds are used for making espresso or coffee from Moka pots. In Moka pots, for instance, the water gets heated up in a bottom chamber, travels quickly through the middle chamber where the ground coffee is placed, extracts it, and moves to the top chamber, where a beautiful, flavorful cup of joe is ready and waiting. As with espresso machines, here, too, the contact between hot water and coffee is brief.
Fine grinds are also used for electric drip and filter brew coffee makers. Using a fine grind for something like French Press would possibly over-extract the beans and leave lots of sediment in your cup of java.
Extra-Fine/Pulverized Grind
Extra-fine or pulverized grind is the finest type of grind which has the approximate consistency of fine flour. This type of grind is most generally used for preparing Turkish coffee. With Turkish coffee, the grind itself stays in your cup. To prepare Turkish coffee, you mix the pulverized grind with cold water into a coffee pot, place it on a stovetop, and let it cook for several minutes until it rises. Then, you pour the entire contents of the pot into a cup without filtering out the coffee residue. The coffee itself is rich and flavorful, while the super-fine sediment stays at the bottom of your cup.
Not all coffee grinders are capable of producing a grind this fine, so if you are a Turkish coffee lover, double-check your potential grinder’s capabilities before buying it.
Appliances Reviewed is reader-supported. When you buy through links on our site, we may earn an affiliate commission. As an Amazon Associate I earn from qualifying purchases.
You don’t have to dough out a lot of money for an expensive espresso machine to get great-tasting coffee in your home. A simple and elegant solution is a pour-over coffee maker. Pour-over coffee makers are easy to use, affordable, and most important of all – allow you to create a cup of java that has all the notes and flavors that can be extracted from a good coffee bean.
With a little bit of skill, like knowing how to get the right water temperature and at what pace to pour the water over the coffee beans, you will be the composer of your own coffee symphony. Plus, you’ll always have control over how much coffee you want to make, and how strong you want the flavor. Of course, to get the most subtle flavors from this method, you’ll need to have the best pour-over coffee maker first.
Luckily, we’re here to help you find just that: the best pour-over coffee maker to buy in 2020. We scoured the market and rounded up the top four options for the perfect cup of joe. We reviewed them in detail so you know what to expect from performance, price, and maintenance.
Make sure you read our handy buying guide at the end of the article, where we’ve outlined some important factors you should consider when deciding which pour-over coffee maker is the best choice for you.
Best Pour-Over Coffee Makers
Before we get to our reviews, here’s a quick look at our top recommendations:
The Kalita Wave 185 made it to the top of our list for its wonderful performance – it consistently makes flavorful coffee with detectable, intricate notes. The unique wave design and flat bottom allow for just the right amount of coffee to be extracted, to get a full-bodied cup of coffee. It’s a great choice for both professionals and beginners in the world of coffee-making, as getting a perfectly-balanced cup doesn’t require much technical know-how.
The Kalita Wave 185 features a smart design that allows it to consistently produce a flavorful cup of coffee. Cone drippers require carefully selected grounds and pouring skills to get a great cup of coffee, but this isn’t the case with the Kalita. The bottom of this dripper, where the coffee beans are placed, is flat, which gives more space for the water to drain while providing uniform extraction. Additionally, the bottom has three holes through which the water drips evenly.
The design of the Kalita makes it really easy to use. That’s why it’s a great choice for beginners, as they won’t have to time and measure the pouring of water to get great results.
But the great design doesn’t end with the dripper itself. The special Kalita filters that are to be used with the dipper have a patented wave design which minimizes the contact between the filters and the sides of the dripper, i.e. the brewing space. This creates a kind of a water pool on top of the bed of beans which helps maintain uniform extraction, preventing the possibility of a bitter-tasting outcome from over-extraction.
The Kalita is quite small, yet you can use it to make about three to four cups of coffee. You place the dripper over a cup or carafe and put between 26-45 grams of coffee (depending on how many cups you want to make). Then, you start with a single short pour to help the coffee bloom, and once the bubbles die down, you simply fill up the dripper to the top and wait for it to drain a couple of times until you have the desired amount of coffee. This means that although it won’t take up space in your cupboard – or backpack, it’s also a great portable option! – you’ll still be able to make enough coffee for the whole family.
Lastly, the Kalita is compatible with most cups and carafes. As the full length of the bottom is about 4-inches, you can easily place it on most regular containers without worrying about the coffee spilling over or the dripper sliding in.
Cons:
To get the best results with the Kalita, you also need to purchase the wave-y Kalita filters. The drawback here is that they’re a bit pricier than other filters and not as easy to find in stores, so you’ll have to purchase them online.
The Hario V60 is a long-standing favorite for pour-over coffee lovers, and for good reason: it embodies everything a traditional pour-over coffee maker should be. The durable material and design of the dripper are ideal for getting that perfect cup of pour-over coffee. However, it’s not enough to have a great tool in your hands to create something beautiful: you need a master to get the best possible results. In this sense, the Hario V60 is a great choice for pros that are ready to spend the time required for a proper brewing cycle, doting over the dripper with a gooseneck kettle.
Pros:
The Hario V60 is designed for a hands-on pour-over brewing experience. There’s a large, single hole at the bottom which means that the taste of your coffee will change based on how slowly or quickly you add water to the beans. If you enjoy those several meditative minutes measuring water temperature and then timing the pour, you’ll love the Hario, and what it has to offer. You can brew one to three cups with a single brewing cycle.
The Hario is also designed so as to give you the most flavorful cup of java. The conical shape will allow floral and fruity notes to be more detectable in your beverage, while the spiral ribs allow the coffee grounds to expand as the coffee is extracted.
Like the Kalita, the Hario also gives the best results with the same brand’s proprietary filters. However, they’re cheaper than the Kalita and also more widely available in coffee shops and stores.
The Hario offers great value for your money, as it’s quite affordable yet durable. The sturdy ceramic dripper retains heat so that by the end of the brewing process, your cup of joe will still be piping hot.
Last but certainly not least, the Hario boasts one of those simple, yet elegant looks that are hard to pass up on. True to form, it’s manufactured in Japan. In addition to ceramic, you can also get the Halio in a heat-resistant borosilicate glass design, which is the most beautiful, or in plastic, which is the best for traveling.
Cons:
Filters other than the Hario filters designed for this pour-over coffee maker, don’t work with the V60 and often end up tearing at the bottom.
The LHS pour-over coffee dripper is our favorite eco-friendly option as it doesn’t use any paper filters – the cone itself is the filter. And no, it won’t spill! If you don’t have the opportunity to compost, and you feel guilty every time you throw out a paper filter, the LHS is a sweet little environmentally-conscious option. The LHS is also the most budget-friendly pour-over coffee maker on our list.
Pros:
The LHS is designed to bypass the needs of a paper filter. The cone is made of mesh stainless steel, which won’t allow coffee to drip from the sides. The base contains extra-fine wire mesh, which prevents much residue from ending up in your cup of coffee.
You can use the LHS as a reusable metal filter for an existing pour-over coffee maker, or as a standalone pour-over coffee maker. It comes with a wide, detachable metal base, i.e. cup stand, which fits over most regular-sized mugs or travel canteens.
The LHS is a great portable option. It’s quite lightweight and compact, measuring about 8 cm over 13.5 cm, so it can easily fit in your backpack. Plus, the stainless steel material is quite sturdy, so it won’t bend and get deformed while you’re traveling. You can make one to two cups of coffee at a time.
Lastly, the LHS is quite easy to clean and maintain. Once you’re done making your cup of coffee, you can just throw away the beans, rinse the filter, and wipe it. It comes with a little brush which you can use for more thorough occasional cleaning. Plus, the LHS is dishwasher-washable, so you can also just stick it on the top rack of your dishwasher.
Cons:
While the LHS is made from stainless steel, its type of stainless steel alloy (18/8 grade) includes about 18% chromium and 8% nickel. While this is common in cookware and generally deemed safe, some people prefer 100% stainless steel. So if you’re in that category, this dripper may not be the best option for you.
We’re back to this Japanese manufacturer for the best designed pour-over coffee maker: the Hario Woodneck Drip Pot. The style is timeless, elegant, and slick – it will look beautiful in any home or office. But the Hario Woodneck is not just a pretty face – it uses a delicate cotton flannel cloth instead of regular filters to produce a rich, full-bodied cup of coffee. One downside of this pour-over coffee maker is that it’s quite pricey.
Pros:
The Hario Woodneck Drip Pot is truly wonderful for coffee lovers that want to taste every last bit of what a coffee ground has to offer. The drip cloth has smaller holes than any metal or paper filters, so the coffee grounds get more extracted before the water passes through the mesh. It does take a bit longer than paper or reusable metal filters, but the resulting coffee is well worth an extra minute or two.
Rather than changing the taste of the coffee like some paper filters, the drip cloth allows intricate notes to dominate the taste of your cup of java. The slow extraction allows for the coffee oils to pass through to the end result, and aid in the creation of a rich, full flavor.
Much like the Hario V60, the Woodneck Drip Pot is also a great choice for hard-core pour-over coffee enthusiasts. The unique brewing process takes devotion to the method, time, and patience – but the delicious cup of coffee you get makes the effort negligible.
The Hario’s beautiful look is a combination of the woodneck glass pot, the featured filter with a wooden handle, and the delicate cotton flannel drip cloth. Together, they give this pour-over coffee maker a timeless, rustic look. You can choose from 240 ml or 480 ml-capacity options, and from dark wood and olive wood alternatives. The 240 ml is suitable for up to 2 cups, and the 480 ml is suitable for up to 4 cups.
Thanks to its reusable cloth filters, the Hario Woodneck is another eco-friendly option. The initial purchase comes with one drip cloth. Once it wears out, which should be about 6 months or so, you can order a set of three cloth filters.
Cons:
The Hario Woodneck is the priciest option on our list, so it’s not a good idea if you’re on a budget.
Additionally, the glass is a bit fragile, so you’d best handle it with care.
Our overall favorite pour-over coffee maker is the Kalita Wave 185 Pour-Over Coffee Dripper for its consistently excellent performance in making a flavorful, rich cup of coffee. The Kalita Wave’s design makes it a very forgiving little tool, which makes it a great choice for beginners. Even if you don’t get everything right, your coffee will come out tasting pretty good! While the Kalita is reasonably priced at $23.99, one possible drawback is that the Kalita proprietary filters are a bit pricier than regular filters.
The best pour-over coffee maker for pour-over coffee aficionados is the Hario V60, as it will give you everything you need in order to get the most intricate, delicious cup of coffee. But this dripper isn’t as forgiving as the Kalita Wave – you’ll need to have the necessary skill and knowledge on how to create that perfect cup of coffee. The Hario also offers excellent value for your money, as all three options – plastic, glass, and ceramic – are durable and affordable. The plastic is the cheapest, the ceramic the priciest, at $26.58, while glass sits between the two.
Our favorite eco-friendly option is the LHS Paperless Pour-Over Coffee Dripper, as it doesn’t use any paper filters. Rather, the stainless steel which the dripper is made of contains mesh which functions as a filter. It’s also quite compact and lightweight, which makes it a great portable choice. The LHS pour-over coffee maker is the most budget-friendly option on the list (except for the Hario V60 plastic), costing $13.79.
The pour-over coffee maker with the most beautiful design is the Hario Woodneck Drip Pot. It has an elegant, classy look and it’s made of glass and wood. A lovely addition to this coffee maker is the cotton filter which is reusable. The tiny holes in the cloth allow for a beautifully extracted cup of coffee that emphasizes all the delicate notes contained in the coffee beans. However, the Woodneck Drip Pot is also the priciest recommendation on our list. The 240 ml versions are cheaper than the 480 ml versions. Out of the 480 ml pots, the olive wood one that we have featured in our review costs $66.99.
How to Choose the Right Pour-Over Coffee Maker
Alright, so now you know what the best pour-over coffee makers are on the market – but which one is the right choice for you? Here are some tips on what to look out for when choosing a pour-over coffee maker that will suit your needs and preferences.
What’s Your Skill Level?
As you may have realized, not all pour-over coffee makers are as forgiving as the Kalita Wave. Some, like the Hario options, require that you’ve familiarized yourself with the pour-over method quite well in order to get the optimal cup of coffee. Plus, if you’re already a pro, you may want to opt for a coffee maker that has the versatility necessary to allow you to adjust the brewing process to your taste.
Of course, you may also be willing to learn, so just think over how much effort you’re willing to put into coffee brewing before settling on a coffee maker for yourself.
What’s Your Desired Capacity?
The pour-over coffee makers on our list have different capacities when it comes to how many cups of coffee you can brew at a time. Check out how much each option can yield, and see if that suits the needs of your home or office.
What’s Your Budget?
In the conclusion, we tried to give you a general idea of how much each pour-over coffee maker costs, but you should still check their current prices on Amazon. In any case, you don’t need to pay a lot of money to get a great coffee maker. The Hario V60, for instance, is quite affordable and still yields wonderful results.
Are You Stationed, or on the Go?
If you want a pour-over coffee maker for your home, any of our recommendations will do. However, if you want something that you can take with you while traveling, you should look for an option that’s lightweight, compact, and not likely to break. The LHS and the Hario V60 plastic dripper are the best portable options and great camping companions.
What Accessories Does Your New Coffee Maker Need?
Some coffee makers don’t require much, other than a hot water source. Others, on the other hand, may require that you have a gooseneck kettle from which to slowly pour water in small quantities. Additionally, some drippers need specific paper filters, while others rely on reusability.
Check what your pour-over coffee maker of choice needs, and see if you have it. If not, think whether you’d be willing to invest in it.
How Much Time You Got?
Each coffee maker has a different brewing time. This is often based on how many drainage holes they have, and how dense the mesh of the dripper or filter is. Check how long the brewing process for each pour-over coffee maker is, and decide if you can fit it in your schedule.
How Does Pour-Over Coffee Taste?
The wonderful thing about pour-over coffee makers and the reason there’s such a thing is pour-over coffee die-hard fans, is that it has a very unique, flavorful taste. The slow extraction of the beans during the measured brewing process produces a clean, light, and well-balanced cup of coffee that has all the intricate high and low notes of the coffee bean.
This means that pour-over coffee will take your taste buds someplace new, allowing you to finally make sense of those descriptions that accompany coffee beans, like fruity or flowery. Essentially, pour-over coffee prevents over-extraction and bitterness, so you only get the crisp flavor of the coffee bean.
A Few Words Before You Go…
Hopefully, our recommendations and buying guide helped you find the right pour-over coffee maker for your needs, preferences, and taste. Make sure you follow the links to the products to check their current prices and find answers to any additional questions you may have about the material, warranty, or brewing process. Soon enough, you too will be enjoying your delicate cup of joe!
You can also check out our other product reviews and guides, or try some of our favorite coffee shop grade recipes that will be the perfect addition to your cup of pour-over coffee.
Want to see our favorite pour-over coffee makers one more time before you go? Here they are! Happy brewing!
Appliances Reviewed is reader-supported. When you buy through links on our site, we may earn an affiliate commission. As an Amazon Associate I earn from qualifying purchases.
Being picky about your coffee is one of the milestones of adulthood, as silly as that sounds. It’s kind of like how you only accept intensely sweet milk chocolate as a dessert when you’re a kid, and then slowly start developing the taste for more subtle flavors as you grow older – like tiramisu or scones.
So when you start consciously tasting the difference between one coffee bean and another, one brewing method and another, and so on, you realize that no matter what your favorite cup of joe entails, it always starts with the same prerequisite: freshly ground beans. Freshly ground beans enable all the intricate notes of your coffee to pop and be beautifully extracted for your drinking pleasure.
That all being said, to have freshly ground coffee in your home you need to have a grinder. Electric grinders are great, but sometimes they’re pricey and usually they’re quite bulky, so they’re not a viable option for traveling. That’s where a manual grinder, or hand grinder, also referred to as a coffee mill, enters the picture. The best manual coffee grinders offer excellent performance and a sturdy build, so they’ll last you for years to come. With that in mind, let’s take a look at our favorite manual coffee grinders for 2020, where there’s something for every budget and preference.
Make sure you read our buying guide at the end of the grinder reviews, so you’ll know exactly what to look for in the right grinder for your needs and preferences.
Best Manual Coffee Grinders in 2020
Before we get to our detailed reviews, here’s a quick overview of our top recommendations:
The Akirakoki Manual Coffee Bean Grinder is our top pick and favorite recommendation for most people thanks to its excellent performance, sturdiness, decent bean capacity, and great design. All in all, the Akirakoki combines functionality and style in this lovely travel-friendly, affordable coffee grinder.
Pros:
The Akirakoki produces excellent results, so you can always depend on it for a flavorful fresh grind. Its grinding is more consistent than many electric grinders, and it certainly produces better results than cheap, flimsy manual grinders. The Akirakoki’s burr is made of cast iron that doesn’t produce heat which can ruin the taste of your coffee by messing up its essential oils. Plus, the cast iron is rust-proof and won’t leave a metallic aftertaste in the grind.
You’ll love how easy to use the Akirakoki is. In order to adjust the fineness of your grind, you can just shift the screw under the base of the grinder. It works well for all sorts of grinds, like fine for espresso or coarse for French press. The crank handle is quite ergonomic, providing leverage for easy hand grinding, which means you won’t feel like your arm’s about to come off by the end of your grinding session. Plus, it’s designed for practically silent operation.
The Akirakoki doesn’t fall short when it comes to capacity, either. While a lot of manual grinders sacrifice capacity for the sake of compactness, the Akirakoki has both. It has an 85 gram-grind capacity, which is enough for three to four cups of coffee. At the same time, it’s compact enough to take with you wherever you go.
Cleaning and maintaining this grinder is simple enough. You can disassemble it in a matter of seconds for a thorough cleaning session, so you can get rid of the residue from yesterday’s grind in a couple of minutes.
Overall, the Akirakoki offers excellent value for your money, as it’s affordable and durable at the same time. As we already mentioned, the burr is made of sturdy, premium cast iron that will last you for years and won’t have an adverse effect on the taste of your coffee. The body of the grinder is made of a single piece of high-quality wood, which ensures that it will never crack.
Last but not least, this grinder has a beautiful design. The wood isn’t only sturdy, but it also gives the grinder an elegant, rustic look. You can get the Akirakoki in brown wood or No products found..
Cons:
Grinding will take time, patience, and elbow grease – but this is the case with most manual grinders, anyway.
Of course the best quality manual coffee grinder comes from, as the manufacturer points out, fine German craftsmanship. And in truth, the Zassenhaus Santiago coffee mill is nothing but craft: it produces a high-quality grind, it has a beautiful mahogany finish, and comes with a durable mechanism that has the best warranty we’ve seen on the market – 25 years! The Zassenhaus also happens to be our priciest recommendation, but it’s a great choice for the coffee-loving aesthetes.
Pros:
The Zassenhaus manual coffee mill is quite versatile when it comes to grind fineness. It has a very broad range of grind settings thanks to the large size of its adjustment dial, which will allow you to control the fineness of the grind until you get it just right. It can even get you a consistently high-quality grind for Turkish coffee or espresso, which require the finest possible grind of any brew.
The consistent results are largely due to the high-quality, conical, carbon steel grinding mechanism. It doesn’t allow heat to build up and affect the essential oils of the coffee grounds negatively. It’s this mill’s grinding mechanism that’s backed by a 25-year warranty. So although the mill is pricier than our other recommendations, you can be sure that it will last you for a very, very long time.
The Zassehnaus is easy to use – it works just like traditional lap coffee mills. Sit back in a comfortable chair and place the grinder in your lap, between your thighs, and grind away! The sides of the mill are designed to fit snug and comfortable as you work. Alternatively, you can also grind on the kitchen counter. The ground beans end up in a cute, little front drawer compartment. The capacity for ground beans is around 40 grams, which is enough for two to three cups of coffee.
Cons:
One thing to keep in mind is that the Zassenhaus is the priciest recommendation on our list. Although the price is justified by its quality, it’s not a good budget-friendly pick.
Another possible drawback of the Zassenhaus is that it’s a bit bulkier than our other recommendations, so it may be the best choice for travel (and it weighs nearly 2 pounds).
Our favorite budget-friendly manual coffee grinder is the Hario Skerton Plus Coffee Mill. While the Skerton Plus is quite affordable, it’s by no means cheap or flimsy – rather, it can give you the best value for your money. The Hario Skerton Plus is quite sturdy, easy to use, and has a bigger coffee grind capacity than most manual coffee grinders.
Pros:
The Hario Skerton Plus offers a broad range of grind settings, from fine to coarse. While it won’t produce a grind fine enough for Turkish coffee, it does well with a near-espresso fine grind. It’s also a great choice for coarse grinds, like you’d need for French press and cold brew, as it generally gives quite consistent results.
The Skerton Plus is an especially good choice for folks that need a coarse grind, as it’s designed for smooth operation even when it comes to coarse grinds. It features a stabilizer plate, which prevents the burr shaft from wobbling when you grind, which especially happens for the coarser settings. The stabilizer keeps the movement more restricted, and the non-slip rubber base at the bottom keeps the grinder from slipping off the counter.
The Skerton Plus has one of the highest hopper capacities you’ll find in a manual coffee grinder. The top bean chamber can fit around 80 grams, while the bottom chamber can fit around 100 grams of ground coffee, which is enough to make up to five cups of java. This is quite convenient when you’re making coffee for your family or friends, as you won’t have to fill up and operate the grinder more than once. Plus, the Skerton Plus comes with a can cap container, so you can cap your freshly ground beans and take them with you to work, on a picnic, and so on.
Overall, the Skerton Plus is quite durable. It’s made of stainless steel, high-quality glass, silicone, and BPA-free plastic, which make it sturdy and great for everyday use. In fact, Hario is a famous Japanese glass manufacturer (Hario means “the King of Glass” in Japanese), which is no stranger to the coffee scene. They’re also the company behind one of our favorite pour-over coffee makers.
The cool thing about the Skerton Plus is that while the materials in its build are sturdy, they’re also quite lightweight. This makes the Skerton an excellent choice for travel. Plus, the crank handle detaches easily which makes it an even more attractive portable option.
Cons:
Adjusting the grind size can be a bit of a hassle, as you’ll need to dismantle the handle in order to adjust the grind. However, if you aren’t planning on changing the grind size too often, this shouldn’t be much of an issue.
Another thing to keep in mind is that getting a finer grind will take more time and effort – which again, is the case with most manual coffee grinders.
Our top recommendation for travel is the JavaPresse Manual Coffee Grinder – it’s small, lightweight, and easy to operate. The JavaPresse is also quite simple to clean and provides a consistently uniform grind, no matter if you want it coarse or fine. The JavaPresse’s capacity isn’t too high, though, so it will be a hassle to use regularly in the home, for multiple people, and on a daily basis. The capacity of the JavaPresse is around 40 grams, which makes it suitable for up to two small cups of coffee.
Pros:
First things first – the JavaPresse is truly great for travel. Not only is it very lightweight (about 9.4 ounces) and compact (measuring 1.8 x 1.8 x 7.5 inches), but it’s also the perfect portable companion as the hand crank is removable and easy to pack up. Plus, the sturdy stainless steel build will prevent it from getting damaged in your backpack or suitcase.
Using the JavaPresse is quite simple and straightforward. It features a built-in adjustable click-based grind selector with 18 settings which will allow you to manage the fineness or coarseness of the grind. You may need to play around with the settings a little bit to find the perfect grind.
The grinding mechanism on the JavaPresse is designed to produce consistently great results. It comes with a patented, ceramic, conical, combo burr grinder blades, which are made to last up to five times longer than regular stainless steel ones.
Last but not least, you’ll have ease of mind choosing the JavaPresse thanks to their excellent customer support team. If you experience any issues with your grinder, the folks at JavaPresse will immediately send you a new grinder without any additional charges. Plus, when you buy a JavaPresse grinder, you get a code that allows you to redeem a free bag of tasty coffee beans!
Cons:
While the customer support team is great, quality control isn’t the best. At least if your first grinder is faulty, you’ll get a second one that works.
Another possible drawback of the JavaPresse is that it only grinds small quantities, so it may be a hassle to use on a daily basis if you’re grinding for more than one person.
Our overall favorite manual coffee grinder that combines price, functionality, and style is the Akirakoki Manual Coffee Bean Grinder. You can always depend on this hand grinder to get consistently fine or coarse grounds that will be as flavorful as possible. The Akirakoki can fit around 85 grams of coffee, which is enough for up to four cups of java. It costs $54.99, which is quite reasonable for the quality you get. The Akirakoki is perfect for travel, but it will also look beautiful on your kitchen counter.
Our pick for the best quality hand grinder is the Zassenhaus 'Santiago' Manual Coffee Mill, and the 25-year warranty on its finely crafted grinding mechanism makes it clear why its title is justified. You can always depend on the Santiago to get a perfect grind – although it may take a couple of tries to find the right adjustment. This is one of the few hand grinders that can produce the finest possible grind for Turkish coffee and espresso. The design is truly beautiful, and you can choose from various mahogany and beech wood options. Of course, quality comes at a price, and the Zassenhaus costs Price not available, but that changes depending on which finish you choose. It has a capacity of 40 grams, which is enough for up to three cups of coffee.
The best coffee grinder if you’re on a tighter budget is the Hario Skerton Plus Coffee Mill. The Skerton Plus costs $43.50, so it’s not cheap, cheap, but it’s as low as you can go for a great quality manual grinder. The Skerton Plus has quite a high capacity for coffee – around 100 grams – which makes it an ideal choice for multi-person homes and holidays, as you can grind enough coffee for everyone in your party with a single go. The Skerton Plus is sturdy and lightweight at the same time, so it’s another good portable option.
When it comes to the best option for travel, we picked the JavaPresse Manual Coffee Grinder for its super lightweight and compact design. It’s the lightest option on our list and comes with a detachable handle which makes packing it up easy. Operating the JavaPresse is quite simple, thanks to its click-based grind adjustment settings. It produces a consistent grind thanks to its ceramic, dual-blade burr mechanism. While it’s a great portable option, the low coffee ground capacity of the JavaPresse makes it a less than ideal option for multiple people. It’s reasonably priced, costing $39.99 on Amazon.
How to Choose the Right Manual Coffee Grinder
Now you’re familiar with the best manual coffee grinders on the market. However, the question remains: which one is the right choice for you? Here are some of the main factors you should consider when picking out your new hand grinder so that it can be perfectly tailored to your needs.
Size and Portability
While all manual coffee grinders are quite small, they’re not all as small and compact. Consider whether you want a manual grinder for your home or one that you can take with you wherever you go.
If you want a grinder for daily use in your home, bulkiness and weight aren’t very important. However, if you want a portable hand coffee mill to take on your travels and camping adventures, you should opt for something which is small, lightweight, and sturdy enough to survive the road. Having a detachable handle is always a plus!
Coffee Grounds Capacity
The capacity for coffee grounds with these manual grinders ranges from about 40 grams to about 100 grams. If you’re only grinding coffee for yourself, a small-capacity grinder will do the trick. However, if you’re grinding for multiple people, or want a fresh batch of ground beans for multiple cups of coffee (even if it’s just for yourself – who lives on a single cup a day, anyway?), you’d do best to pick one of the larger-capacity grinders.
With 40 grams, you can usually create up to two cups of coffee, while with 100 grams, that number can go up to five. (It all depends on the coarseness of the grind and the brewing method you’re using.)
Build and Durability
Make sure that your coffee grinder of choice is made of sturdy, durable materials that can stand the test of time. Especially if you want a grinder which you’ll use on a daily basis, you’d better opt for something that’s high-quality and comes with a good warranty.
If you’re looking for a grinder that you’ll only use occasionally, like when you’re traveling, you can sacrifice top-quality for affordability, as the grinder won’t go through as much wear and tear anyway.
Grind Settings
What’s your favorite type of coffee to make at home? Do you use a French press, an espresso machine, a pour-over coffee maker, cold brew, or a Moka pot? Depending on your go-to brewing method, the fineness of the grind will change. For instance, espresso and Turkish coffee require the finest of grinds, while cold brew and French press require coarser grinds.
We ask this question because it’s important to consider when choosing your new grinder. Make sure that your grinder of choice has the necessary grind settings to achieve the perfectly fine or perfectly coarse coffee for your favorite brewing method.
A Few Words Before You Go…
Hopefully, our reviews and buying guide have been helpful on your journey to finding the perfect manual coffee grinder for the freshest cup of coffee, both in your home and on the road. Make sure you check all the additional information about the products on their Amazon sites, including their warranty, grind setting specifications, and current prices.
Make sure to check out our other product reviews and guides, where you’ll find the results of our meticulous market research, all to bring the best products to your home. You can also check out our recipes which will have the scent of your favorite coffeeshop wafting throughout your home.
Want to see our favorite manual coffee grinders one more time before you go? Here they are! Happy grinding!

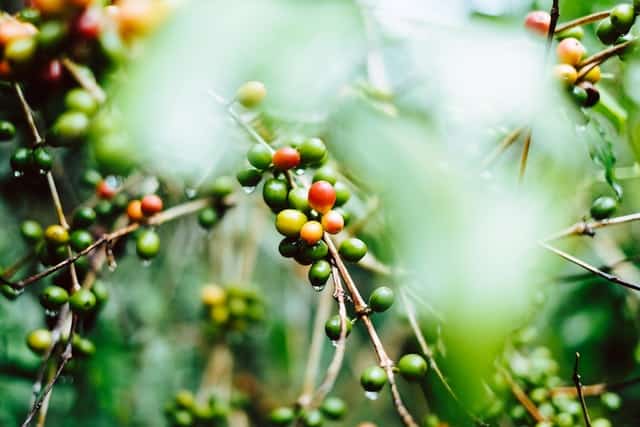
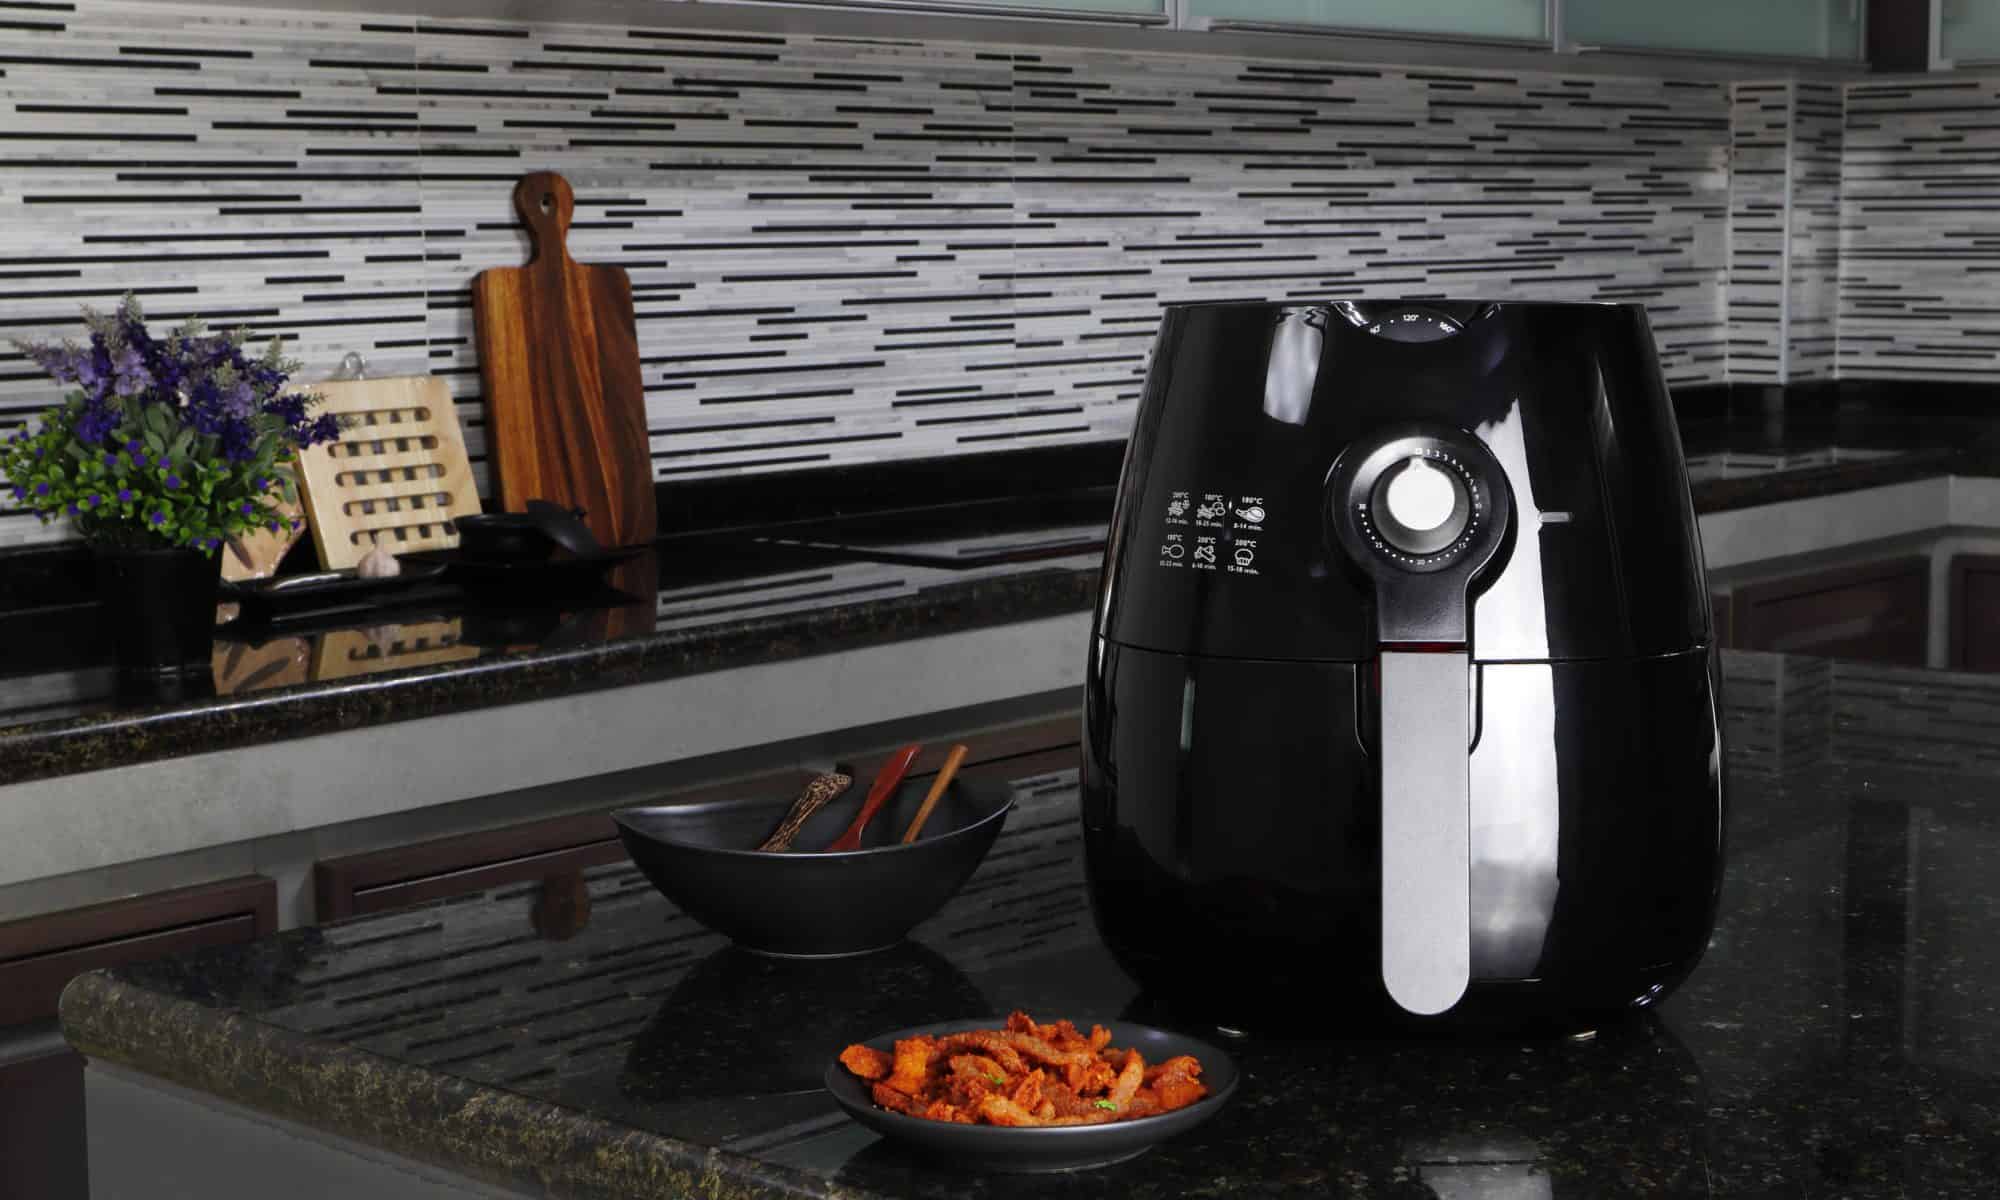
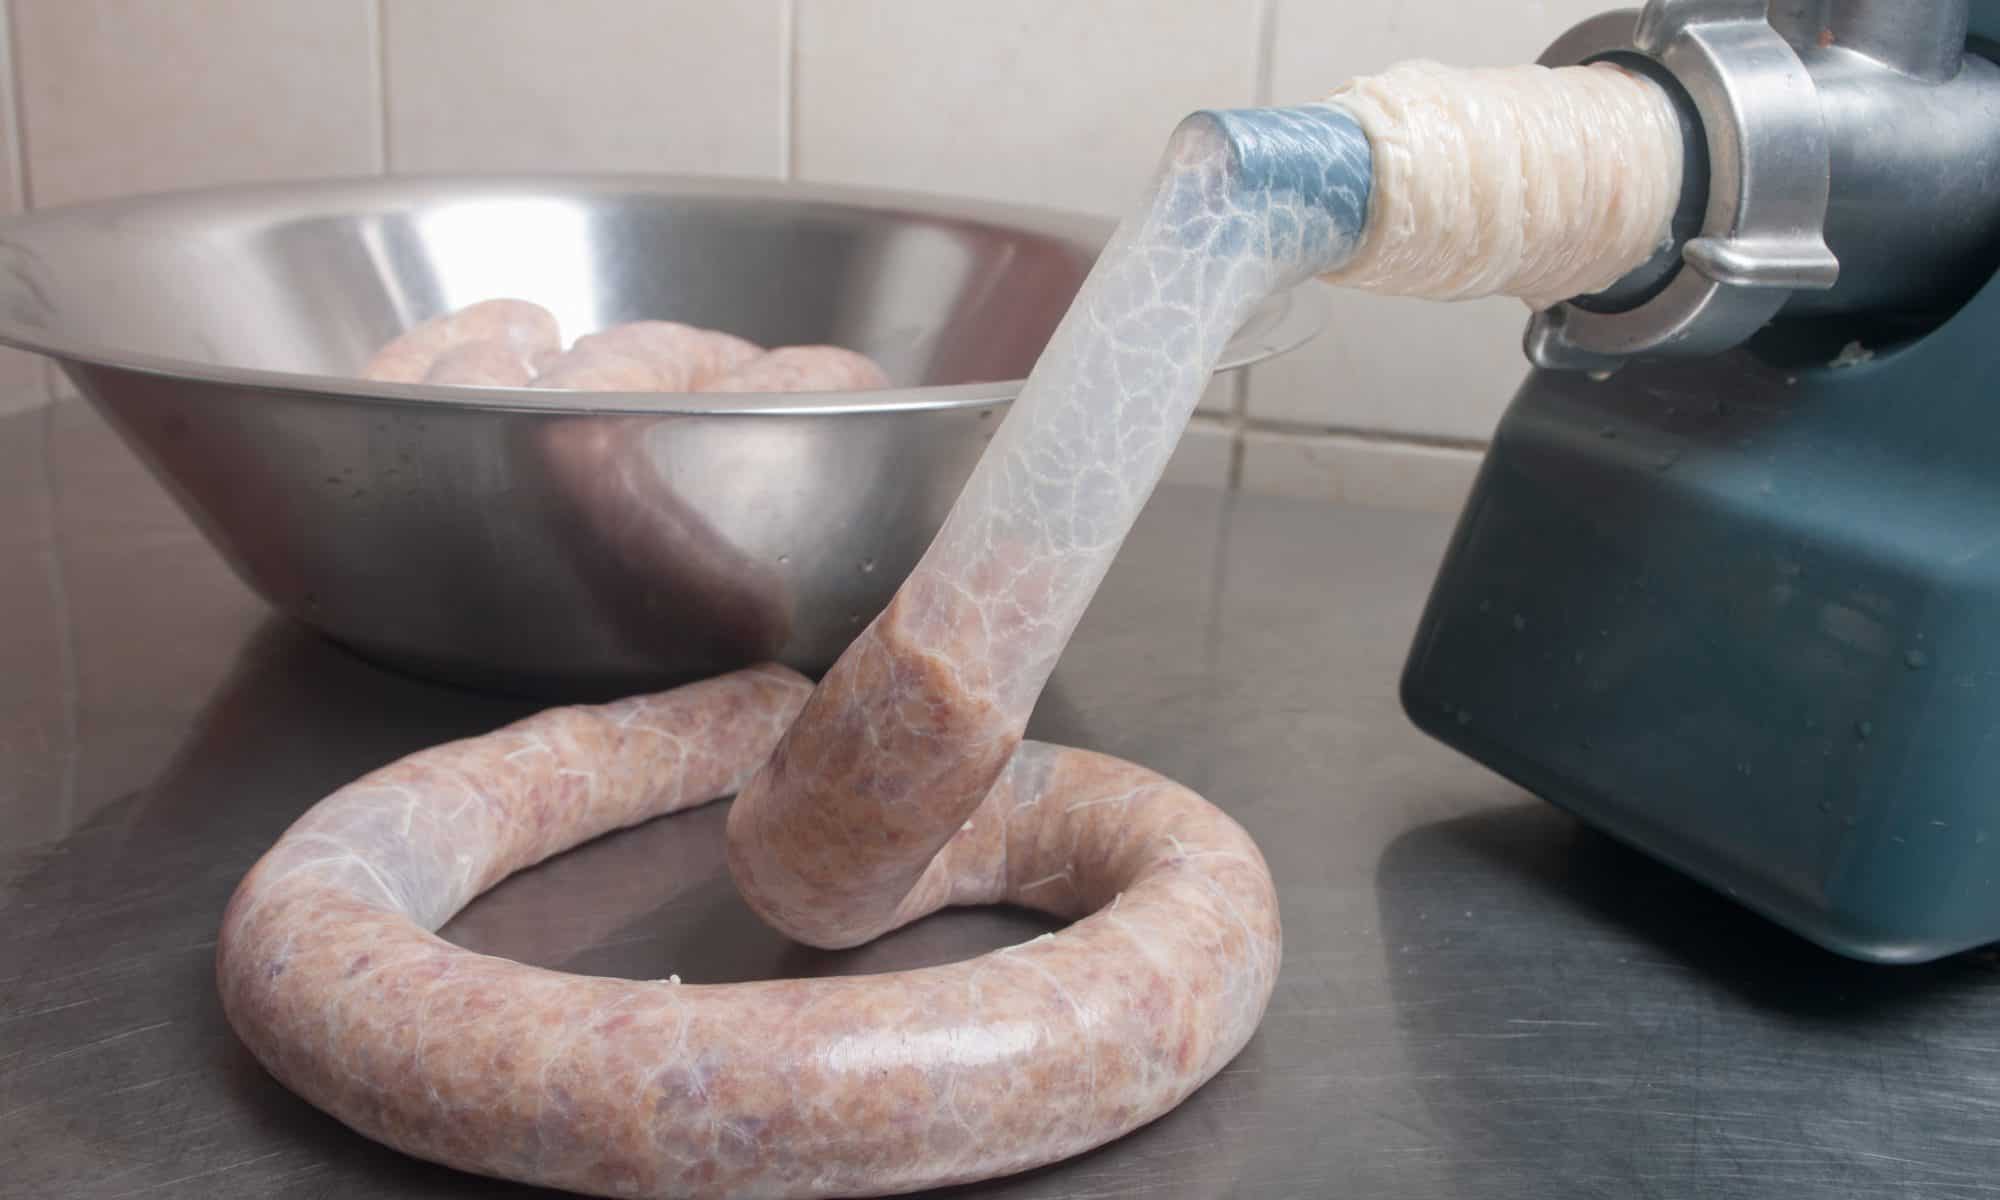

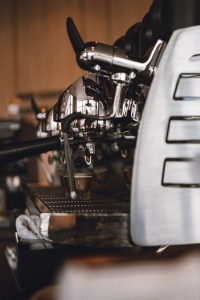 Coffee is the staple drink of every morning routine. Well, nearly every morning routine – a 2018 study published by the National Coffee Association reported that
 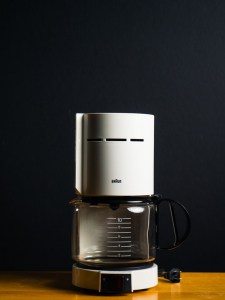 Let’s start off with the classics, and nothing is more contemporary Americana than drip coffee makers. Drip coffee makers can be found in homes, hotels, motels, offices, support groups… Their popularity can easily be attributed to their ease of use, consistent results, and ability to produce a big batch of coffee with minimal effort on your part.
 Espresso machines can bring the full coffee shop experience to your home. If you’re an avid espresso lover, you may find the effort and additional cost that come with an espresso machine well worth the cup of full-bodied, rich, tasty espresso brew.
 Pour-over coffee makers are a simple yet delicate way to produce a custom cup of coffee that’s per your taste. Pour-over coffee makers consist simply of a cup with holes on the bottom, which you can place over any mug or carafe to make as much coffee as you want.
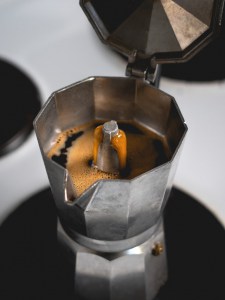 Moka pots are my go-to method when I want a rich, full-bodied cup of coffee that gets as close to an espresso as possible without actually using an espresso machine. Although it’s not as dark as an espresso, a Moka pot will give you a thick, deeply dark cup of delicious coffee that’s also made on the principle of using high-pressure to extract the coffee grounds.

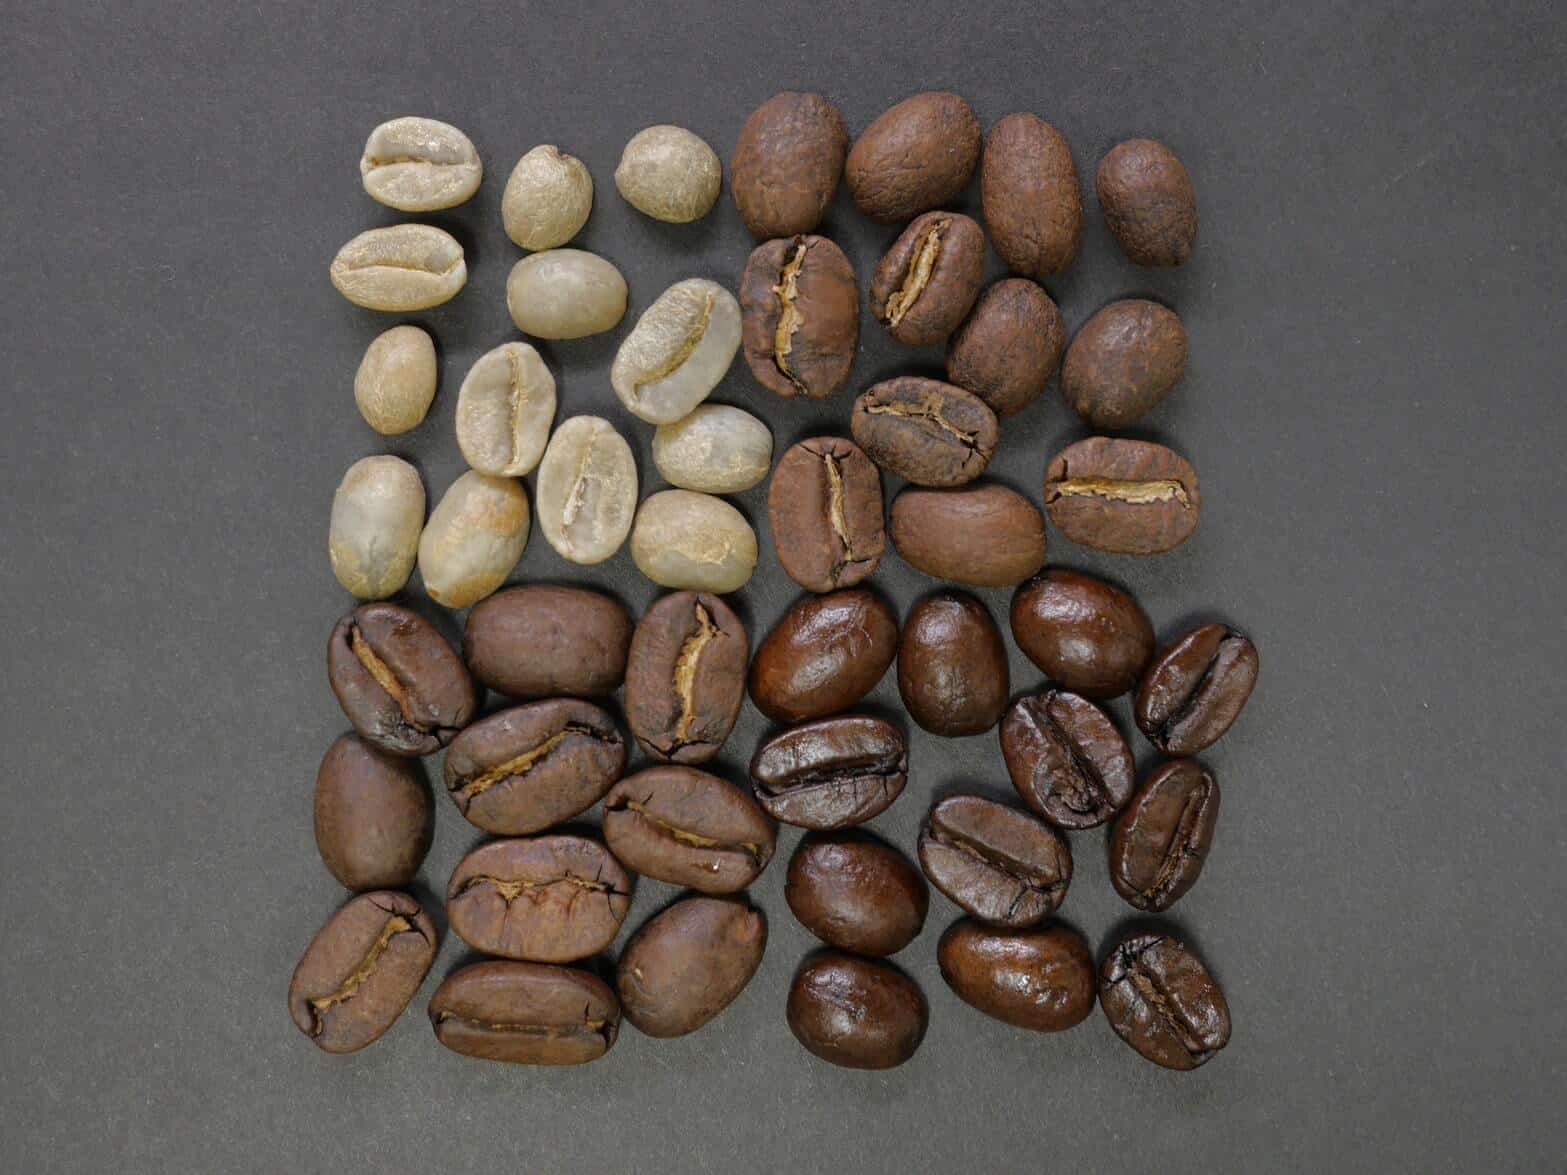

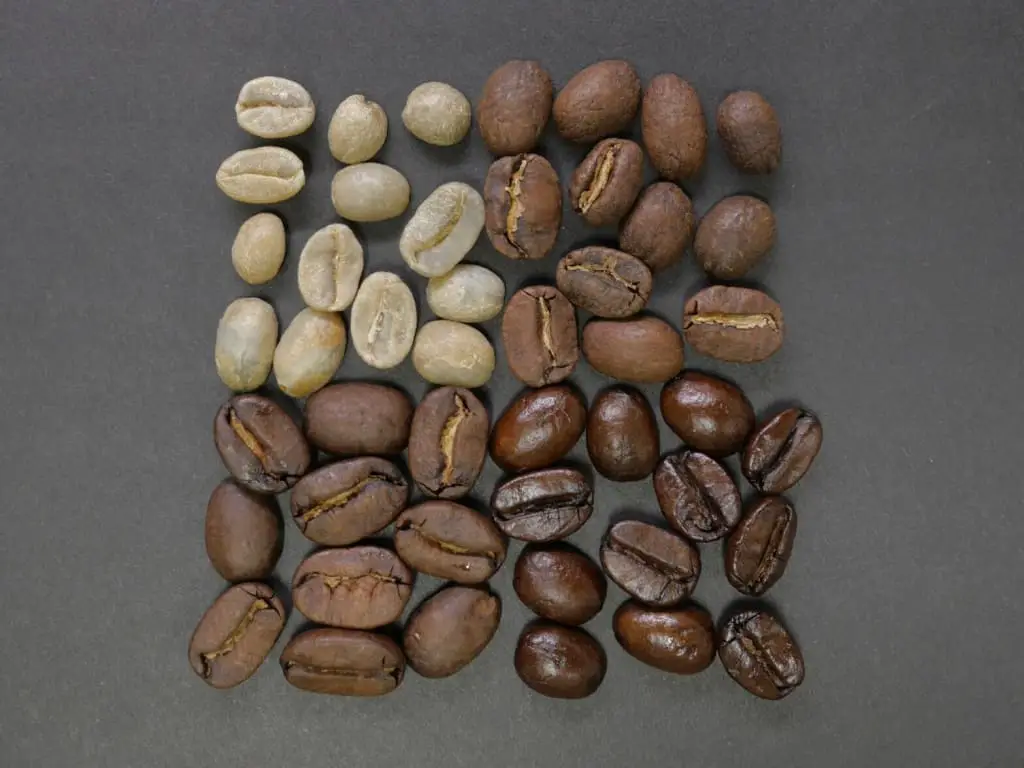


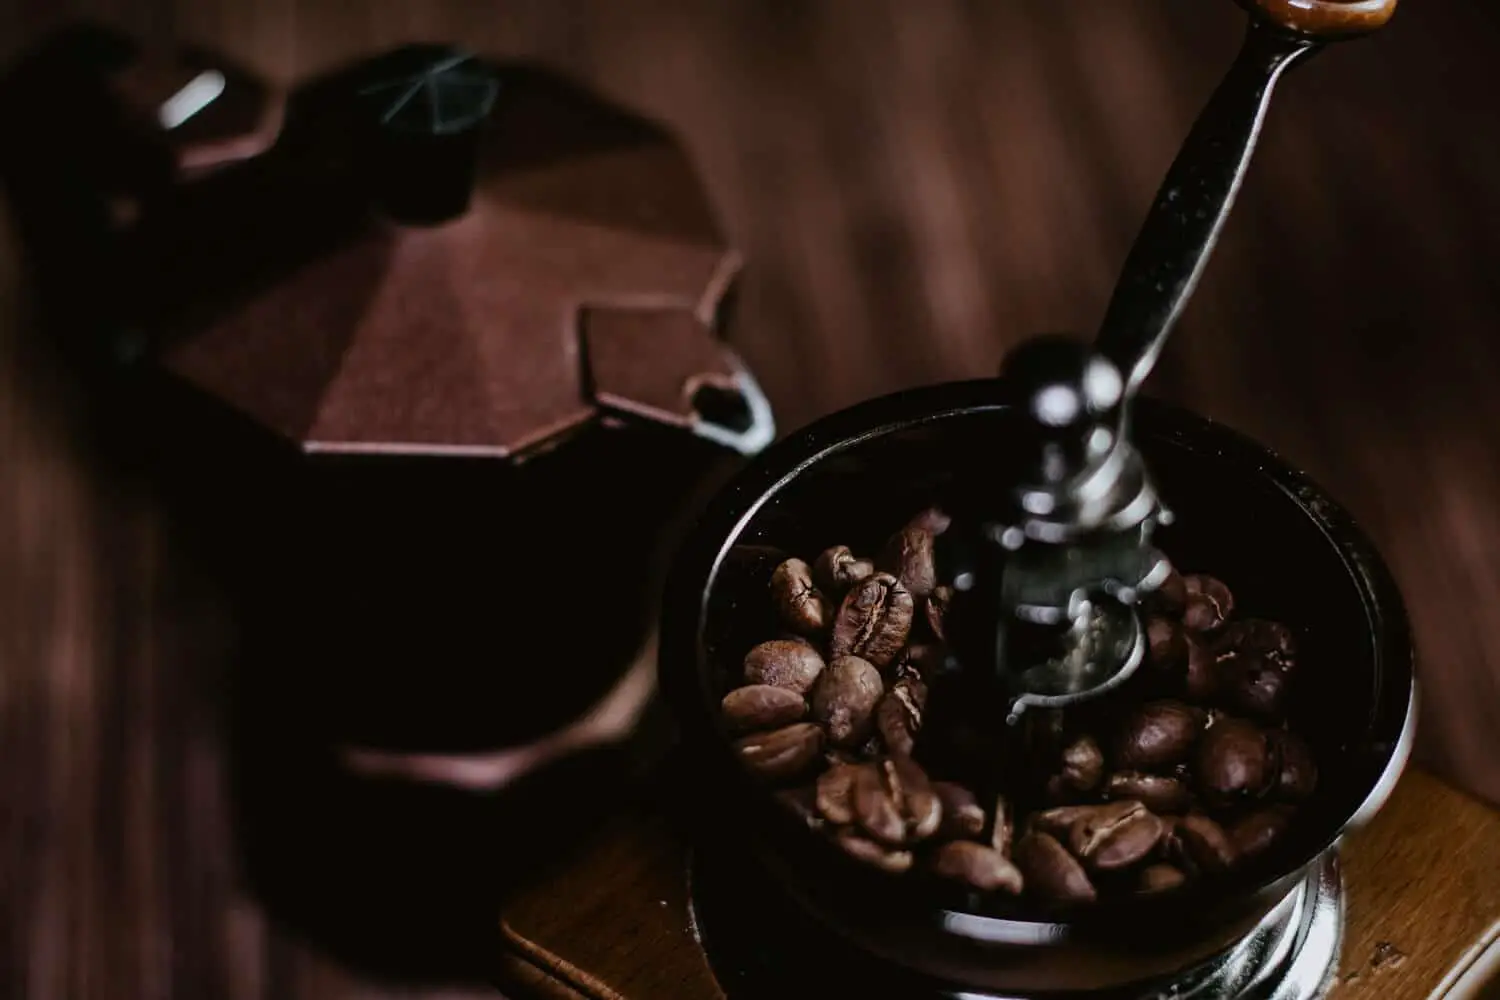

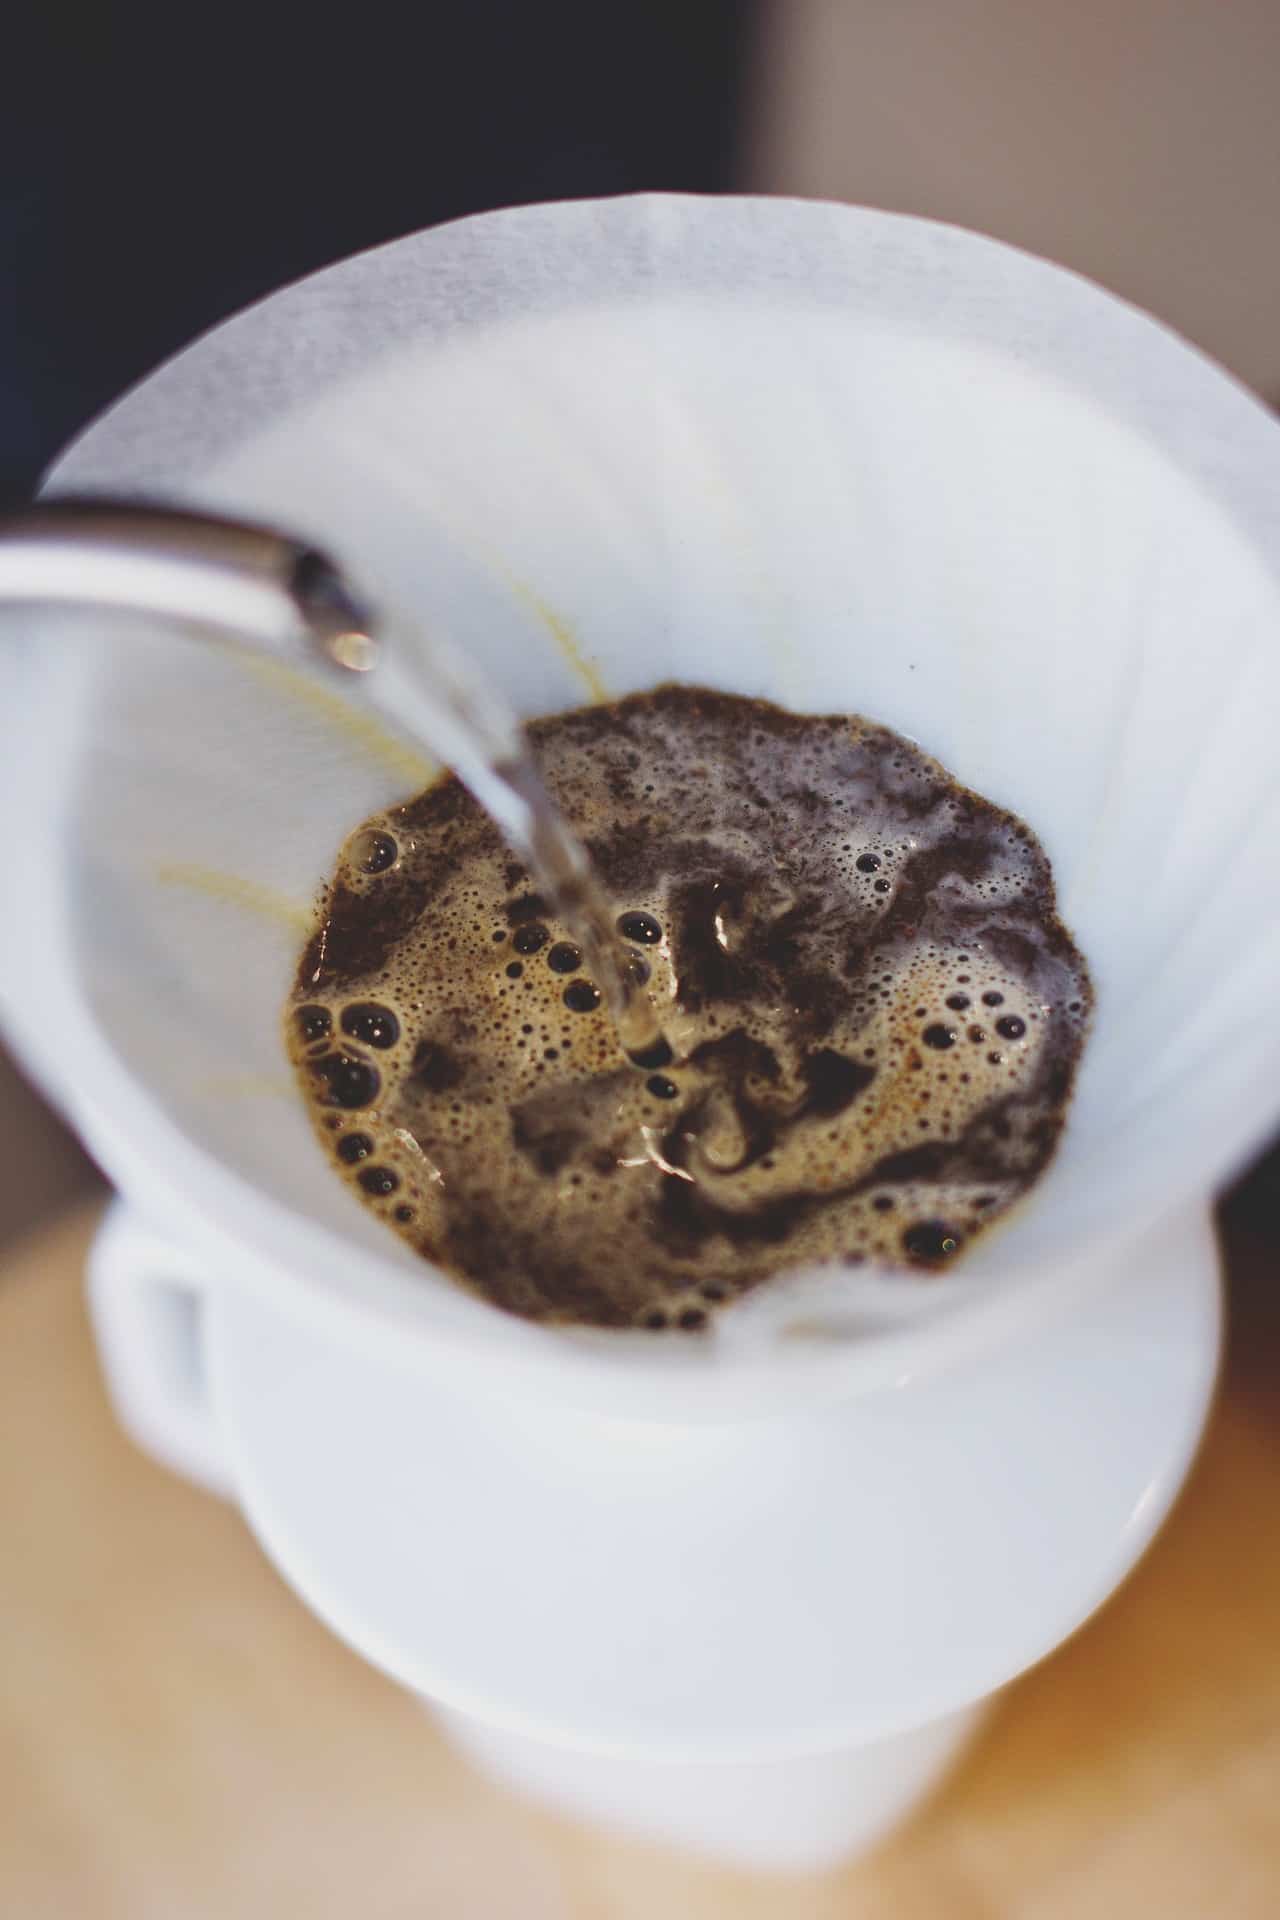
 You don’t have to dough out a lot of money for an expensive espresso machine to get great-tasting coffee in your home. A simple and elegant solution is a pour-over coffee maker. Pour-over coffee makers are easy to use, affordable, and most important of all – allow you to create a cup of java that has all the notes and flavors that can be extracted from a good coffee bean.
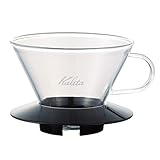


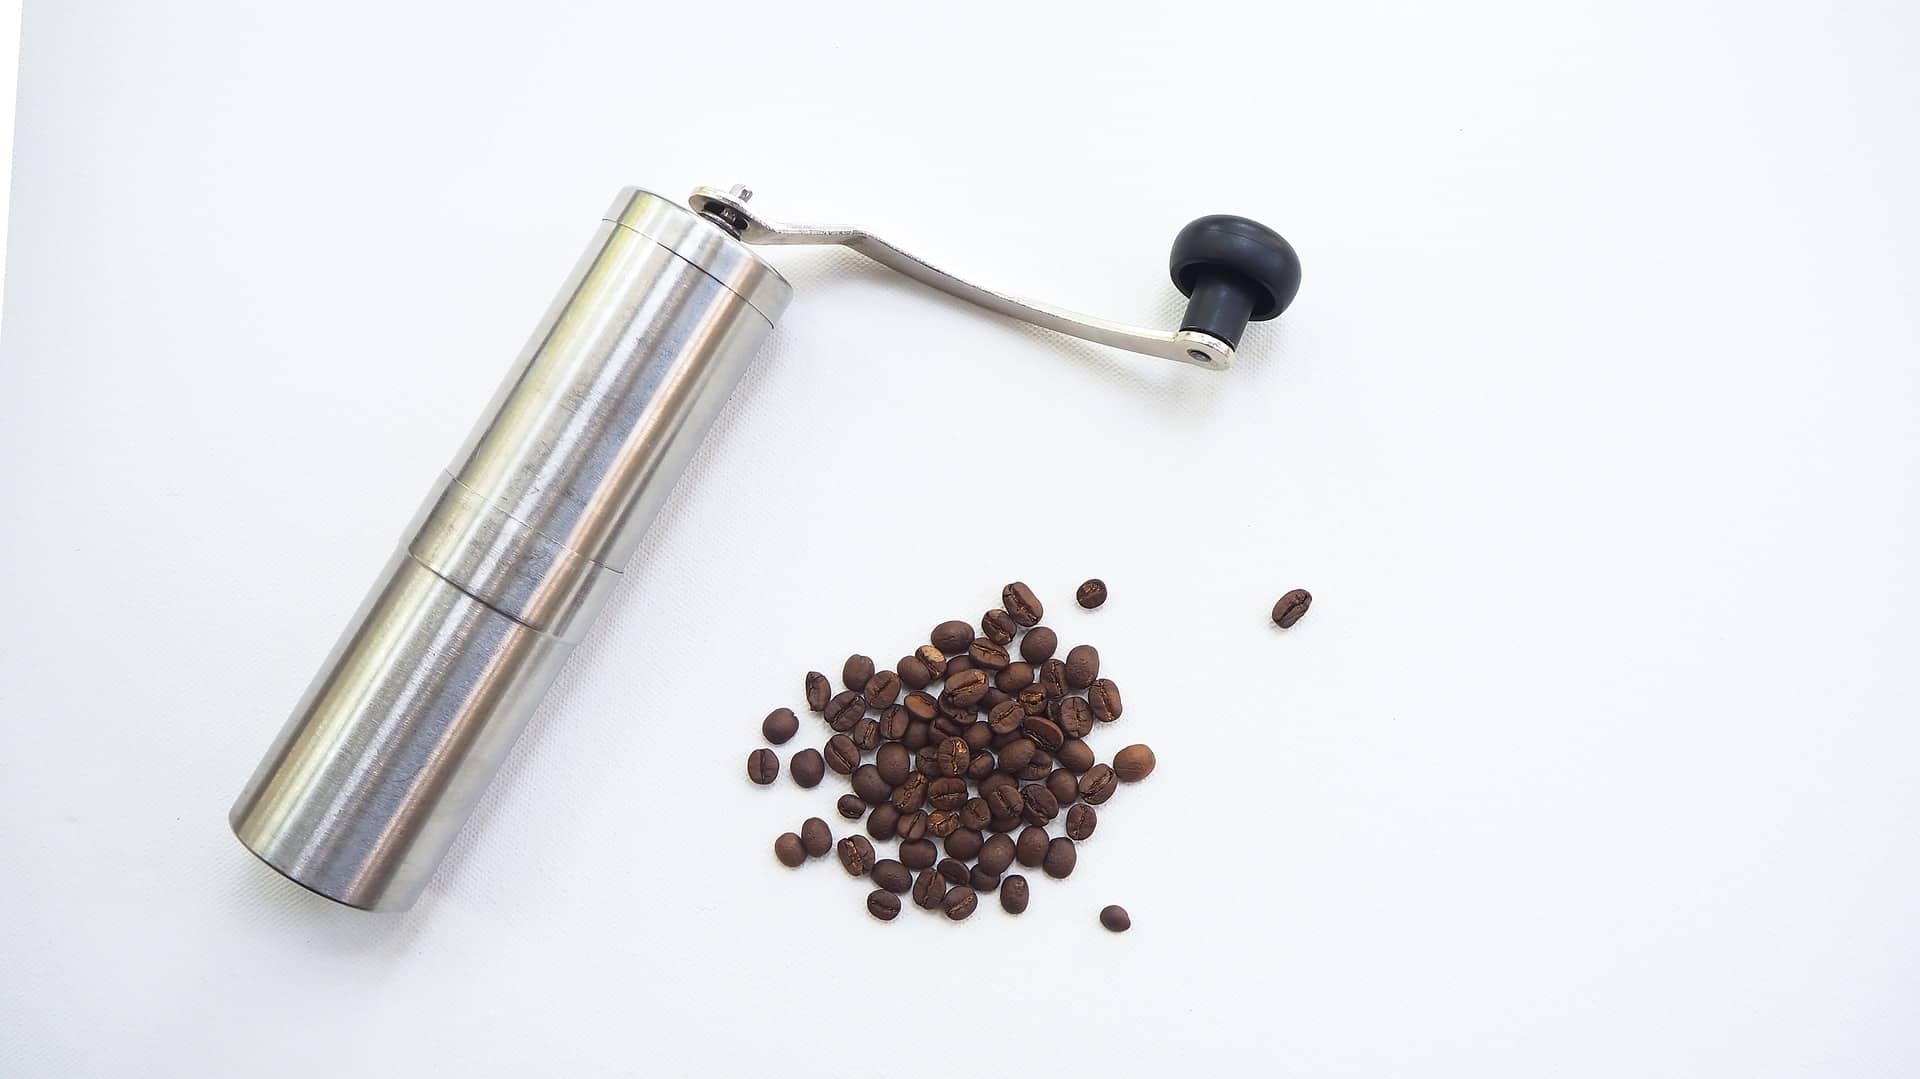
 Being picky about your coffee is one of the milestones of adulthood, as silly as that sounds. It’s kind of like how you only accept intensely sweet milk chocolate as a dessert when you’re a kid, and then slowly start developing the taste for more subtle flavors as you grow older – like tiramisu or scones.