Appliances Reviewed is reader-supported. When you buy through links on our site, we may earn an affiliate commission. As an Amazon Associate I earn from qualifying purchases.
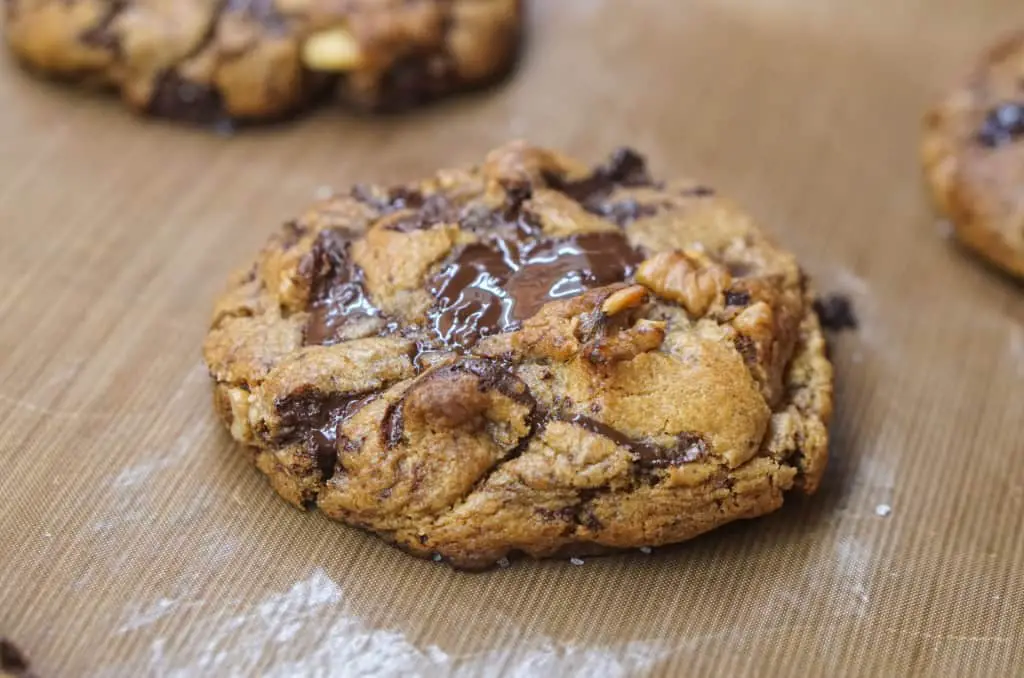
“a crispy chocolate bite that melts in your mouth”
It’s well known that chocolate chip cookies are the most popular and loved sweet snack in the world. So, it doesn’t come as a surprise that there are many recipes and variations to the traditional formula that all claim to be the best chocolate chip cookies recipe.
However, I believe it all comes down to personal preference. For example, just when I thought I’d tried every recipe out there, I found yet another way to make mouthwatering chocolate chip cookies using greek yogurt. Have you ever cooked cookie dough with greek yogurt? Trust me, it makes super soft and chewy chocolate chip cookies. Best of all, the yogurt makes the cookie formula healthier.
Greek yogurt is sometimes used as a substitute for butter (like in this recipe) in order to reduce fat, while still keeping the cookie moist and soft. It will add a rich tangy flavor, plus all the health benefits that come with it. The only thing you need to keep in mind is that too much yogurt and too little flour can result in soggy cookies, so don’t be shy on the flour. Also, don’t beat the dough too much! Mixing too much can make the cookies rise and then sink in the oven, and we don’t want that!
To make this Greek yogurt chocolate chip cookies recipe, you’ll need a baking sheet, parchment paper, and two mixing bowls. The preparation and baking time are 10 minutes each, which means in 20 minutes, you’ll have fresh-out-of-the-oven delicious treats. So, let’s see just how ridiculously easy this recipe is.
The first step is to preheat the oven to (180°C) 350°F.
After this, take a large mixing bowl and combine the brown sugar, butter, shortening, and eggs. Next, stir in the vanilla extract and Greek yogurt. Be careful not to overmix the batter. Stir slightly, just until the ingredients are combined.
Combine the flour, baking powder, and salt in another mixing bowl and gradually stir it in the batter. Beat very lightly just until the dough gets a little dense. If it’s too sticky, add a little bit of flour.
Set the dough aside while you prepare the baking sheet. Line parchment paper over the baking sheet and grease it with cooking oil or melted butter.
After this, take a tablespoon and scoop from the dough, then drop it in one corner of the baking sheet. Repeat the same procedure and spread cookie dough drops all over the baking sheet. Just keep in mind that the dough is going to rise and spread while baking, so don’t place them too close to one another.
Place the baking sheet in the oven and bake for 10 minutes. Pull the rack a bit and check whether the cookies are done. Touch the edges just slightly with a spatula or your finger. If the cookies are firm and stay in place, then they’re done. If the edges still feel a little soft on the touch, then let them bake for 3-5 minutes more.
Once the cookies are done baking, let them cool on a rack for about 20 minutes, or until they reach room temperature. I know it will be hard to resist the temptation, but the waiting is worth it! Never store warm cookies, as you’ll lose the crunchiness. The cookies will go soft and will feel gooey while eating.
Keep yourself busy while the cookies cool, then serve and enjoy!
Prep
Cooking time
Total
Servings
10 minutes
10-15 minutes
25 minutes
30 pieces
Ingredients
1 cup of all-purpose flour
2 cups of chocolate chips
3 tsp baking powder
2 eggs
¾ cup of plain, non-fat Greek yogurt
¼ cup of shortening
1 ½ cup of brown sugar
2 tsp vanilla extract
A pinch of salt
Instructions
Preheat the oven to (180°C) 350°F.
Cream together the brown sugar, butter, shortening, and eggs in a large mixing bowl.
Stir in the greek yogurt and vanilla extract. Mix lightly until just combined. Don’t beat the batter too much.
Take another small mixing bowl and mix the flour, baking powder, and salt. Gradually add the dry ingredients into the batter while stirring. Once you add the flour beat very lightly.
Finally, fold in the chocolate chips and set aside.
Take a baking sheet and line it with parchment paper. Grease with cooking oil.
Use a tablespoon to scoop up from the dough and drop it on the baking sheet.
Leave enough space between the drops of cookie dough because they’ll grow while baking.
Bake for 10 to 15 minutes.
Place the cookies on wire racks to let them cool completely. It usually takes around 20 minutes at room temperature.
Appliances Reviewed is reader-supported. When you buy through links on our site, we may earn an affiliate commission. As an Amazon Associate I earn from qualifying purchases.
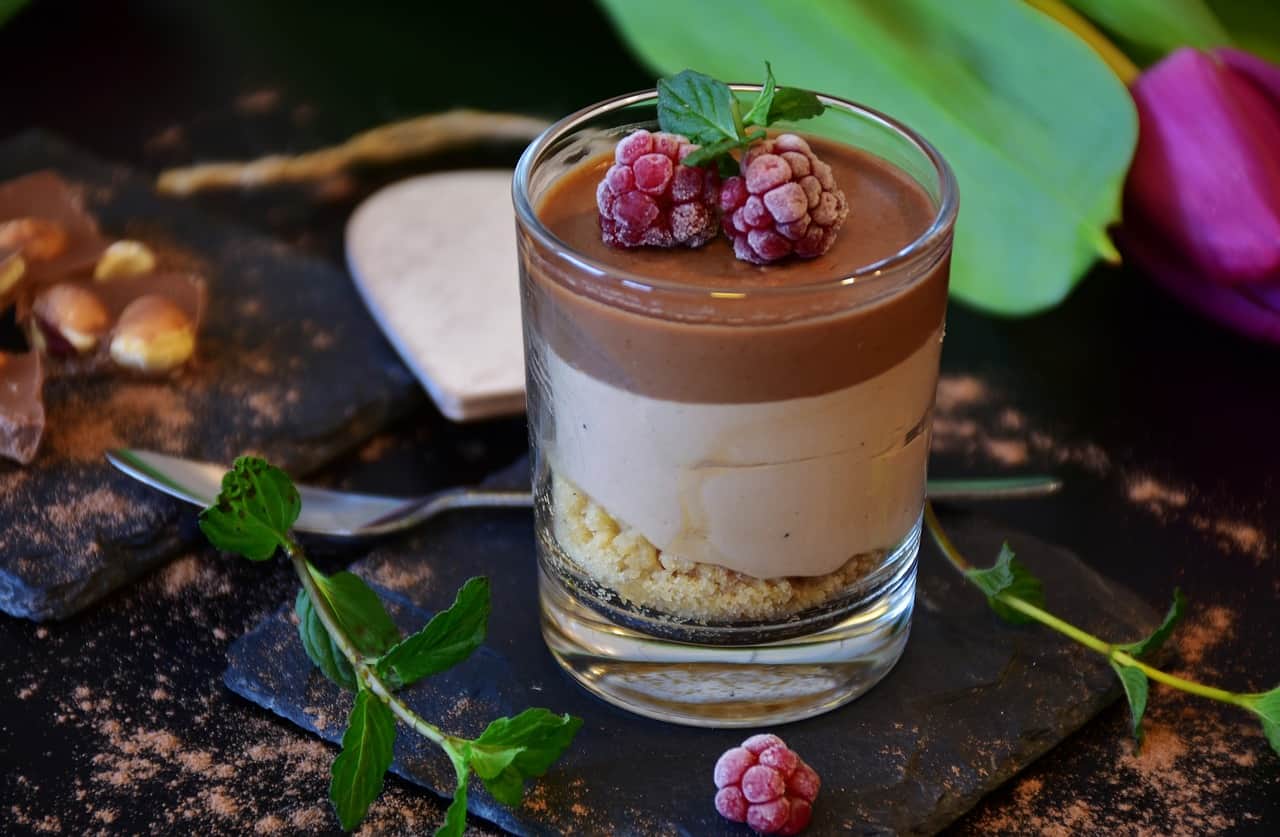
“quick, creamy, and delightfully sweet”
Many delicious recipes have originated from the French culture, and I’m a fan of most of them – with sweet chocolate mousse being on the top of my list! However, there comes a time when you have eaten so much that your body starts craving a different flavor. Since I easily get attached to the things I like, this is usually the time when I start searching for a way to still enjoy a sweet mouse but try different flavors at the same time. Long story short, this no-bake blueberry cheesecake mousse recipe quickly became my new addiction.
It’s soft, creamy, fluffy, and it melts on your tongue – what more can we ask from a mousse?
The cheesecake and blueberry puree make for the perfect balance between sweet and sour. The cheesecake cream is a little bit sweeter, which compliments the tartier flavor of the blueberry puree.
And, the good thing is that this is a very quick and easy-to-follow recipe, which means you can make this blueberry cheesecake mousse anytime your sweet-tooth kicks in. However, you still have to resist the temptation for an hour while it chills in the fridge, so keep that in mind!
To make this recipe, you’ll need two mixing bowls, a blender, plastic wrap, and serving glasses or bowls.
The first step is to prepare the Oreo crust, so you can let it cool in the fridge while you make the cheesecake and blueberry puree. Combine the Oreo cookie crumbs, butter, and sugar in a blender and pulse until all the ingredients are well combined. The mixture will be crumbly, but it should still clump together.
Next, pour the mixture on a plastic wrap and press it to form a flat circle, then wrap it tightly with the plastic wrap. Place the Oreo crumble in the freezer and let it cool for 10 minutes.
In the meantime, take a large mixing bowl and whisk half-and-half for a minute or two. Once it starts to thicken, add half of the icing sugar and stir again.
Take another mixing bowl and combine the cream cheese, vanilla extract, and the remaining icing sugar. Once the ingredients are combined, stir in the mixture into the half-and-half bowl. Set the bowl aside.
To make the blueberry puree, place the blueberries, brown sugar, lemon juice, and water in the blender and pulse for a minute or two. Once the puree is smooth, and there are no lumps, set it aside.
Take the Oreo crumble from the freezer and pour two to three tablespoons on the bottom of each serving glass or bowl. After this, pour a one-inch layer of the cheesecake, then the blueberry puree in each glass, and repeat the same layering process until each glass if full.
Put the glasses in the freezer to chill for an hour. It will be hard to resist, but the mousse tastes so much much better and more refreshing once it’s chilled. After all, we’re making a mousse, not a cream, so have patience.
Before serving, garnish each glass with a fresh blueberry or raspberry. Enjoy!
Prep
Chill time
Total
Servings
15 minutes
1 hours
1 hours 15 minutes
4
Ingredients
For the cheesecake mousse:
1 cup half-and-half
1 cup softened cream cheese
¾ cup icing sugar
1 tsp vanilla extract
For the blueberry puree:
⅓ cup brown sugar
1 ½ cup blueberries
1tbsp lemon juice
3 tbsp water
For the crust:
1 cup oreo cookie crumbs
4 tbsp butter (melted)
2 tbsp brown sugar
Instructions
Combine the Oreo cookie crumbs, butter, and sugar in a blender. Pulse the mixture until all of the ingredients are incorporated, and you have a crumbly blend that clumps together.
Roll the Oreo dough and make a flat circle. Take a plastic wrap and wrap the dough tightly, then place it in the freezer for 10 minutes.
Combine the blueberries, sugar, lemon juice, and water in a blender and pulse until you have a smooth paste with no lumps. Set it aside.
Take a large mixing bowl and whisk the half-and-half. Once it starts to thicken, add half of the icing sugar. Stir for one to two minutes.
Whisk together the cream cheese, vanilla extract, and the remaining icing sugar in another mixing bowl. Stir until smooth, then pour it into the half-and-half mixture. Mix again then set aside.
After 10 minutes, take the Oreo crust out of the freezer. Let it rest for 5 minutes at room temperature.
Prepare a serving glass and add two to three tbsp of Oreo crust at the bottom.
After this, pour a one-inch layer of the cheesecake mousse over the Oreo crust.
Next, pour a one-inch layer of the blueberry puree over the cheesecake mousse.
Repeat the blueberry-cheesecake layering until the serving glass is full.
Do this with the other three serving glasses.
Place the glasses in the fridge for an hour.
Garnish with a fresh blueberry or raspberry on top and serve.
Appliances Reviewed is reader-supported. When you buy through links on our site, we may earn an affiliate commission. As an Amazon Associate I earn from qualifying purchases.
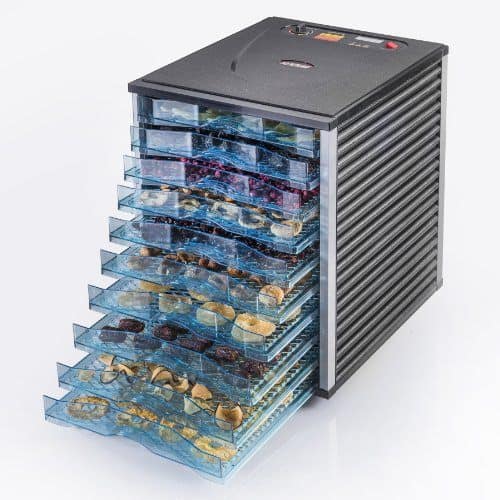
Are you wanting to expand the food dehydration capabilities that your kitchen can produce? Do you end up with a large amount of foods in season that need to be processed? The STX International Dehydrais a kitchen appliance that will work hard to meet your needs. With up to 10 trays that can be used at once and a 3 drawer blank that can be used for bread and yogurt, you’ll get a lot of added versatility with this food dehydrator too. Best of all, you can save over $130 right now just by shopping on Amazon!
What Are the Features of the Dehydra?
This food dehydrator’s main feature is the 800 watts of power that can be used to create a variable temperature level. Adjust drying temperatures from 85F to 155F and have the ability to dry your foods thanks to the horizontal air flow. The trays themselves are dishwasher safe and in total provides 14 square feet of drying space. This is backed up by a 100% fix it or replace it guarantee that is good for 12 months and includes labor and parts.
There are also these additional features to consider with this particular kitchen appliance:
this food dehydrator offers 1.75 inches of space between the trays so that thicker slices of food products can be dried;
the polyscreen tray liners make cleaning up after a dehydration a simple and easy process; and
you don’t have to open the machine up in order to check on the food being dried, helping to improve the final result.
The tray liners do make cleaning up a lot easier, but the holes with the tray liners are a little large for some food items. You’ll need to line them with parchment paper because otherwise the smaller seeds can fall through the trays.
Is There an Advantage To Using This Product?
There’s some versatility with the silicone mats that are included with this product. They are rated at 500F for baking, which means they can double as a baking mat if you want for cookies or even meat. Then baked items just slide off of the mats when they’re done baking, leaving you with a quality end product that will turn your cooking into a memorable experience… for all of the right reasons!
If there was one improvement that could be made with this food dehydrator, it would be with its efficiency. It takes just a bit longer than comparable models to fully dry out food products and that can create some issues with some certain foods. This can be countered by rotating the trays every so often, but does extend the dehydration time.
If you’re looking for an expansive food dehydrator, this kitchen appliance can definitely help you get the job done right. You can raise bread dough, create good jerky, and have a number of dried fruits and veggies as snacks in no time at all! We fully recommend this product because it really can meet the needs of a large family or niche commercial operation.
Appliances Reviewed is reader-supported. When you buy through links on our site, we may earn an affiliate commission. As an Amazon Associate I earn from qualifying purchases.
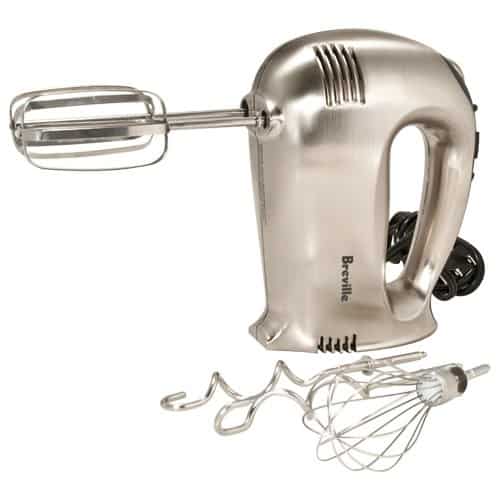
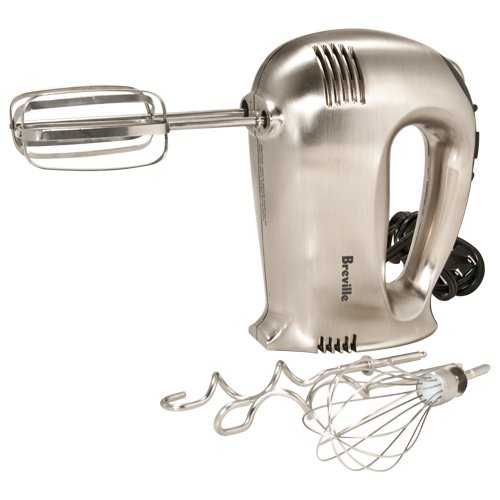
Are you looking for a solid hand mixer that has the power to do virtually anything in your kitchen when you’ve got a baking craving to fulfill? Would you love to own a tool that can transform your cooking from ok to gourmet? What you’re going to want to consider owning is the Breville Handy Mix. This hand mixer is a solid contributor to your kitchen chores with a strong motor, useful features, and a lot of strength. When you shop on Amazon for your hand mixer, you can even save 33% off of the MSRP of this kitchen appliance.
What Are the Features of the Breville Handy Mix?
The primary feature with this hand mixer is the amount of mixing speeds that you get with this small appliance. Instead of 6, 9, or even 12 speed settings like other models in this price point offer, the Breville Handy Mix gives you 16 speed options that you can change with one-touch convenience. Go from light mixing for heavy batter or bread dough to high speed whipping in just an instant.
You may also want to consider these additional features as well of this Breville hand mixer:
it offers users a backlit LCD screen with a timer function so that you’ll have more control over the final product;
it is designed with a heel rest that is designed specifically so that the hand mixer won’t tip over when you set it down; and
it comes with two beaters, two dough hooks, and a wire whisk.
With 200 watts of power and a timer for recipes that require specific mixing times, you’ll have all of the tools you need in your kitchen for a fair, competitive price. Coming in three distinct colors, you’ll be able to select the right tool, the right color, and get it for the right price.
Are There Any Advantages To the Breville Handy Mix?
The one advantage that we noticed straight away with this hand mixer is that the strength of the beaters are improved over other makes and models at this price point. Some beaters look so thin and weak that you don’t really want to use them to make cookie dough or even a thick biscuit! With these Breville beaters, however, you’ll have a kitchen appliance that will give you a lot of confidence in the kitchen.
If there was one design improvement to make with this hand mixer, it would be to have a double whisk instead of a single option. This tends to be something more of a personal preference, but with the one whisk you risk splashing your cream or egg whites into the locking mechanism of the hand mixer and that is a pain to clean out if it happens!
Overall, however, this hand mixer delivers a lot of value for this price point. It’s strong, durable, and will give you the right tool that you may need to get your baking chores done in a snap! If you’re ready to get a hand mixer, we strongly recommend considering this hand mixer to meet your needs because it will do so efficiently and reliably.
Appliances Reviewed is reader-supported. When you buy through links on our site, we may earn an affiliate commission. As an Amazon Associate I earn from qualifying purchases.
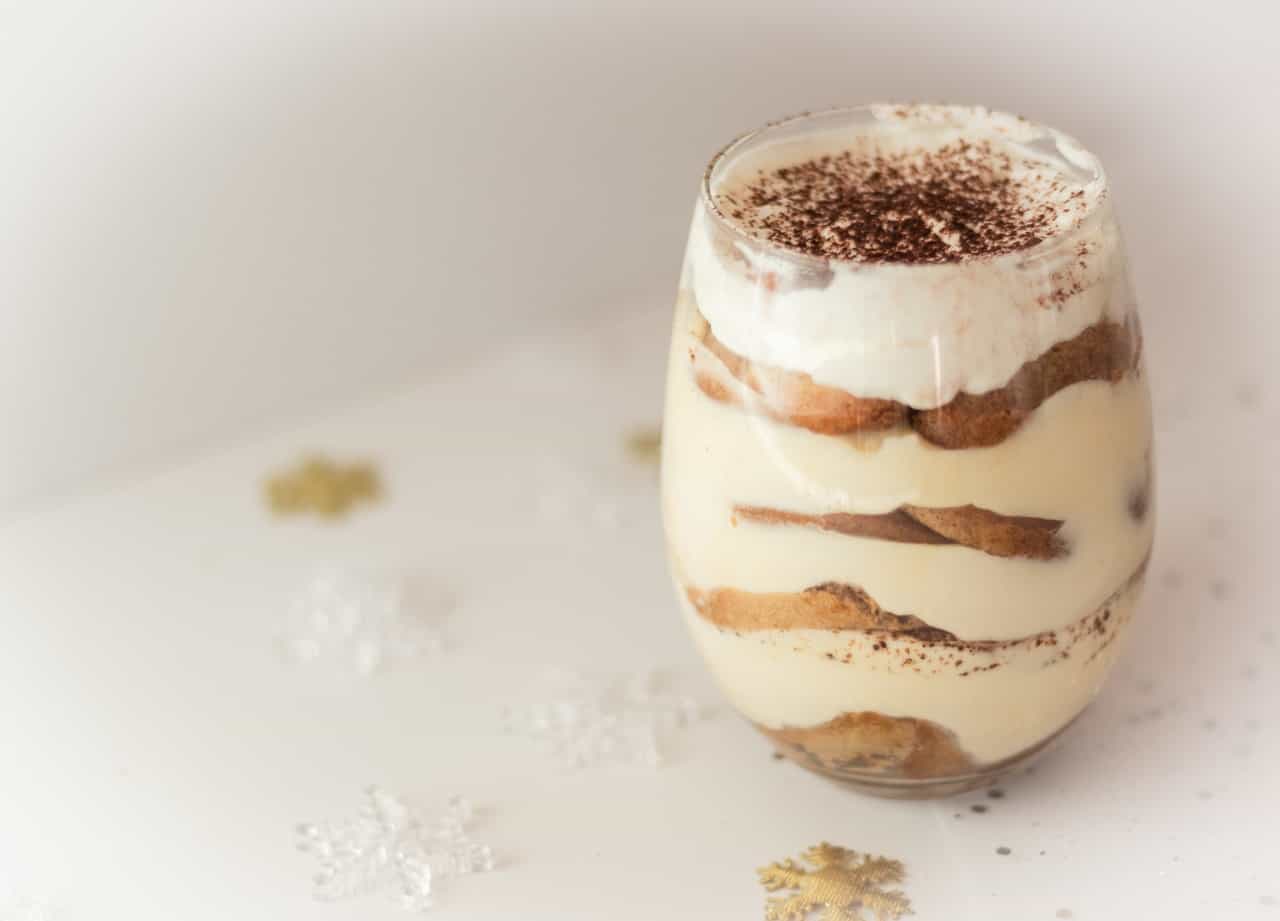
“irresistible chocolate cream biscuit sundae”
Imagine having a s’mores sundae on a chill summer night – if that’s not heaven, what is? Actually, when I think about it more, whenever you decide to have this delicious chocolate marshmallow ice cream with fudge biscuit swirls, it’s going to feel like you’re in heaven because it’s that good. The name might be a mouthful, but you’ll definitely remember the taste.
Whenever we’re talking about a chocolate ice cream dessert, we’re not counting the calories, right? However, if you’re in the mood for a healthier option, I shared this amazing single-serving raspberry ice cream a few days ago, you can check out. I love healthy options for typically high-calorie meals, but sometimes I enjoy turning simple ice cream scoops into rich-flavored desserts. So, thinking along those lines, this time I asked myself “can I turn the popular s’more treat into a refreshing sundae?” It turns out, I can. This yummy ice cream recipe is a s’mores sundae with a twist.
I used cocoa powder, vanilla, hot chocolate fudge, and vanilla bean biscuit crumbs to make the ice cream. The vanilla reduces the bitterness of the cocoa powder and makes it sweeter, while the biscuit crumbs give the ice cream a denser and crisp quality. As a contrast, melted marshmallows are soft and chewy. This is why the layers of marshmallow and ice cream make each bite a perfect balance of the flavors used.
To make this recipe you’ll spend only 15 minutes in preparation, but unfortunately, you’ll have to wait a lot longer before you can eat it! I like to leave the ice cream in the freezer overnight, then layer the marshmallows the next morning. This way, by the time I’m done with my breakfast, I can enjoy this amazing treat. However, I do believe this dessert is best enjoyed in the afternoon, so if you can resist for that long, after lunch would be a perfect time to treat yourself.
You’ll need a saucepan, one big bowl, freezer-safe plastic container, and a rectangle glass dish.
The first step is to heat the heavy cream in a saucepan over medium heat. After two minutes, stir in the vanilla powder (or extract), sugar, cocoa powder, and egg yolks. Continue to cook while stirring constantly. Once the mixture starts to thicken (around 5 minutes of cooking), remove the saucepan from heat and transfer the ice cream blend in a big bowl. Set it aside to rest at room temperature.
After this, make the hot fudge. If you have your own preferred fudge recipe, then feel free to use it. What I like to do is simply melt two cups of chocolate chips together with one cup of milk over medium to high heat for a few minutes. I found that this is the easiest and fastest way.
Once the hot fudge is done, pour it in the ice cream mixture and stir well until the ingredients blend. Then, crush the Viennese vanilla bean swirls and fold in the crumbs into the mixture. You can use different kinds of sweet, vanilla-flavored biscuits, or crackers. Graham cracker crumbles will also work for the recipe, although I personally like the vanilla-flavored biscuits better.
The next step is to transfer the ice cream mixture into a freezer-safe plastic container and let the ice cream freeze over the next five to six hours. You can also leave the ice cream in the freezer overnight and continue the recipe the next morning. Also, I like to point out that I specifically mentioned plastic containers for storing the ice cream, because glass is a poor conductor of heat and it can take a very long time for the ice cream to reach the desirable solid consistency. Here’s a few examples from Amazon.
When the ice cream is completely frozen, we can continue with the second part of the recipe.
Take a saucepan and place it over medium to high heat. Spray the saucepan with cooking oil and add the marshmallows. Cook for five minutes while stirring constantly. The marshmallows won’t melt completely, but you’re looking for a nice and creamy texture. Remove from heat and set the saucepan aside. Take the ice cream out of the freezer and leave it next to the marshmallow creme.
Take a glass rectangular dish and line it with the graham crackers. Pour half of the marshmallow creme over the crackers, then spread a layer of the ice cream. Repeat the layering process and spread marshmallow creme again then ice cream over it. Finally, take a knife and make swirls in the ice cream dish.
Return the dish in the freezer and let it cool for at least two to three hours. If you let the ice cream freeze overnight, then make the marshmallow creme in the morning and then let the dessert freeze again while you have your breakfast and get ready for the day. The time will pass before you even notice it. On the other hand, if you’re at work, you’ll know that when you get home, there will be a chilled dessert waiting for you as a reward for all of your hard work.
When you take it out of the freezer, cut the ice cream dish into eight equal squares. Place a piece of the ice cream on a serving plate and sprinkle with chocolate curls. Garnish with one Viennese vanilla bean swirl biscuit and serve with ice coffee. Share this delicious treat with your friends or family to enjoy it even more.
Prep
Rest time
Total
Servings
15 minutes
8-10 hours
10 hours, 15 minutes
8
Ingredients
For the ice-cream:
2 cups marshmallows
¾ cup cocoa powder
3 ½ cups heavy cream
4 egg yolks
1 cup of brown sugar
1 tbsp vanilla powder
¼ cup hot chocolate fudge (chocolate chips + milk)
¼ cup of Walkers’ Viennese vanilla bean swirls (crushed)
½ cup of Graham crackers
For the topping:
1 tbsp chocolate curls
1 or 2 Viennese vanilla bean swirls
Instructions
Take a saucepan and heat the heavy cream over medium temperature.
After two or three minutes, add the vanilla powder (or extract), sugar, cocoa powder, and egg yolks.
Stir well until the sugar dissolves and the blend becomes smooth.
Continue to cook for another 3-4 minutes.
Remove from heat and let it chill at room temperature for a few minutes while you prepare the hot fudge.
Take a small saucepan, place it over medium heat, and whisk together 1 cup of milk with 2 cups of chocolate chips to make the chocolate fudge. Once the chocolate is completely melted and the fudge starts to thicken, remove from heat and stir it into the ice cream mixture. Mix well.
Crush the Viennese vanilla bean swirls and add the crumbs into the mixture.
Transfer the ice cream mixture into a plastic, airtight container and put it in the freezer.
After five to six hours (or overnight), take a saucepan and melt the marshmallows over medium to high heat. Stir constantly and add two to three tbsps of plain water to aid the melting process. After five minutes, remove from heat.
Take a rectangle glass baking dish and line the graham crackers in one layer.
Pour half of the marshmallow creme over the crackers and pour half of the ice cream over the marshmallow creme.
Repeat the same process with the rest of the marshmallow creme and ice cream. Spread a layer of marshmallow creme, then spread ice cream on top.
Use a knife to make swirls between the layers of marshmallow and ice cream.
Place the sundae in the freezer and let it rest for another two to three hours.
Before serving, sprinkle chocolate curls over the ice cream piece and garnish with a Viennese vanilla bean swirl cookie.
Appliances Reviewed is reader-supported. When you buy through links on our site, we may earn an affiliate commission. As an Amazon Associate I earn from qualifying purchases.
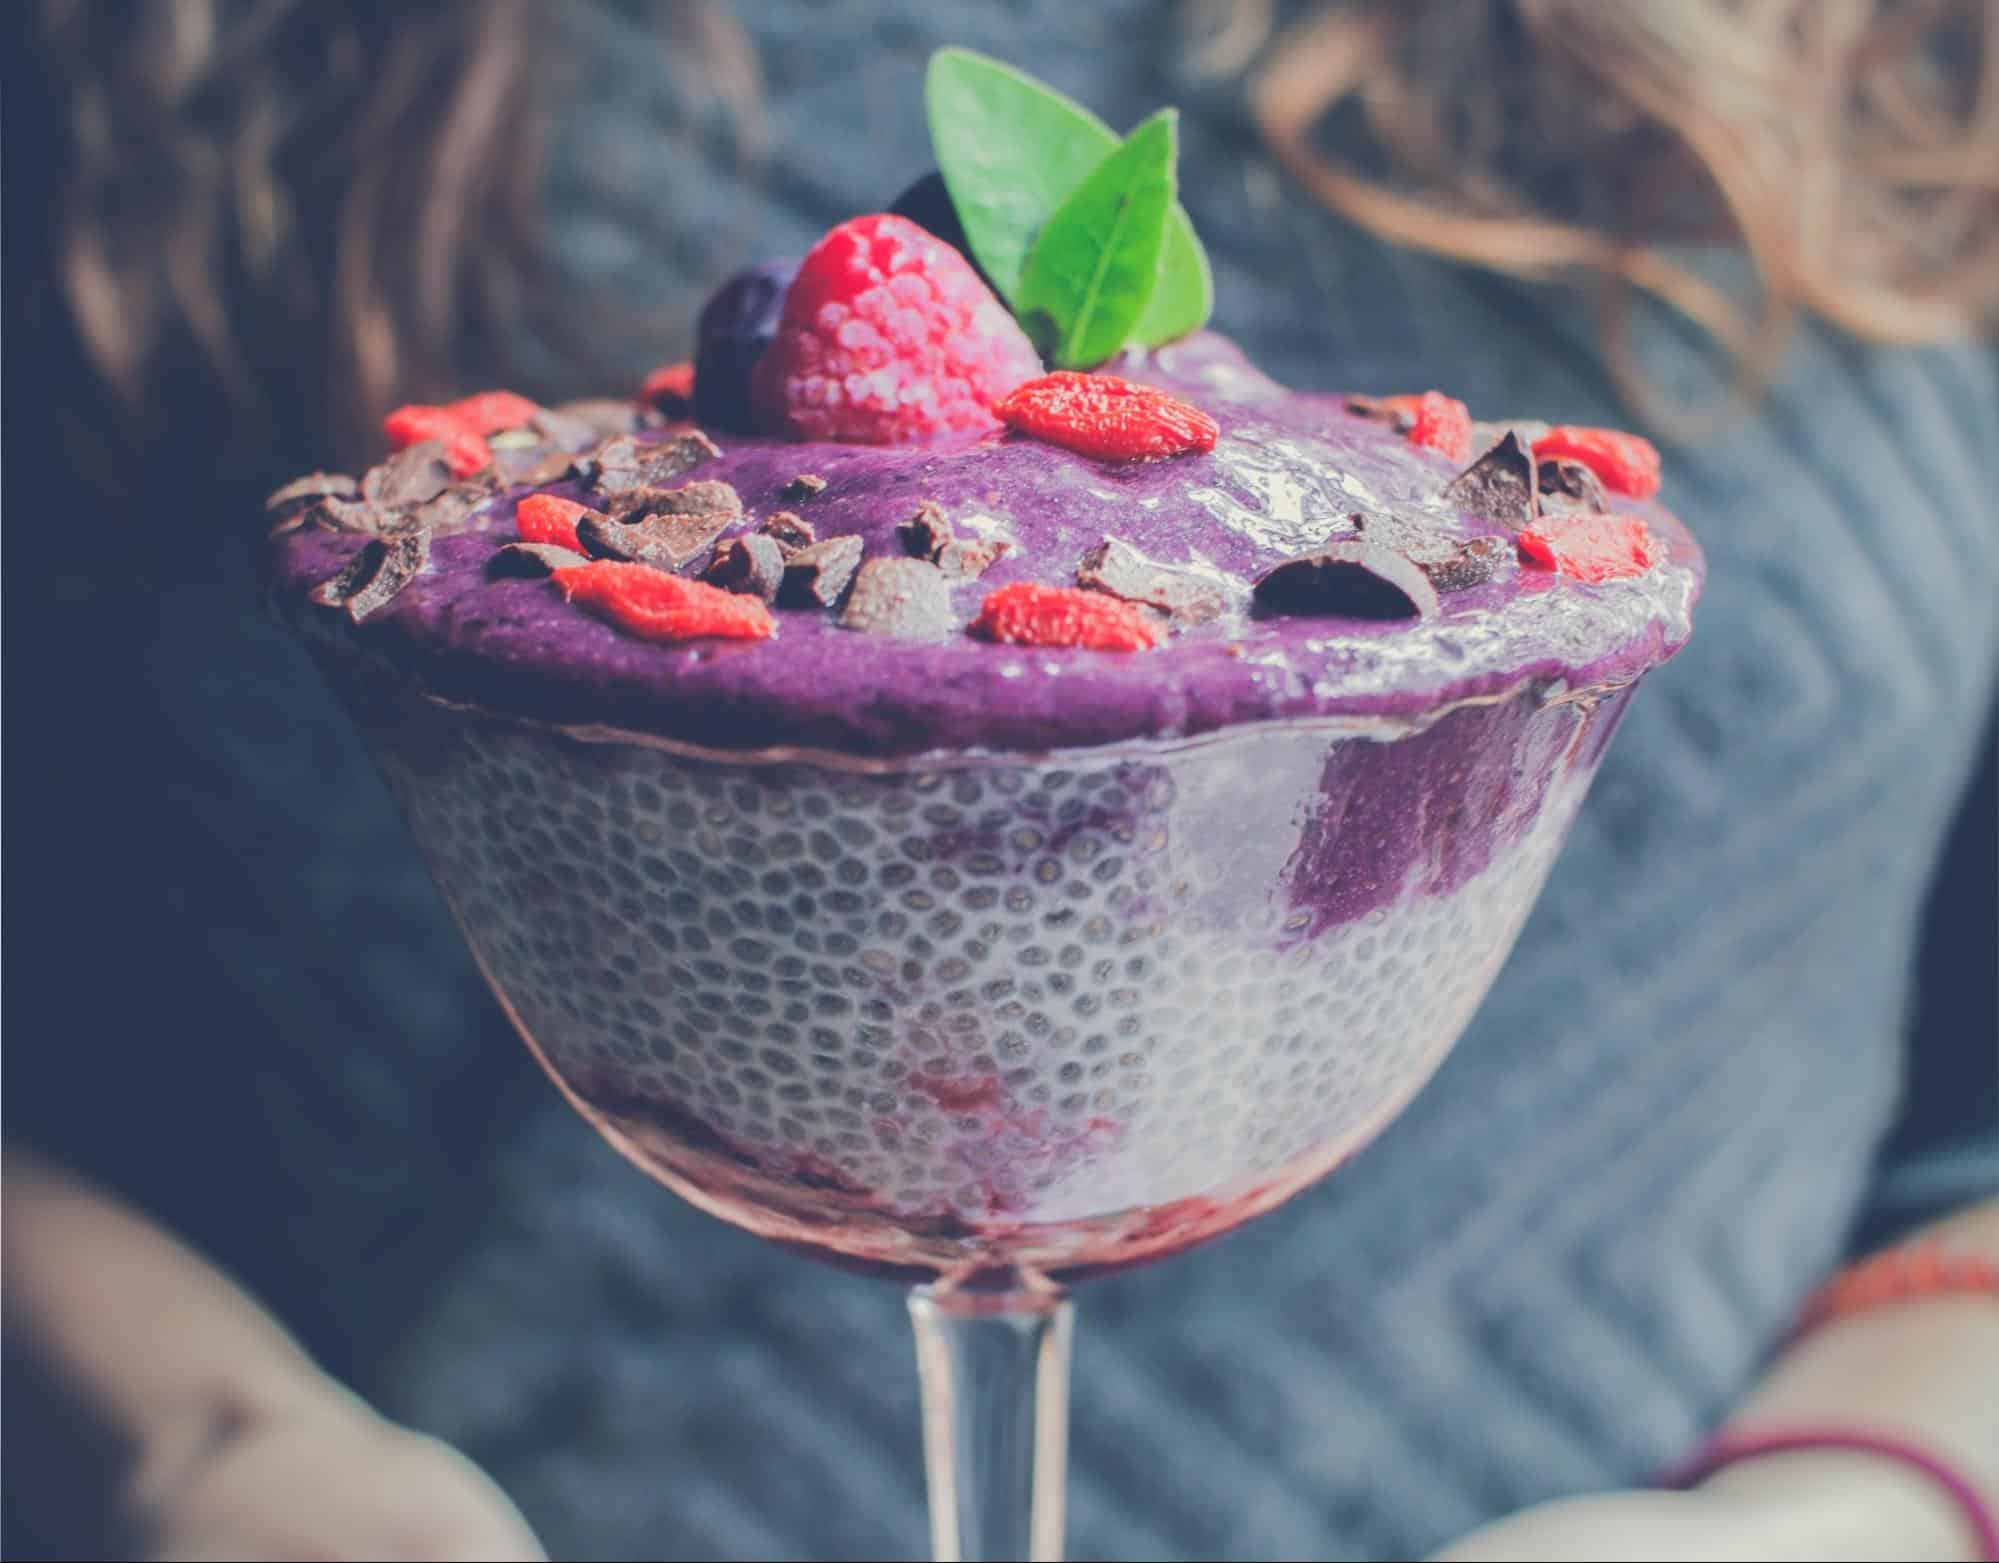
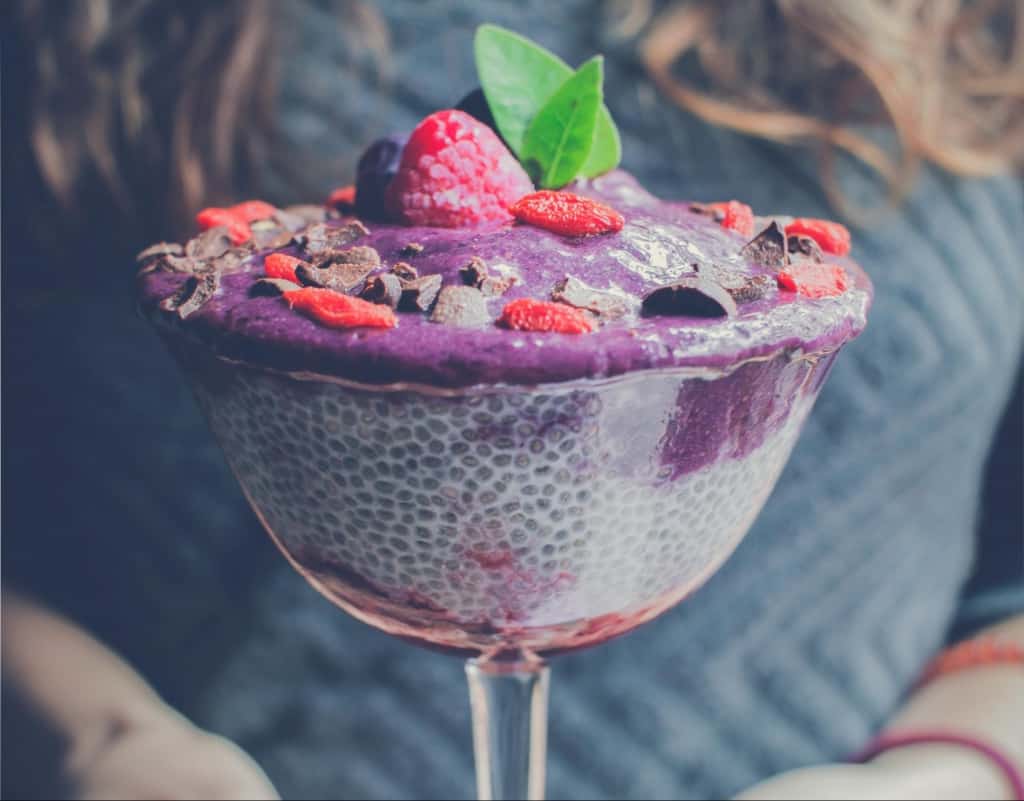
“an amazingly nutritious and tasty cup of raspberry pudding”
Chia seed pudding is one of the most versatile foundations for a sweet treat. This is because chia seeds have no taste, so the pudding will acquire the taste of the ingredients used in combination. As a big fan of this light and healthy delight, I have tried so many flavors including, strawberry coconut, peanut butter cookie dough, blueberry, matcha, cinnamon roll, and all the possible variations with chocolate. Trust me, I can write a mini-book for all the ways you can make chia seed puddings. However, today I’m sharing with you this raspberry chia seed pudding recipe that is definitely a finger-licking flavor and one of my favorites.
I would choose a chia pudding over any other type any day because of three main reasons. First, it’s ridiculously easy to make. Everything that you’ll need for this recipe is a blender (one of these immersion blenders will do), the ingredients listed below, and two small bowls or one bowl and a glass/jar/mug or whatever you have. The preparation time is less than five minutes, although you’ll need to leave it in the fridge for a couple of hours. My tactic is to leave it in the fridge overnight, so that way I have a sweet and refreshing breakfast waiting for me when I get up.
Second, you can adjust the flavor to suit your taste. When you’re making a chia pudding the final result is a very light but also dense and creamy consistency. The taste comes from whatever you put inside the mixture. If you’re a fan of chocolate, you can add cocoa powder with honey as a sweetener, and sprinkle chocolate chips on the top. Raspberries, blueberries, and strawberries are the stars of the fruity, sweet, and sour flavor, while peanut butter is an amazing ingredient when you like something nuttier. In this recipe, I added vanilla and dates as the main sweeteners, but feel free to substitute if you have a specific preference. Just be careful not to overpower the raspberry flavor with other strong ingredients.
Finally, this raspberry chia seed pudding is the only dessert that you can truly enjoy without feeling guilty. It’s good for our health, incredibly nutritious, and it’s low in calories.
Did you know that chia seeds are high in fiber, protein, B vitamins, zinc, magnesium, and Omega 3s? Yes, you can get all that in this tasty dessert, so without further ado, here’s how to make it!
The first step is to add the milk, vanilla extract, dates (without seeds!), and raspberries in a blender or a food processor. Mix until you get a smooth consistency without lumps.
After this transfer the mixture into a small bowl, glass container, mason jar, ice cream jar, or a simple mug. Fill two-thirds of the container, leaving space for the topping. Next, fold in the chia seeds. Stir well until they’re incorporated in the mixture.
Place the chia mixture in the fridge and let it rest for at least 2 hours so that you can let the chia seeds absorb the liquid and get a gel-like consistency. Leaving it overnight is also a great option, especially if you plan to make this recipe for breakfast.
After you put the chia mixture in the fridge, make the topping. Simply place the blueberries, raspberries, and milk in the blender and mix until smooth. Transfer the blend into a small bowl and refrigerate. You can also prepare the topping right before serving the chia pudding, but I like to do leave it cool in the fridge. I find it a lot more refreshing and delicious when it’s cold – it actually reminds me of ice cream.
Once the chia pudding is ready for serving, take it out of the fridge and pour the raspberry-blueberry mixture over it. Finally, sprinkle chocolate curls and garnish with two or three fresh raspberries and one mint leaf between them. This way, not only it tastes delicious, but it looks spectacular too. So, don’t forget to snap a picture and show off in front of your friends and family.
Prep
Rest time
Total
Servings
5 minutes
2 hours
2 hours 5 minutes
1
Ingredients
For the pudding:
⅓ cup chia seeds
1 cup milk (alternative: plant-based milk)
1 tsp vanilla extract
2-3 dates
½ cup raspberries (fresh or frozen)
For the topping:
2 tbsp blackberries (fresh or frozen)
2 tbsp raspberries (fresh or frozen)
2 tbsp milk
Optional:
1 tbsp chocolate curls
2-3 fresh raspberries
2-3 blueberries
1 mint leaf
Instructions
Pour the milk, vanilla extract, dates, and raspberries into a blender. Blend for a minute or two.
Transfer the cream into a small bowl or a glass container. Fill only two-thirds of the container, so you have room for the topping.
Add the chia seeds and stir until the seeds are incorporated into the mixture.
Place the container in the fridge and let it rest for at least 2 hours.
Add the blackberries, raspberries, and milk into the blender. Mix until smooth.
Transfer the mixture into a small bowl and refrigerate.
Before serving, pour the blueberry and raspberry mixture over the chia pudding and sprinkle with chocolate curls.
Garnish with 2-3 fresh blueberries and raspberries on top and one mint leaf.
Appliances Reviewed is reader-supported. When you buy through links on our site, we may earn an affiliate commission. As an Amazon Associate I earn from qualifying purchases.
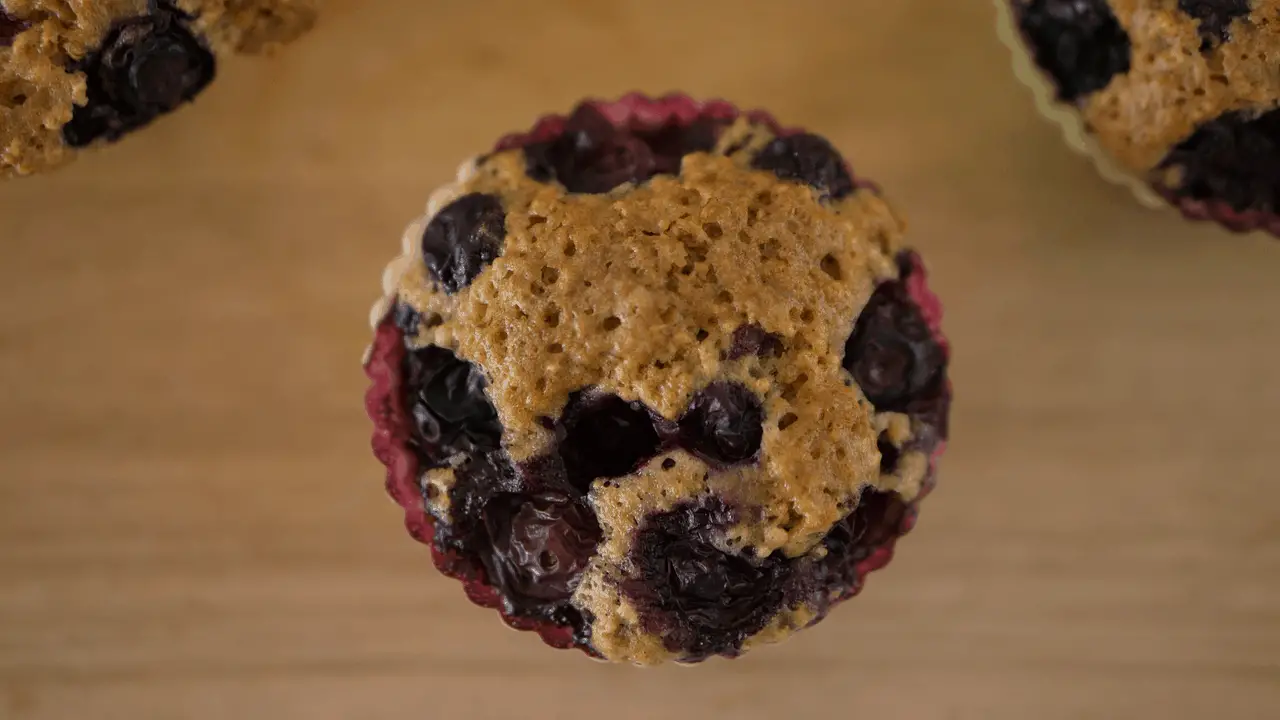
“one muffin a day keeps the stress away”
Working days and busy schedules can be quite a challenge for our meal plan, let alone leave us time to prepare and enjoy a dessert, right? Well, no, because when our devotion to sweet things is put to the test, we adapt and create something like this yummy single serving blueberry muffin mug! It’s the perfect quick delight when you don’t have time to get messy in the kitchen.
It’s incredibly rich in flavor – sweet, yet with a touch of savory to really stimulate your taste buds and make you eat it in a heartbeat. I’m not kidding – one minute you’re taking it out fresh from the oven, and it’s gone the next!
The muffin base is a little drier than cookie dough, but nevertheless very sweet and tender, which is why blueberries are perfect ingredients for muffins. They have a slightly sweet taste with just a touch of acidity. It’s when you bite the muffin that you’ll feel a pleasant “squirt” of juice that really makes you lick your lips in anticipation of the next bite.
Okay, my mouth is already watering, so let’s get down to business. To make this single serving blueberry muffin mug, you’ll need no more than 15 minutes in total, one oven-safe mug or bowl, another mixing bowl, and the ingredients listed below. Now, you may have noticed some of the ingredients are optional, and you can add them or leave them out depending on your personal preferences. For example, I love to sprinkle some lemon zest over my muffins because it enhances that slight acidity from the blueberries, which I adore, especially in my chocolaty deserts. However, if you’re not the person for it, no worries, you can totally skip it!
The first thing you want to do is preheat the oven. I know I usually forget to turn it on when I start preparing my meals, so here’s a friendly reminder! For baking muffins, I’ve found that 180°C (356°F) is the perfect temperature.
Next, take an oven-safe mug or bowl to mix in the dry ingredients for the muffin base – the flour, baking powder, brown (or regular) sugar, salt, and vanilla. Once the ingredients are well-combined, stir in the milk, olive oil, and butter (if you’re using). Butter makes the muffins more tender and moist, and it gives them a more familiar taste, but if you want a lighter dessert, that’s okay. Make sure the butter is well-melted before leaving the mug on the side to make the topping.
Take another mixing bowl and briefly beat together the flour, sugar, olive oil, and coconut flakes. When you get the right consistency, you can the mixture to the mug. But before you do that, first take the blueberries and add them over the muffin. Now, apply the topping over the blueberries.
Sprinkle lemon zest, or maybe chocolate chips (optional).
Place your mug in the preheated oven and let it cook for around 10 minutes.
Remember, it’s going to be very hot when you take it out, so use a protective pad to save your countertop! Finally, let the muffin cool off before eating it. That’s a perfect time to brew a nice cup of tea to enjoy with this muffin.
Considering that a typical oven can easily fit four mugs, you can make blueberry muffin mugs for your whole family or for when your friends when they come to visit and you want to surprise them with something sweet!
Prep
Cooking time
Total
Servings
5 mins
10 mins
15 mins
1
Ingredients
For The Muffin:
¼ cup flour
¼ tsp baking powder
1 tbsp brown sugar
2 tbsp milk (optional: plant-based)
1 tbsp olive oil
30-50g blueberries
A pinch of salt
A pinch of vanilla extract or powder
Optional: 1 tbsp butter
For the Topping:
1 tbsp flour
1 tbsp sugar (optional: powdered sugar)
1 tbsp olive or almond oil
½ tbsp coconut flakes
Optional: lemon zest
Instructions
Preheat the oven to 180°C degrees (356°F).
In a small oven-safe bowl or mug, mix together the dry ingredients: flour, baking powder, sugar, salt, and vanilla powder.
While stirring, add the milk, olive oil, and butter (if using). Make sure the butter is well melted, then set aside.
In another bowl mix in the flour, sugar, olive oil, and coconut flakes to make the topping.
Add the blueberries in the mug, then spatter the topping over the blueberries.
Place the mug in the oven and cook for 10 minutes.
Remove the mug carefully and let it cool at room temperature before eating.
Enjoy the muffin as a breakfast treat before starting your workday, or even better – surprise your kids and be a real supermom!
Appliances Reviewed is reader-supported. When you buy through links on our site, we may earn an affiliate commission. As an Amazon Associate I earn from qualifying purchases.
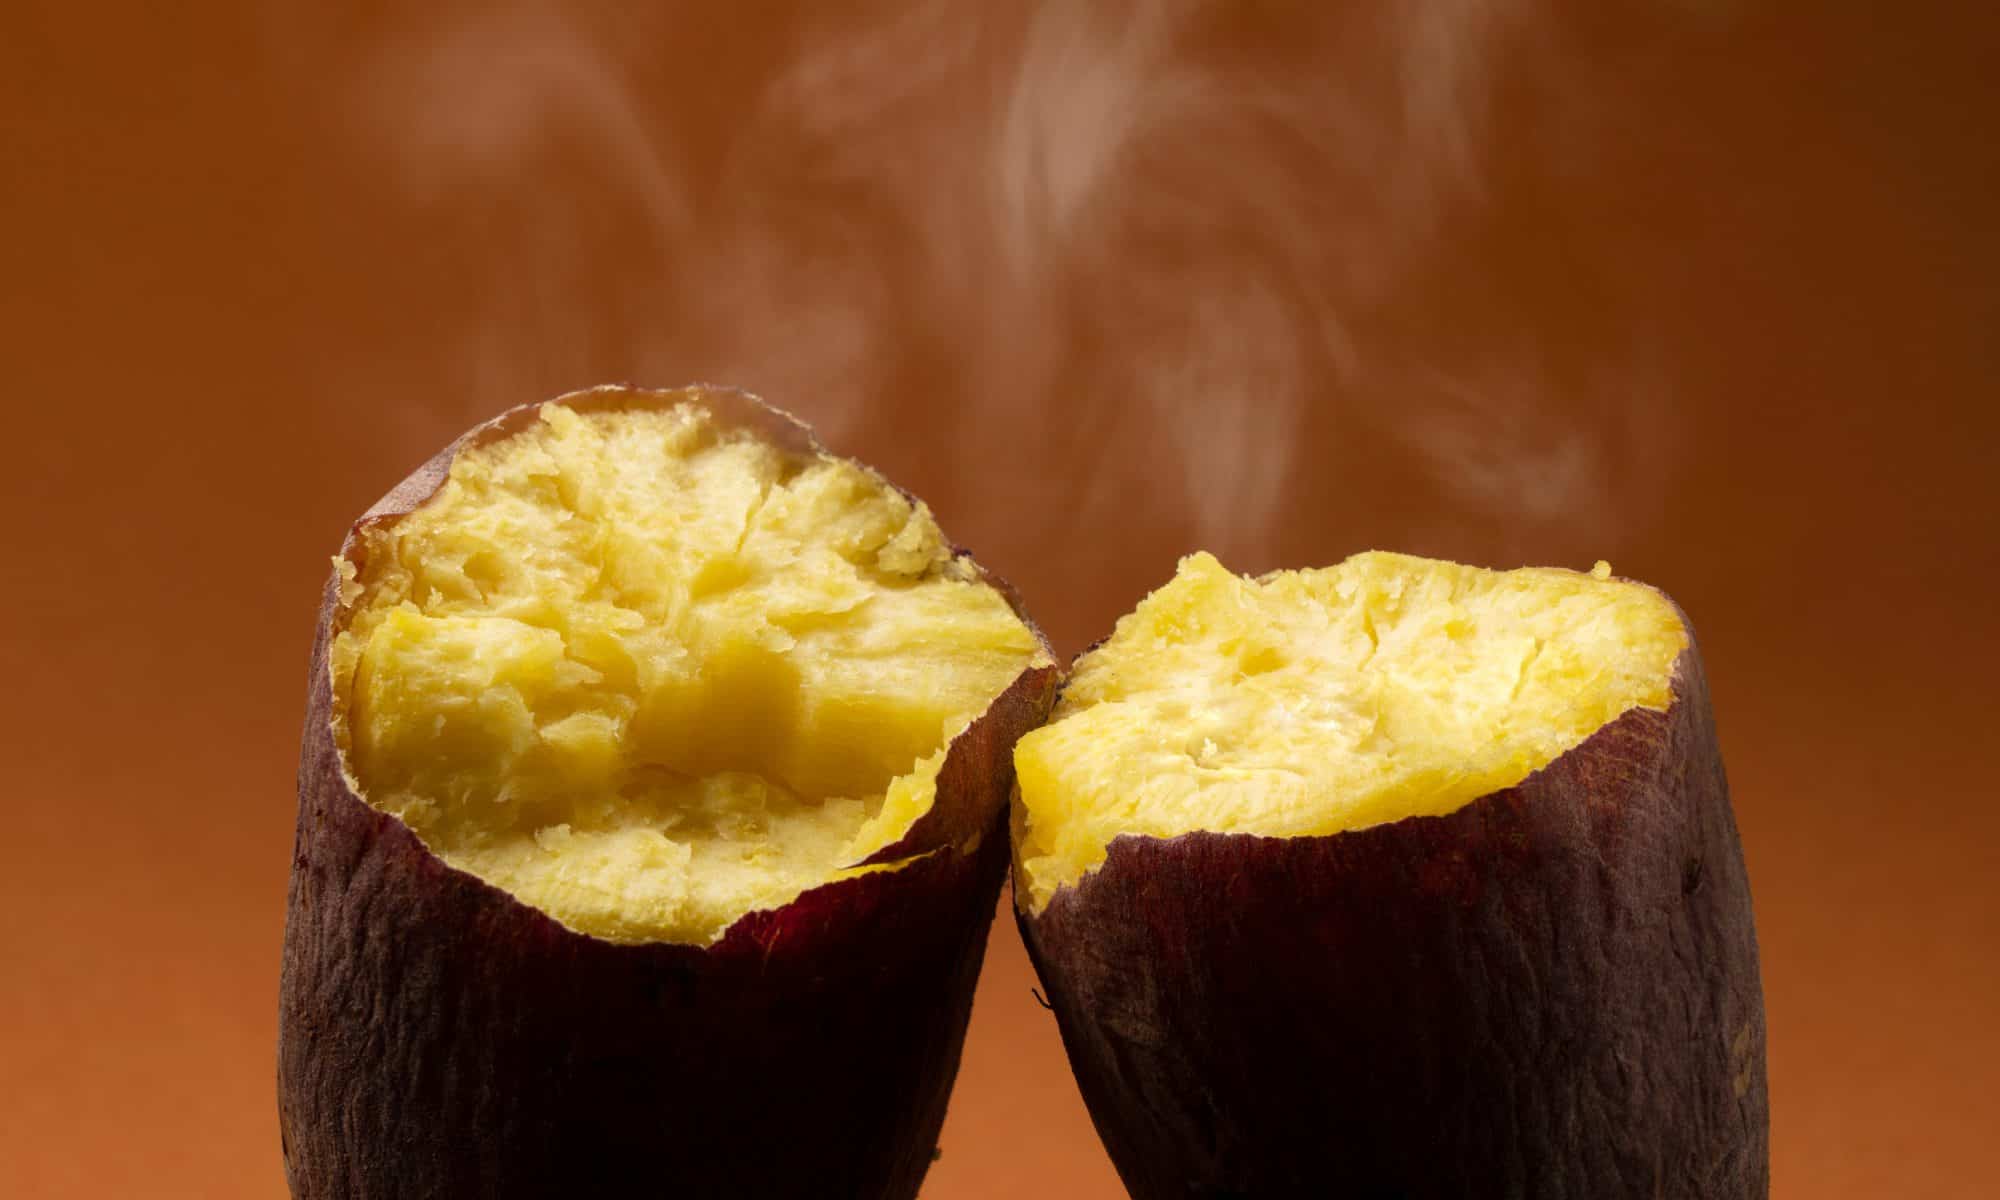
Tasty, healthy, and somewhat exotic, sweet potatoes are the new cool, especially if you have an instant pot to prepare them in.
Some people love them baked, and some prefer crock. However, if you’re in a rush, the best way to make perfectly cooked sweet potatoes with creamy insides is in an instant pot.
But, how long to cook them? There are many recipes applying the cookie-cutter principles when it comes to preparing sweet potatoes, but that simply doesn’t fit the basic logic. As you’ve probably noticed, every sweet potato is different, so it makes no sense to cook them all the same. Due to their different sizes, we need to treat each sweet potato differently and cook them at an appropriate length.
Small Potatoes (width less than 2”): 15 minutes + 10 minutes pressure release
Large Potatoes (width greater than 3”): 1 hour + 10 minutes pressure release
If you are continuously disappointed with the sweet potato recipes you’ve run into, and if they’re often undercooked or overcooked, you’ve come to the right place. We’ll share our secrets for preparing the best possible sweet potato for each potato’s uniqueness.
How to Prepare the Perfect Sweet Potato for Cooking
Since the cooking time for the sweet potato depends on its size and shape, you need to apply some measurements before you initiate the cooking process.
For this, you’ll need a measuring tape (like the one the sewists use) because you want to know the size of the width of your sweet potato.
Cooking Time Depends on Spud Size
So far, we’ve tested many different ways of preparing sweet potatoes in an instant pot, and the formula we’re about to share has shown the best results.
First, you need to measure the width of your potato(es). If the potato is small, and by that, we mean has two inches in width or less, it will take at least 15 minutes to cook, followed by another 10 minutes of pressure release in an instant pot.
In the case of a medium-sized sweet potato, whose width equals 2 to 3 inches, you should coke for half an hour, and once again, additional 10 minutes for the natural release of pressure. This means that mid-size sweet potato preparation will last around 40 minutes.
Finally, for the large sweet potato, whose width is 3 inches or more, the minimum cooking time is one full hour, followed by 10 minutes of pressure release, amounting to 1 hour and 10 minutes of cooking time.
This makes the preparation of sweet potatoes of different sizes a bit complicated to cook at the same time, as each requires a different cooking time. To overcome this problem, you can put the biggest one to cook first, and then add the middle-sized one after 30 minutes, followed by the smallest one after another 15 minutes. After the full hour is over, you can release pressure with all three of them for 10 minutes, and you’re done.
How to Cook Sweet Potatoes in an Instant Pot Step-by-Step Guide
Now that we’ve discussed the necessary time for cooking sweet potatoes, here is a step-by-step process that will make the journey to preparing the perfect sweet potatoes more understandable and straightforward.
Measure the width of your sweet potatoes. If you have a sharp eye, you may also be able to approximate.
Group them in size: large, mid-size, and small ones. This is necessary as you don’t want to put mixed sizes together at the same time in the same pot.
Wash them, scrub them, and prick each potato with a fork to make tiny holes visible on the surface.
Depending on the size of your instant pot, place 1 – 1.5 cups of water in the insert of your instant pot.
Put the trivet on top of the pot.
Place the potatoes on the trivet. In the case of potatoes of different sizes, place the larger ones first.
Set up a timer to 60, 30, and 15 minutes respectively (in case you have all three size groups).
Put the lid on and set up the valve to the ‘sealing’ setting.
Pressure cook the potatoes as long as necessary and according to the instructions given above.
Let the pressure out for 10 minutes and slowly release any remaining pressure.
That’s it. Your dream sweet potatoes with soft inner parts are done!
How to Scale and Adjust this Recipe According to Your Needs
How many potatoes can fit in your instant pot usually depends on the size of the potatoes you’re dealing with. In the case of a 3-quart instant pot, you can put approximately 3 sweet potatoes (the exact number may vary depending on the size), while in the 8-quart one you can fit around 8 pieces. The 6-quart potatoes usually fit between 4 and 6 sweet potatoes for cooking at the same time.
If you want to cook potatoes in multiple layers in your instant pot, we recommend you use no more than 2 layers to ensure that all your potatoes cook evenly.
No matter how many potatoes are being cooked at once, the post-cooking pressure time will always remain the same.
Even if you want to cook just a single potato, you can still apply the same procedure.
After cooking sweet potatoes in an instant pot, if you don’t eat them all immediately (which we doubt will happen), you can store them in a container in the fridge for up to 4 days. During those 4 days, you can reheat them in a microwave or in the regular oven at 350 degrees Fahrenheit. Finally, you can also freeze them by packing each potato individually in a wrap and leaving them in the refrigerator for one day or night before moving them to the freeze. They can keep in the freezer for up to 3 months.
Final Thoughts
Over the past several years, sweet potatoes have seriously grown in popularity, but so have instant pots. When you are in a rush and don’t want to waste your time on long, slow-cooking recipes (that certainly taste great otherwise), preparing sweet potatoes in an instant pot is a great idea. Not only will you get a fabulous and tasty result, but you will also save up an immense amount of time.
To achieve the best possible instant pot sweet potatoes, simply follow the instructions we provided above, measure the width size of each potato that you want to cook, and organize the potatoes according to the size of your instant pot. In case of leftovers, you can keep them in the fridge for a couple of days, heat them up in both microwave and oven, and keep them in the fridge.
Appliances Reviewed is reader-supported. When you buy through links on our site, we may earn an affiliate commission. As an Amazon Associate I earn from qualifying purchases.
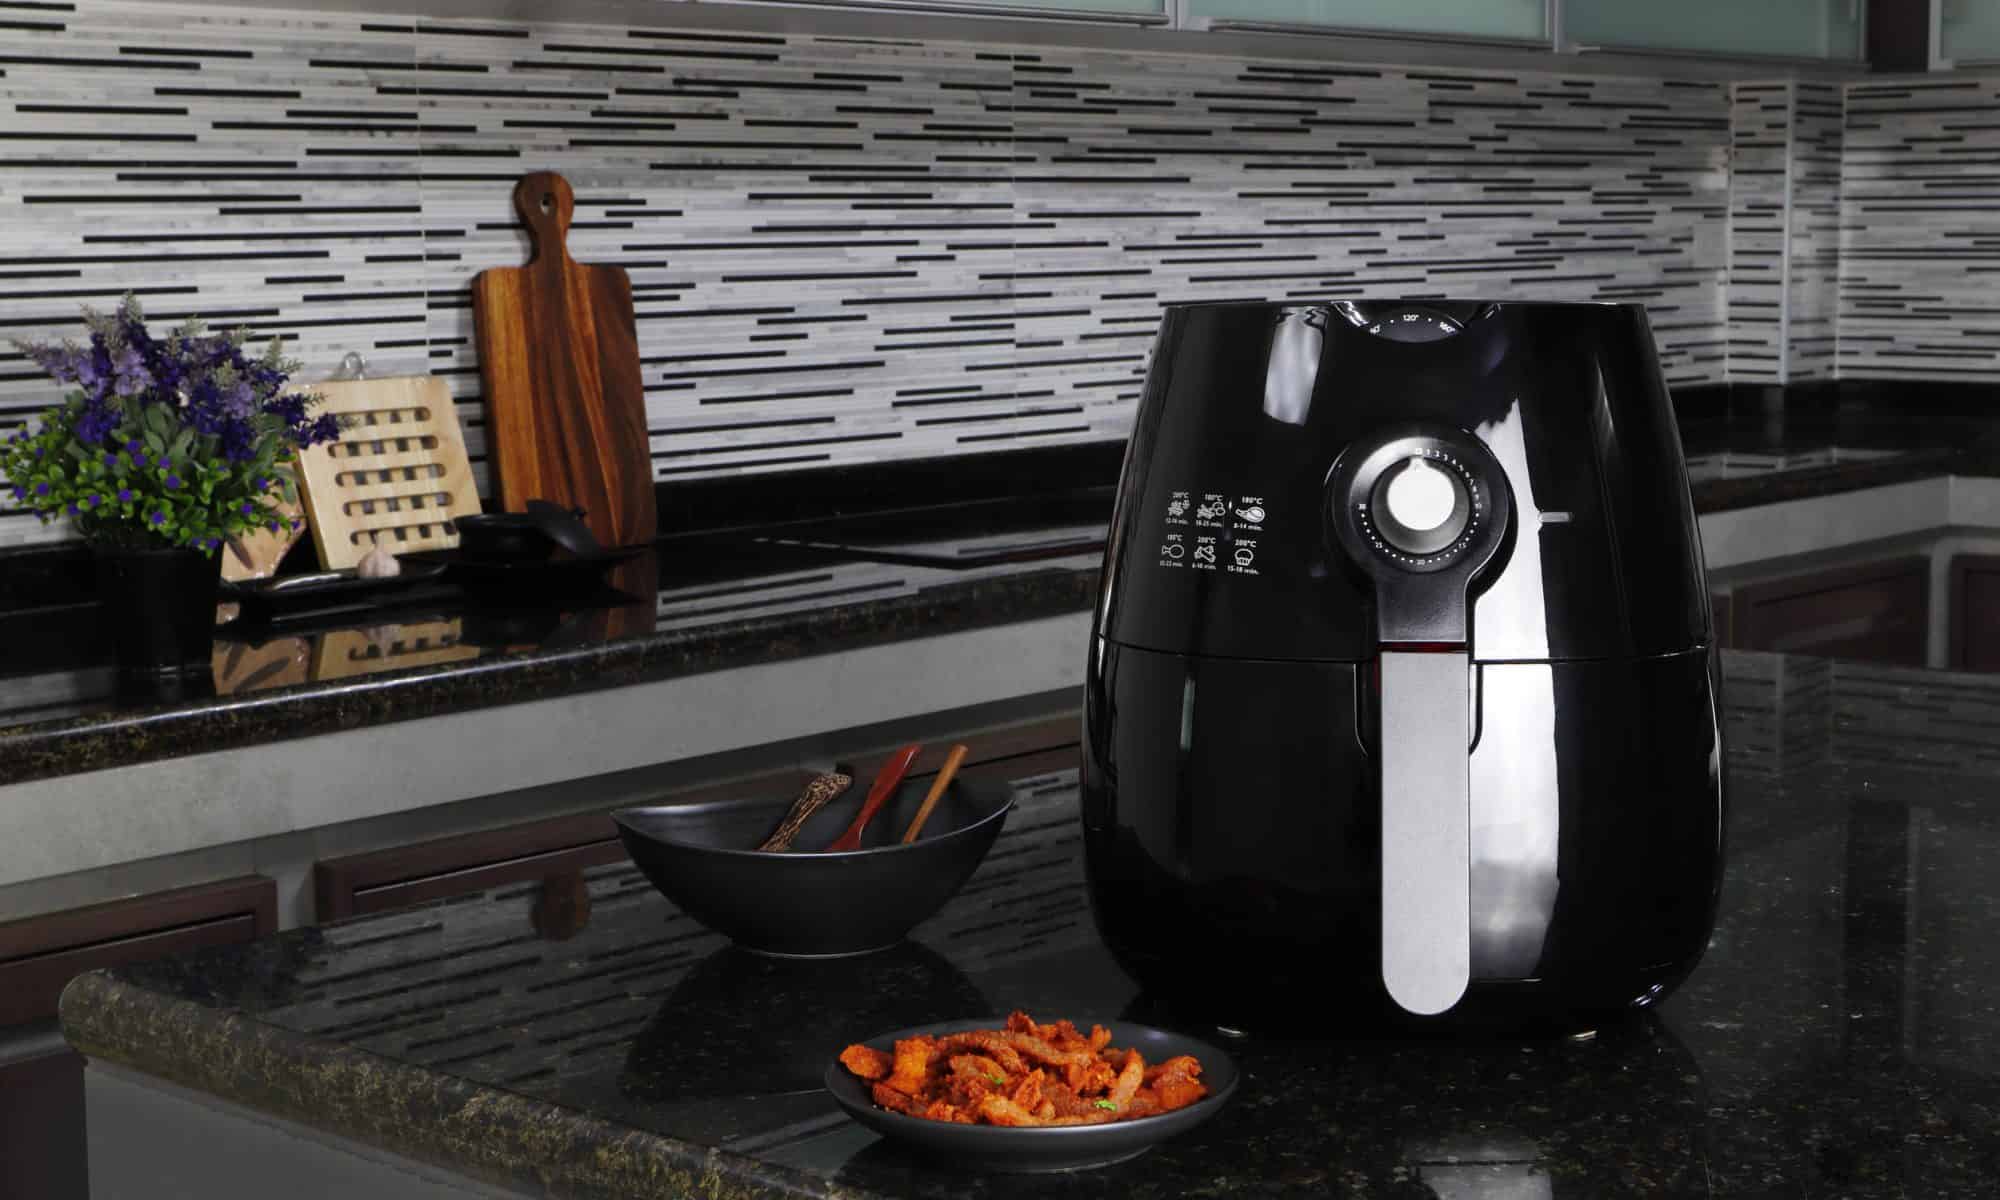
In this day and age, when more and more people are looking for healthier cooking alternatives, the air fryer has become a popular cooking appliance that emulates the results of deep-frying using just hot air and little to no oil.
The best thing about it is that everything can be air-fried – from prepackaged chicken wings and handmade French fries to roasted veggies and fresh-baked cookies.
There is, however, one thing you should do before cooking, and that’s preheating your air
fryer and today we’re here to help you learn how. But before we get into that, let’s first start with some air fryer basics.
The Process of Using an Air Fryer
Air fryers have a heating mechanism and a fan in the upper part of the inside. When you turn it on, heated air flows down and around the food in the fryer-style container. The quick hot air circulation allows the food to get crispy, as it’s similar to deep-frying but without the oil. The fact that you can get this result without all the grease makes the air fryer much healthier.
You can, if you wish to, add just a tiny bit of oil, like a few drops or a spoonful, to make the food even crispier.
Step-By-Step Guide on Using Your Air Fryer
If you’ve already purchased an air fryer, or you are on your way to do so, we believe our short and easy step-by-step explanation of how to operate it can give you more confidence in cooking with this appliance.
1. Fill the Basket With Food
There are different sizes of air fryers. The size determines the amount of food you can prepare and how many dishes you can make simultaneously. Open the basket, fill it with food, but don’t overfill it.
Circulating hot air around the food is how air fryers function. The circulation can be limited if you pack food too tightly, steaming the meal instead of crisping it properly, and the end result is that it will be cooked unevenly.
To be sure you don’t overfill the air fryer, don’t pack in all the food you can fit inside it. After you fill the basket with food, add 1 or 2 tablespoons of oil if you want. Although oil is not essential, it will aid in the crisping of the dish.
2. Decide on a Time and Temperature
Depending on the meal you’re preparing, air fryer baking time might range from 5 to 25 minutes.
3. Allow the Meal to Cook
To ensure the food crisps up evenly, you may need to rotate it halfway through the cooking process.
4. Keep It Clean
When you’re done cooking, don’t forget to clean your air fryer.
Why Do You Want to Preheat Your Air Fryer?
We’ll explore why with a simple example.
Let’s compare cooking with an air fryer with cooking on your kitchen stove or furnace.
For instance, you want to make fish or vegetables. When cooking on your stove, you will use a pan; if you use your furnace, you’ll use a pot.
With the first method, you don’t put your meat in a cold pan – you preheat the pan, make it sizzling hot, put some oil in it, and then throw in your meat or vegetables. Or, if you’re baking a delicious vegan casserole, you preheat the oven before you put the food in. That’s the way of cooking, and that’s how air fryers work, too!
The only time you shouldn’t preheat your air fryer is when warming up food leftovers or when baking bread that you can also bake in the oven. You place them in the oven and then check periodically if the bread is done baking or if the leftovers are heated.
But with most food, for instance, fries or chicken, you always preheat your air fryer. Luckily, the preheating only takes a couple of minutes, so it doesn’t cause any delays to your lunchtime preparation.
Types of Air Fryers
Even though there are various models of air fryers on the market, they can be divided into two main types: basket air fryers and convection oven air fryers.
A convection oven air fryer is a turbo oven with an installed air fryer. It makes air frying in your range a breeze with convection fans swiftly circulating heated air over the food, giving it a fine crisp.
A basket-type air fryer is a type that does exactly what it says – it cooks meals in a basket. The basket features a handle for convenient tossing/flipping of the dish at one or more intervals while cooking.
Air fryers can be further divided into digital, analog, and classic, and each of these is preheated differently. Let’s see how.
How to Preheat Your Air Fryer
You might have a robust digital air fryer, and if you put it to the highest setting, it will reach the temperature in two to three minutes. It’s fast and quick, way faster than a regular oven.
If you have the classic air fryer, that one is a little less powerful, but still, it will reach the desired temperature in a couple of minutes, and you’re ready to go.
Digital Air Fryer
Choose a temperature, and hit go. For example, say you want to preheat your air fryer to 50 degrees Celsius (120 degrees Fahrenheit). You only need to set the temperature and the air fryer will do its job. You’ll hear a beeping sound signaling that the appliance is preheated, and you’re ready to start cooking.
Analog Air Fryer
An analog air fryer features two LEDs – one is a temperature indicator and the other indicates that the power is on. You also have a knob for the timer. You can set the temperature and then turn the knob. Usually, this type of air fryer is really quiet, and although the tech is older, it works great.
Initially, the temperature indicator LED is green, and when the air fryer reaches the desired temperature, the green LED indicator will turn off, alerting you that it’s preheated.
Classic Air Fryer
The classic air fryer is the easiest to use. It will signalize when it’s preheated with a bell.
What Happens if I Don’t Preheat the Air Fryer?
If you don’t preheat your air fryer, a variety of problems might happen:
Cooking time will increase.
The food won’t get as crispy.
If you’re cooking in stages, the first batch will take longer to cook, and if you’re not careful, the following batches will burn.
The meal may be overcooked or undercooked.
Every air fryer has a unique wattage that warms up at a different rate.
Follow the instructions in the recipe; if you don’t, your dish might not turn out as planned.
Frequently Asked Questions
Q: Do I take the basket out of the air fryer while preheating it?
A: You should keep the basket in. Many models won’t even turn on if the basket isn’t in place.
Q: Can I use baking paper to preheat my air fryer?
A: No! Food is used to weigh down the baking paper, or they will burn while preheating.
Summary
Step-by-step guide on using your air fryer
Fill the Basket With Food
Decide on a Time and Temperature
Allow the Meal to Cook
Keep It Clean
Conclusion
Due to their convenience, speed, and method of cooking, air fryers are here to stay. In terms of preheating – think of this appliance like a stove that’s quicker and you can’t get wrong!
Most air fryers have their unique method of alerting us when it has reached the desired temperature.
Please be aware that you can also buy an air fryer that doesn’t come with this feature, so shop wisely!
Already have an air fryer? Share your favorite recipe with us! Looking to buy an air fryer? What type looks the most appealing to you?
Appliances Reviewed is reader-supported. When you buy through links on our site, we may earn an affiliate commission. As an Amazon Associate I earn from qualifying purchases.
Coffee is all about taste. Sure, it’s the world’s go-to beverage for a morning pick-me-up, thanks to its stimulating caffeine content, but most of us don’t drink coffee just to get a kick out of bed. We drink coffee because of its unique, delicious flavor.
However, coffee beans don’t exactly come out of the ground with that signature taste we all know and love. The key to bringing out that characteristic, rich flavor of coffee is roasting.
In any case, there’s no single type of coffee roast. Whether it’s in a specialty coffee shop or just the local market, you’ve noticed that there’s a variety of coffee roasts, ranging from light to dark, and each of them has a unique flavor. To help you decide what type of roast you’re into, let’s take a look at the different types of coffee roasts, as well as how roasting changes the taste of the green coffee beans.
What’s Coffee Roasting?
Roasting green coffee beans triggers a chemical reaction that changes the taste of the coffee, turning it into a consumable product. While unroasted green beans have a similar makeup to roasted coffee – like the amount of caffeine, protein, sugar, and acid – they lack the beautiful taste that roasted coffee has been giving us since roasting became a thing in 15th-century Persia and the Ottoman Empire.
Several chemical reactions occur when green beans are roasted. One of them is the Maillard reaction – a chemical reaction between amino acids and reducing sugars – which is also responsible for the beautifully popping flavors and colors of seared steaks, caramel, toasted bread, marshmallows, cookies, chocolate, and even beer!
Guatemalan green coffee beans in their natural habitat
The different types of coffee roasting are a result of how long and at what temperature coffee beans are roasted. In general, beans are roasted by quickly increasing their internal temperature to high degrees, and then being quickly cooled to end the roasting process. Unlike green beans, roasted beans have that scent that, to us, is coffee, and are crunchy, since all the moisture has been removed.
For the most flavorful cup of coffee, you’ll want to use freshly roasted and ground beans. You can always ground your beans yourself by getting a great little manual coffee grinder for your home.
The Different Types of Coffee Roasts
Let’s take a look at the different types of coffee roasts, what temperature they require, how they taste, and what some popular roast names are in each category.
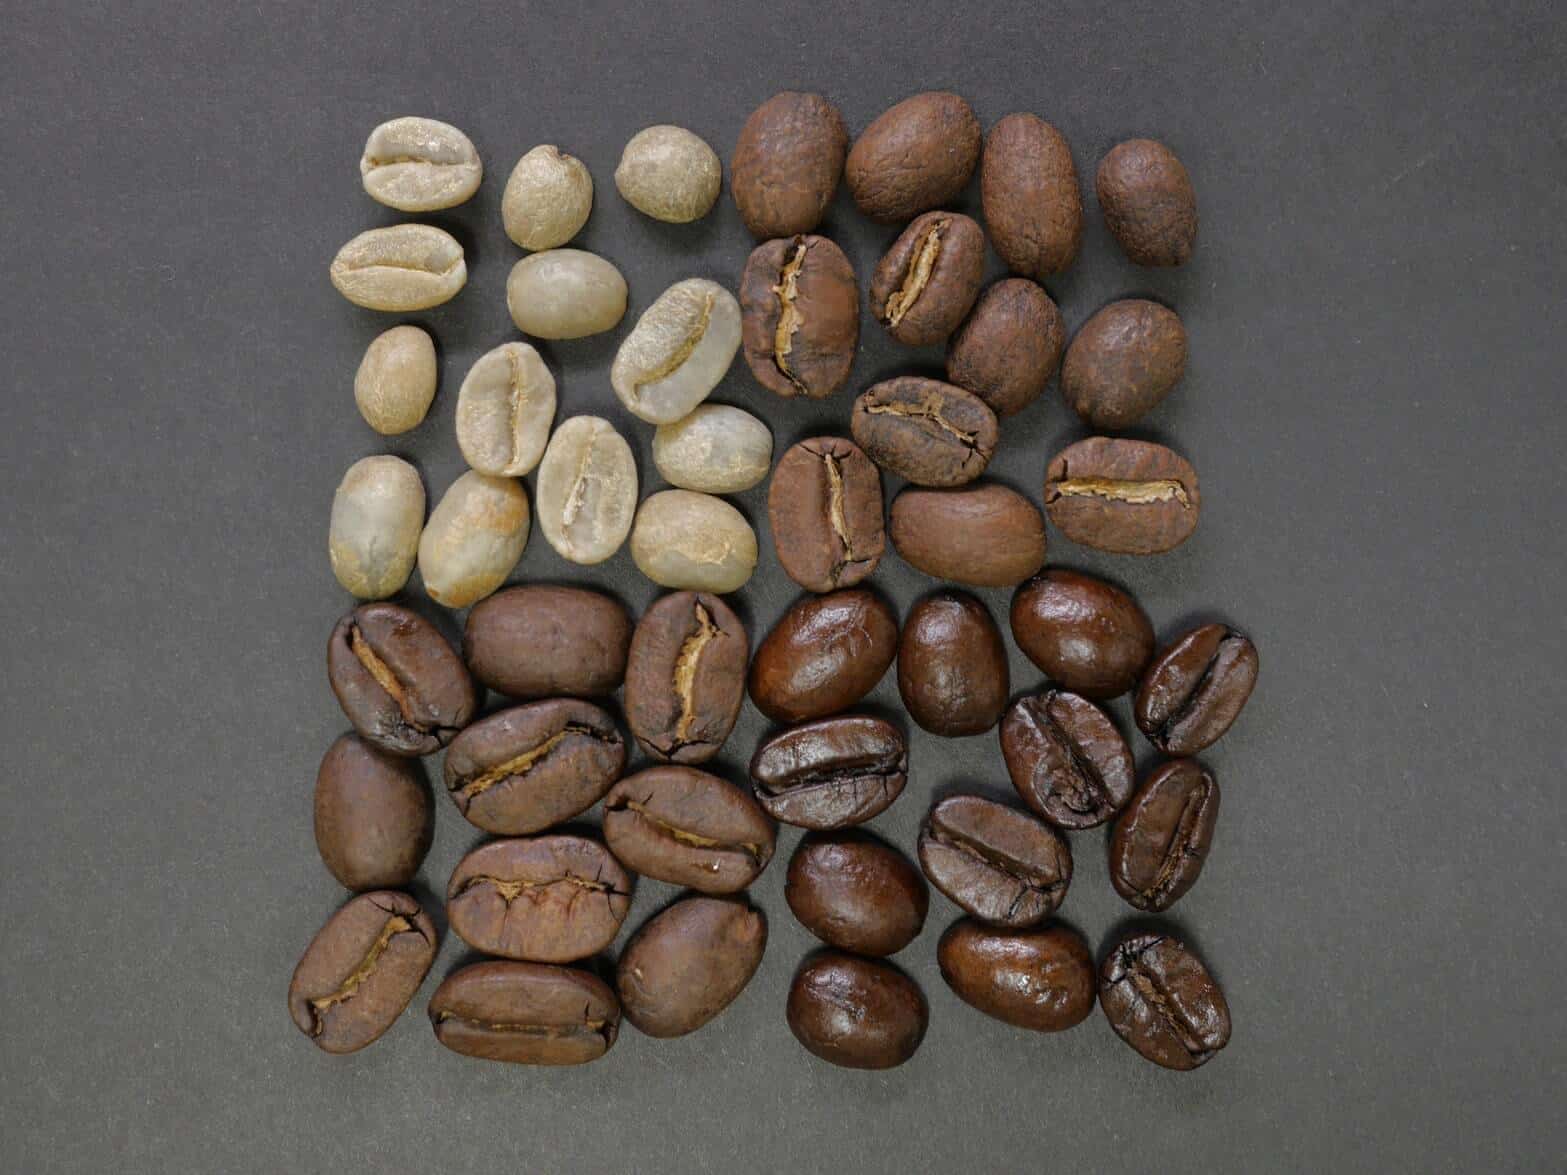
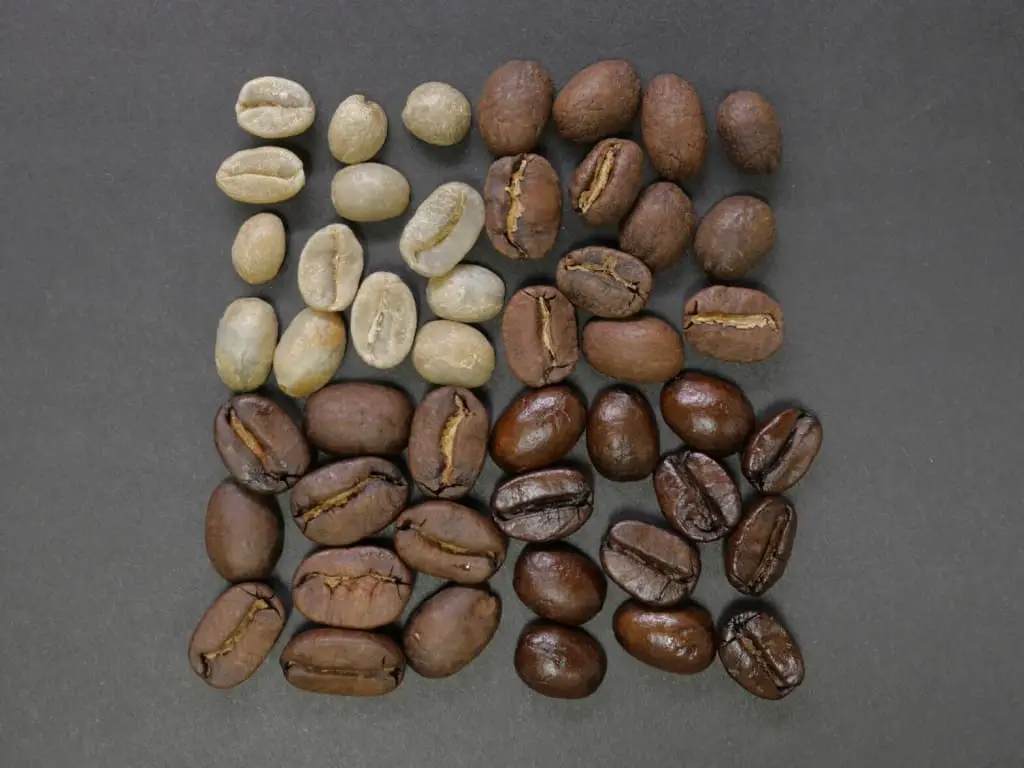
The different types of roast: light, medium, medium-dark, and dark.
Light Roasts
The first step on the coffee-roasting ladder are light roasts. Light roasts are brightly colored, have the highest level of acidity, and in general retain most of the coffee’s original features.
Light roasts are achieved when the bean is pulled out from the heat after the first crack. This usually means that lightly roasted beans reach an internal temperature between 356°F and 401°F.
Although people usually think the darker the bean the higher the caffeine content, green beans and therefore light roasts have the highest caffeine content, as the caffeine content decreases with continued roasting and higher temperatures.
Light roasts have a light brown color and don’t have any oil on the bodies of the beans, as they haven’t been roasted long enough for the oils to seep out.
Light roasts have the taste of a toasted grain, and have a slightly pronounced acidity. They also have a more fruity scent, which makes the origin of the coffee bean more easily detectable for the coffee connoisseur. Although you can use any roast for any coffee brewing method, coffeeshops usually prefer using light roasts for milder coffee types, such as pour-over coffee and drip brews.
Some popular light roasts are Cinnamon, New England Roast, Light City and Half City.
Medium Roasts
Medium roasts are apparently the favorite of people in the United States, which is why they’re sometimes referred to as the American roast (although George Carlin had a different take on an American roast, amirite?). Overall, medium roasts strike a delicious balance between body and acidity.
Medium roasts are roasted longer than light roasts, and thus reach a higher internal temperature which is somewhere between 410°F and 428°F. Medium roasted beans usually reach this temperature after the first crack, and right before the beginning of the second crack.
Medium roasted beans have less caffeine than light roasts, but more caffeine that medium-dark and dark roasts.
Medium roasted coffee has a brown (sometimes specified as medium-brown) color, and no oil on the surface of the bean. In terms of taste, medium roasts have a stronger and sweeter taste than light roasts, but they also have less of that grainy scent. Overall, the aroma, flavor, and acidity of light roasts are quite beautifully balanced, which is probably why medium roasts are a popular favorite.
Some popular roasts in the medium category are American roast, Breakfast Roast, City Roast, and Regular Roast.
Medium-Dark Roasts
Medium-dark roasted beans are dark brown, with finally some oil beginning to show on the surface. This is because they’re roasted just long enough to get the essential oils moving, bolden the flavor, and activate a whole new host of seductive scents that tickle your sensations. Medium-dark and dark roasts have a richer taste and bolder bodies.
Medium-dark roasts generally reach an inner temperature of about 437-450°F. This happens around the beginning or middle of the second crack. The longer, hotter process allows for the taste and aroma of roasting to become more pronounced.
Medium-dark roasts have a rich, almost spicy, full-bodied taste – certainly heavier than that of light and medium roasts – with aromas and flavors that are fully unleashed. In this process, the acidity in the flavor virtually disappears. Rather, medium-dark roasts have a unique bittersweet aftertaste.
Keep in mind that while light and medium roasts have more pronounced acidity, medium-dark and dark roasts have a more pronounced bitterness. So next time you’re at a coffee tasting (perhaps in the coziness of your kitchen), pay attention to this difference and see which one tickles your fancy.
Some popular medium-roasts you may have come across are Full City, Vienna Roast (which borders on a dark roast), and After Dinner Roast.
Dark Roasts
Darkly roasted coffee beans have the darkest color, which can range from dark brown, like the color of dark chocolate, to almost black. They have quite a bit of oil on the surface, which gives the beans a lovely sheen. Dark roasts offer a rich, full-bodied, smokey, and almost burnt taste which is a result of the roasting process, so the original taste of the green coffee bean is pretty much gone at this point.
To create a dark roast, the beans need to reach the highest internal temperature, which is somewhere between 465 and 480°F. This temperature comes either at the end of the second crack, or sometime after. However, beans are almost never roasted beyond 490°F, as at that point the coffee bean loses all positive flavor characteristics, and starts tasting like charcoal or tar. Blegh.
As we’ve mentioned, the aroma of dark roasts can be attributed to the roasting process, so the origin flavors and acidity of lighter roasts are lost. As it’s the most roasted bean, dark roasts have the lowest caffeine content, and also the bitterest taste.
Due to the boldness of the flavor, dark roasts are often the go-to option of baristas for making espresso and espresso-based beverages like lattes. Dark roasts are a great choice for espresso-based drinks as their rich taste is excellently complemented by creamy, silky milk and froth.
But there’s even variety among dark beans. The roast can range between slightly dark to charred, so make sure you check what kind of dark roast you’re getting before purchasing the beans.
In fact, the body of the coffee will depend on the exact temperature, or point, where the bean was removed from the heat. The body is fully developed at the beginning of the second crack, but begins to diminish right after that. So for instance, one dark roast, like Full-City Roast, will have a much fuller body than another dark roast, like Italian Roast, due to the higher temperature and roasting time of the latter.
Dark roasts have been quite popular in Europe, which is why some common roasts in this category include French Roast, Italian Roast, Viennese Roast, Spanish Roast, Espresso Roast, Continental Roast, or European Roast. Some other, less obvious dark roast varieties are High Rost and New Orleans Roast.
A Few Words Before You Go…
Hopefully, our guide on the different types of coffee roasts has helped you get a better idea of what you’d like to try next, or how your favorite bean comes into being.
At the very least, knowing all this can help you look mighty smug on your next trip to the coffee shop.